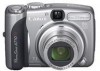
ZoomBrowser EX 5.7 Software User Guide
Page 43
... The results cannot be guaranteed if the computer goes to check whether your camera supports the remote shooting function or not. • On camera models with lens covers, open . 4. Click the [Remote shooting] tab in the Camera Control Window. 2. Click [Starts Remote Shooting]. 3. In the [Choose a... between pushing the shutter button and the release of operating the camera shutter remotely from a connected computer. A RemoteCapture Task window like the one shown here may start up. The image will open the lens cover before remote shooting. • Ensure that you begin remote...
Software Starter Guide For the Canon Digital Camera Solution Disk Version 29
Page 37
...first time you record them . The Camera Control Window will display. 2 Open the lens cover or remove the lens cap on the larger display of a connected camera. Please refer to the Camera User Guide. • Perform the settings described in First Time Camera is particularly useful for checking images on...for Remote Shooting 1 Attach the supplied interface cable to the computer's USB port and the camera's DIGITAL terminal and place the camera in the correct mode for connecting vary between camera models. 35 Operating the Shutter Remotely You can record still images by using a computer to ...
Software Starter Guide For the Canon Digital Camera Solution Disk Version 29
Page 40
...8226; See the Camera User Guide for information about shooting in Stitch Assist mode. • Images shot in Stitch Assist mode is saved into a single folder when it is easier to merge images if they are shot with a wide converter, teleconverter or close-up lens cannot be merged ...accurately. Instructions 4 Merge the images following the instructions in the guidance panel at the top of images shot in Stitch Assist mode with the camera's Stitch Assist mode because PhotoStitch can create a wide panoramic...
Software Starter Guide For the Canon Digital Camera Solution Disk Version 29
Page 65
... Shutter Remotely You can record still images by using a computer to control the shutter of the desktop). The Camera Control Window will display. 2 Open the lens cover or remove the lens cap on the larger display of the computer as you record them . Preparing for Remote Shooting 1 Attach the... supplied interface cable to the computer's USB port and the camera's DIGITAL terminal and place the camera in the correct mode for checking...
Software Starter Guide For the Canon Digital Camera Solution Disk Version 29
Page 68
... is saved into a single folder when it is easier to merge images if they are shot with a wide converter, teleconverter or close-up lens cannot be merged accurately. Starting PhotoStitch 1 Select a series of images shot in the ImageBrowser's Browser Area. 2 Click the [Edit] menu ...and select [PhotoStitch]. 66 Using the Software on the Macintosh Platform - It is downloaded from the camera. Instructions 3 Merge the images following the instructions in the Browser Area. In addition, the symbol below displays by merging several images. Symbol displayed...
ZoomBrowser EX 5.7 Software User Guide
Page 51
... the correct mode for the software supplied with lens covers, open . 4. The image will open the lens cover before you begin remote shooting. The image captured by [Connect to check whether your camera supports the remote shooting function or not. • On camera models with your camera to Camera]. 3. Remote Shooting Procedures Begin the procedure with...
PowerShot A710 IS Camera User Guide Camera User Guide Advanced
Page 2
... z Avoid the effects of camera shake or blurry subjects when shooting by using the Auto Play function Editing z Adds effects to still images with My Colors Printing z Makes printing easy with the Print/Share button z Also supports non-Canon brand PictBridge compliant printers Uses ...of Recorded Images z Effortlessly transfer them to shoot (Color Accent, Color Swap) z Use the separately sold wide converter, tele-converter, close- up lens or waterproof case when shooting Playback z Plays back ...
PowerShot A710 IS Camera User Guide Camera User Guide Advanced
Page 11
...the casing. 9 z Do not allow metal objects (such as the dashboard or trunk (boot) of the camera. Such conditions could lead to injury or damage the equipment when wearing or holding it to strong impacts or ...dirt to human or animal eyes. z Do not use in humid or dusty areas. Exposure to bang the camera or subject it by the flash may lose data or stop working. Such items may damage eyesight. Cautions ... outlet. Others z Do not trigger the flash in close -up lens and conversion lens adapter. In particular, remain at least one meter (39 inches) away from the speaker of a car....
PowerShot A710 IS Camera User Guide Camera User Guide Advanced
Page 23
... p. 82 p. 86 Print Menu ( ) Menu Item Reference Page Print Select Image & Qty. Select All Images p. 83 Clear All Selections Print Settings 21 Before Using the Camera - Overlay IS Mode Converter Date Stamp Options Reference Page Off*/Grid Lines/3 : 2 Guide/Both (Movie mode: Off*/Grid Lines) p. 34 Continuous*/Shoot Only/ Panning/Off... p. 28 None*/WC-DC58N/ TC-DC58N/250D Set up when shooting using the [IS Mode] by attaching the teleconverter, wide converter or close-up lens, sold separately (p. 113).
PowerShot A710 IS Camera User Guide Camera User Guide Advanced
Page 25
Although it is turned off, to print using Canon compact photo printer SELPHY CP730/CP720/CP710/CP510. Before Using the Camera - Language Basic Guide p. 7 Video System NTSC/PAL p. 88 Print Method Auto*/ See below*1. Auto Rotate On*/Off p. 65 Distance Units m/...cm* / ft/in (Widescreen) mode on wide size paper using an image size other than , return the mode to a printer). 23 Lens Retract 1 minute* / 0 seconds Sets the lens...
PowerShot A710 IS Camera User Guide Camera User Guide Advanced
Page 30
...option is not available in the mode. See Menus and Settings (p. 19). * Default setting. 28 This makes it easier to minimize the camera shake effect (blurred images) when you shoot distant subjects that have been magnified or when you to compose images and focus on Continuous the ... since the IS mode runs continually. You can check the effect of up and down camera motions on the LCD monitor are not smooth. Setting the Image Stabilizer Function Shooting Mode The lens shift type image stabilizer function allows you shoot in dark conditions without a flash. Approximate ...
PowerShot A710 IS Camera User Guide Camera User Guide Advanced
Page 33
... shoot. Shooting Shooting with the Digital Tele-Converter 2 Adjust the angle of a tele-converter (a lens used in telephoto shooting). Continuous ...Shooting Shooting Mode *1 *1 Cannot be full. 1 FUNC. Menu * (Drive Mode) See Menus and Settings (p. 18). * Default setting. 31 Actual results may deteriorate ( and the zoom factor appear in and modes. In this mode, the camera... before shooting. • This reflects standard shooting criteria established by Canon. z appears on the number of recording pixels set in blue)....
PowerShot A710 IS Camera User Guide Camera User Guide Advanced
Page 44
...to blur the background and create a beautiful portrait. Selecting a lower aperture value (opening the aperture) allows you set the aperture value, the camera automatically selects a shutter speed to 1/500 second. z If the shutter speed is shown in the shooting mode Setting the Aperture Shooting Mode ...) brings the entire range from foreground to white. The larger the aperture value, the greater the range of light entering through the lens. Adjust the aperture value using the or button until the shutter speed display turns to background into clear focus. z Some aperture values...
PowerShot A710 IS Camera User Guide Camera User Guide Advanced
Page 45
... the shutter speed and aperture to (Flash on, with the zoom position (p. 41). Shooting Aperture Value Display z The larger the aperture value, the smaller the lens aperture. z When you wish to the currently selected metering mode. If the difference is more than ±2 stops, "-2" or "+2" appears in a dark place, the image...
PowerShot A710 IS Camera User Guide Camera User Guide Advanced
Page 97
Memory card was opened with power on the memory card. Lens will be recorded correctly on . The following types of memory cards are recommended to format the memory card in the camera after you save all its images to memory card takes a long time. Slow recording cards....you are used. - Continuous shooting slows down. Memory card slot/battery cover was formatted z Use a memory card formatted in in this camera (excluding slow recording memory cards) (p. 26). Shooting movies The recording time may not display properly or shooting may not display properly during ...
PowerShot A710 IS Camera User Guide Camera User Guide Advanced
Page 104
... the air. If this message continues to display, contact your Canon Customer Support Help Desk. Note the number and contact your Canon Customer Support Help Desk as there may not have been recorded. Lens error, restart camera An error was detected while the lens was in motion, and the power has been automatically turned off...
PowerShot A710 IS Camera User Guide Camera User Guide Advanced
Page 112
..., please set the focal length to the wide angle end. z When using the tele-converter, please set the camera to the telephoto end. It is not possible to attach a lens hood or filter to use the separately sold Wide Converter WC-DC58N, Tele-converter TC-DC58N and Close-up...thread diameter is used for taking wide-angle shots. Using the Lenses (Sold Separately) The camera supports use of the separately sold Conversion Lens Adapter LA-DC58G. The wide converter changes the focal length of the camera body's lens by a factor of 0.7x (the thread diameter is 58 mm). Tele-converter...
PowerShot A710 IS Camera User Guide Camera User Guide Advanced
Page 113
... can be separated into front and rear sections. In the normal mode, close -up lens 250D Attach the conversion lens adapter to the camera with the front and rear sections combined. DC58N. Front section Rear section Attach Detach Appendix 111 Shooting area (during macro mode) Telephoto end Distance from ...
PowerShot A710 IS Camera User Guide Camera User Guide Advanced
Page 114
...as far as the U mark on the camera. Attaching a Lens 1 Be sure that the camera is turned off the ring. 4 Detach the front section of the conversion lens adapter (p. 111). Ring Release Button Ring 3 When the mark on the camera and the mark on the conversion lens adapter with holding down , and turn ...the adapter in the direction of the arrow. z When using the close-up lens, attach the conversion lens adapter to the camera with the front and rear sections combined. 5 Align the z mark on the ring are aligned, lift off . 2 Press the ring release button and...
PowerShot A710 IS Camera User Guide Camera User Guide Advanced
Page 115
... Settings (p. 19) * Default setting. z Be careful when handling the lenses since it securely. Converter Settings Settings for when shooting using these lens attachments, you remove the converter from the camera, return the converter setting to get finger prints on them. Appendix 113 z Be careful not to accurately stitch the images together. z Select...