
Instruction Manual
Page 2
...the property of their respective owners. * This digital camera supports Design rule for quick shooting at will. The EOS-1Ds Mark II is compatible with all types of people and certain subjects for purchasing a Canon product. Read this camera. Thank you for anything but private enjoyment. ... fully automatic snapshooting to familiarize yourself with a large (36mm x 24mm), 16.70-megapixel CMOS sensor. The camera is a high-performance, digital AF SLR camera with the proper operation of Microsoft Corporation in the United States and other countries. ¡ SD is a standard...
...the property of their respective owners. * This digital camera supports Design rule for quick shooting at will. The EOS-1Ds Mark II is compatible with all types of people and certain subjects for purchasing a Canon product. Read this camera. Thank you for anything but private enjoyment. ... fully automatic snapshooting to familiarize yourself with a large (36mm x 24mm), 16.70-megapixel CMOS sensor. The camera is a high-performance, digital AF SLR camera with the proper operation of Microsoft Corporation in the United States and other countries. ¡ SD is a standard...

Instruction Manual
Page 3
...162; EOS DIGITAL Solution Disk ¢ Digital Photo Professional Disk ¢ Pocket Guide Quick start guide to shooting. ¢ EOS-1Ds Mark II Instruction Manual (this booklet) ¢ EOS-1Ds Mark II Software... Instruction Manual Explains the procedure for transferring images to a personal computer and for RAW image processing. ¢ Digital Photo Professional Main Function Quick Guide ¢ Warranty card * Be careful not to lose any of the above items. * Using Canon memory cards is missing, contact your camera...
...162; EOS DIGITAL Solution Disk ¢ Digital Photo Professional Disk ¢ Pocket Guide Quick start guide to shooting. ¢ EOS-1Ds Mark II Instruction Manual (this booklet) ¢ EOS-1Ds Mark II Software... Instruction Manual Explains the procedure for transferring images to a personal computer and for RAW image processing. ¢ Digital Photo Professional Main Function Quick Guide ¢ Warranty card * Be careful not to lose any of the above items. * Using Canon memory cards is missing, contact your camera...
Instruction Manual
Page 5
... an Image 110 Viewing the Images on TV 111 7 Image Protection 112 Sound Recording for an Image 114 Erasing Images 115 Formatting a Memory Card 118 8 6 Camera Direct Printing 121 7 DPOF: Digital Print Order Format 8 Customizing the Camera 137 9 145 9 Reference 161 5
... an Image 110 Viewing the Images on TV 111 7 Image Protection 112 Sound Recording for an Image 114 Erasing Images 115 Formatting a Memory Card 118 8 6 Camera Direct Printing 121 7 DPOF: Digital Print Order Format 8 Customizing the Camera 137 9 145 9 Reference 161 5

Instruction Manual
Page 6
... use the equipment properly to the battery pack or back-up battery. Do not use any foreign metallic objects into the electrical contacts of the camera, accessories, connecting cables, etc. • Keep the back-up battery away from the reach of children. Do not use the equipment where there is... insulation and cause a fire or electrical shock. • Do not fire the flash at least 1 meter away. • Before storing the camera or accessory when not in the process. • Prevent any home-made or modified batteries. - It can cause blindness or skin problems. If...
... use the equipment properly to the battery pack or back-up battery. Do not use any foreign metallic objects into the electrical contacts of the camera, accessories, connecting cables, etc. • Keep the back-up battery away from the reach of children. Do not use the equipment where there is... insulation and cause a fire or electrical shock. • Do not fire the flash at least 1 meter away. • Before storing the camera or accessory when not in the process. • Prevent any home-made or modified batteries. - It can cause blindness or skin problems. If...

Instruction Manual
Page 7
... fire or a health hazard. If the product does not work properly or requires repair, contact your dealer or your vision. • Keep the camera from the reach of small children. When unplugging a power plug, grasp and pull the plug instead of electrical shock. • Do not disassemble or modify... the equipment and the casing breaks open to expose the internal parts, do not twist or tie the cords. - Doing so may damage your nearest Canon Service Center. 7 High-voltage internal parts can also become hot and cause skin burns. • Do not use a dry cloth to clean off the...
... fire or a health hazard. If the product does not work properly or requires repair, contact your dealer or your vision. • Keep the camera from the reach of small children. When unplugging a power plug, grasp and pull the plug instead of electrical shock. • Do not disassemble or modify... the equipment and the casing breaks open to expose the internal parts, do not twist or tie the cords. - Doing so may damage your nearest Canon Service Center. 7 High-voltage internal parts can also become hot and cause skin burns. • Do not use a dry cloth to clean off the...

Instruction Manual
Page 8
... to avoid damaging the camera. Wipe off any water droplets with your Canon dealer or check the camera yourself and make sure it to clean the camera body or lens. Do not use the camera. Strong magnetic fields and radio waves can cause camera misoperation or destroy image data... dirt, consult your nearest Canon dealer. ¡ Do not touch the camera's electrical contacts with a dry cloth. Corroded contacts can cause the camera to blow away dust on the camera, do not use cleaners that the camera is still working properly. 8 Even while the camera is in storage, press the...
... to avoid damaging the camera. Wipe off any water droplets with your Canon dealer or check the camera yourself and make sure it to clean the camera body or lens. Do not use the camera. Strong magnetic fields and radio waves can cause camera misoperation or destroy image data... dirt, consult your nearest Canon dealer. ¡ Do not touch the camera's electrical contacts with a dry cloth. Corroded contacts can cause the camera to blow away dust on the camera, do not use cleaners that the camera is still working properly. 8 Even while the camera is in storage, press the...

Instruction Manual
Page 9
...memory card or subject it to vibration. Memory Cards ¡ Memory cards are not a malfunction. Lens Electrical Contacts After detaching the lens from the camera, attach the lens caps or put down the lens with over 99. 99% active pixels, there might be able to having a strong magnetic ...field such as a TV set, speakers, or magnet or in a case. ¡ Some non-Canon memory cards may become slower. LCD Panels and LCD Monitor ¡ Although the LCD monitor is manufactured with very high precision technology with the rear...
...memory card or subject it to vibration. Memory Cards ¡ Memory cards are not a malfunction. Lens Electrical Contacts After detaching the lens from the camera, attach the lens caps or put down the lens with over 99. 99% active pixels, there might be able to having a strong magnetic ...field such as a TV set, speakers, or magnet or in a case. ¡ Some non-Canon memory cards may become slower. LCD Panels and LCD Monitor ¡ Although the LCD monitor is manufactured with very high precision technology with the rear...
Instruction Manual
Page 16
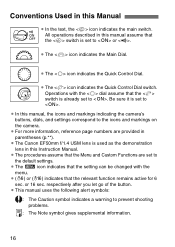
... sure it is set to . ¡In this manual, the icons and markings indicating the camera's buttons, dials, and settings correspond to the icons and markings on the camera. ¡For more information, reference page numbers are provided in parentheses (p.**). ¡The Canon EF50mm f/1.4 USM lens is used as the demonstration lens in this Manual...
... sure it is set to . ¡In this manual, the icons and markings indicating the camera's buttons, dials, and settings correspond to the icons and markings on the camera. ¡For more information, reference page numbers are provided in parentheses (p.**). ¡The Canon EF50mm f/1.4 USM lens is used as the demonstration lens in this Manual...

Instruction Manual
Page 18
s The lamp will light. 2 Detach the protective cover and connect the battery. ¡Attach the cover to the battery compartment cap and store it. ¡Whenever the battery is out of the camera, be sure to attach the protective cover to the instructions for the Ni-MH Pack NP-E3 or Ni-MH Charger NC-E2. 1 Connect the power cord. Recharging the Battery For details on using the battery, refer to prevent a short circuit. 18
s The lamp will light. 2 Detach the protective cover and connect the battery. ¡Attach the cover to the battery compartment cap and store it. ¡Whenever the battery is out of the camera, be sure to attach the protective cover to the instructions for the Ni-MH Pack NP-E3 or Ni-MH Charger NC-E2. 1 Connect the power cord. Recharging the Battery For details on using the battery, refer to prevent a short circuit. 18

Instruction Manual
Page 21
... Life Temperature Shots remaining At 20˚C / 68˚F Approx. 1200 At 0˚C / 32˚F Approx. 800 The figures above are based on CIPA (Camera & Imaging Products Association) testing criteria. ¡ The actual number of shots may be fewer than indicated above depending on the shooting conditions. ¡ The number...
... Life Temperature Shots remaining At 20˚C / 68˚F Approx. 1200 At 0˚C / 32˚F Approx. 800 The figures above are based on CIPA (Camera & Imaging Products Association) testing criteria. ¡ The actual number of shots may be fewer than indicated above depending on the shooting conditions. ¡ The number...

Instruction Manual
Page 22
Using a Household Power Outlet With DC Coupler Kit DCK-E1, you can connect the camera to a household power outlet and not worry about the battery level. 1 Insert the DC Coupler. ¡Insert the coupler and while pushing it in, turn .... 2 Connect the DC plug. 3 Connect the power cord. ¡After you finish using the camera, set to and disconnect the plug from the power outlet. If the camera stops operating, remove the DC Coupler from the camera and reinstall it outdoors. ¡ When the switch is set the switch to , do not...
Using a Household Power Outlet With DC Coupler Kit DCK-E1, you can connect the camera to a household power outlet and not worry about the battery level. 1 Insert the DC Coupler. ¡Insert the coupler and while pushing it in, turn .... 2 Connect the DC plug. 3 Connect the power cord. ¡After you finish using the camera, set to and disconnect the plug from the power outlet. If the camera stops operating, remove the DC Coupler from the camera and reinstall it outdoors. ¡ When the switch is set the switch to , do not...

Instruction Manual
Page 23
... cap and the body cap by turning them as shown by the arrow. 2 Attach the lens. ¡Align the red dots on the lens and camera and turn the lens as shown by the arrow. ¡Turn the lens until it snaps in place. 3 On the lens, set the focus mode... pressing the lens release button, turn the lens as shown by the arrow until the red dot is set to prevent dust from entering the camera through the lens mount. 23 When attaching or detaching the lens, take care to , autofocus will not be possible. 4 Remove the front lens cap...
... cap and the body cap by turning them as shown by the arrow. 2 Attach the lens. ¡Align the red dots on the lens and camera and turn the lens as shown by the arrow. ¡Turn the lens until it snaps in place. 3 On the lens, set the focus mode... pressing the lens release button, turn the lens as shown by the arrow until the red dot is set to prevent dust from entering the camera through the lens mount. 23 When attaching or detaching the lens, take care to , autofocus will not be possible. 4 Remove the front lens cap...

Instruction Manual
Page 24
As shown in the diagram, the top side of small holes is inserted all the way into the camera. ¡The left slot is for the CF card, and the right slot is for the SD card. ¡If you insert the CF card ... arrow. 2 Insert the memory card into the slot. 3 Close the cover. ¡Push in the wrong way, it may damage the camera. Installing and Removing the Memory Card The camera can select which card to record the images. (p.61) If you while the edge with the row of the card must be...
As shown in the diagram, the top side of small holes is inserted all the way into the camera. ¡The left slot is for the CF card, and the right slot is for the SD card. ¡If you insert the CF card ... arrow. 2 Insert the memory card into the slot. 3 Close the cover. ¡Push in the wrong way, it may damage the camera. Installing and Removing the Memory Card The camera can select which card to record the images. (p.61) If you while the edge with the row of the card must be...

Instruction Manual
Page 25
The camera is not displayed on the top LCD panel. 4 Turn the switch to . ¡Make sure the access lamp is off and "buSY" is compatible with Type I and Type II CF cards. will also be displayed. s The folder No. Removing the Card 1 Before opening the cover. ¡Turn the switch to . The...
The camera is not displayed on the top LCD panel. 4 Turn the switch to . ¡Make sure the access lamp is off and "buSY" is compatible with Type I and Type II CF cards. will also be displayed. s The folder No. Removing the Card 1 Before opening the cover. ¡Turn the switch to . The...

Instruction Manual
Page 26
Such actions may also damage the memory card or camera. · Shaking or banging the camera around. · Opening the memory card slot cover. · Removing the battery. ¡ After image capture, you cannot do the following while the access lamp ...is lit or blinking. If you use a microdrive, be careful not to subject the camera to vibration and physical shock. Shooting will appear on the LCD panel and in the viewfinder. Card-full display Card error display Memory...
Such actions may also damage the memory card or camera. · Shaking or banging the camera around. · Opening the memory card slot cover. · Removing the battery. ¡ After image capture, you cannot do the following while the access lamp ...is lit or blinking. If you use a microdrive, be careful not to subject the camera to vibration and physical shock. Shooting will appear on the LCD panel and in the viewfinder. Card-full display Card error display Memory...

Instruction Manual
Page 27
... captured images to while the captured images are finished recording, the display will turn off and the camera will turn off automatically after 1 minute of non-operation. (p.35) To turn on the camera again, just press the shutter button halfway. ¡ If you turn the switch to be recorded will be... sounds when focus is turned off and does not operate. : To turn on the top LCD panel. Basic Operation Power Switch The camera can operate only after the switch is turned on. : The camera is achieved in the One-Shot AF mode or with manual focus. ¡ To save battery power, the...
... captured images to while the captured images are finished recording, the display will turn off and the camera will turn off automatically after 1 minute of non-operation. (p.35) To turn on the camera again, just press the shutter button halfway. ¡ If you turn the switch to be recorded will be... sounds when focus is turned off and does not operate. : To turn on the top LCD panel. Basic Operation Power Switch The camera can operate only after the switch is turned on. : The camera is achieved in the One-Shot AF mode or with manual focus. ¡ To save battery power, the...

Instruction Manual
Page 28
... halfway first or if you press the shutter button halfway and then press it completely immediately, the camera will take a moment before pressing it takes the picture. ¡ No matter what state the camera is displayed on the top LCD panel and in (image playback, menu operation, image recording, etc.), you...
... halfway first or if you press the shutter button halfway and then press it completely immediately, the camera will take a moment before pressing it takes the picture. ¡ No matter what state the camera is displayed on the top LCD panel and in (image playback, menu operation, image recording, etc.), you...

Instruction Manual
Page 29
...you press a button, its function remains selected for shooting-related settings. After the button turns off or if you press the shutter button halfway, the camera will be ready to shoot. ¡In this way, you can turn the dial to set the shooting mode, AF mode, metering mode, drive ... compensation amount. (3) Turn the dial only. When you can set the desired setting. When you release the button, the selected setting takes effect and the camera will be ready to use this dial: (1) While pressing a button, turn the dial. ¡In this time, you can select the AF point or...
...you press a button, its function remains selected for shooting-related settings. After the button turns off or if you press the shutter button halfway, the camera will be ready to shoot. ¡In this way, you can turn the dial to set the shooting mode, AF mode, metering mode, drive ... compensation amount. (3) Turn the dial only. When you can set the desired setting. When you release the button, the selected setting takes effect and the camera will be ready to use this dial: (1) While pressing a button, turn the dial. ¡In this time, you can select the AF point or...

Instruction Manual
Page 30
... or on for AF point selection and selecting the desired setting on the LCD monitor with this way, you press the shutter button halfway, the camera will be ready to . Using the Dial The dial is set the desired setting. When you can turn the dial. ¡In this way, you... function remains on the top LCD panel. ¡In this way, you can select and set various menu settings or set the aperture in the camera's manual exposure mode. 30
... or on for AF point selection and selecting the desired setting on the LCD monitor with this way, you press the shutter button halfway, the camera will be ready to . Using the Dial The dial is set the desired setting. When you can turn the dial. ¡In this way, you... function remains on the top LCD panel. ¡In this way, you can select and set various menu settings or set the aperture in the camera's manual exposure mode. 30

Instruction Manual
Page 31
Vertical Shooting For vertical shooting, the vertical grip (camera bottom) has a shutter button, Main Dial, AF point selection button, AE lock button, Assist button, and FE lock/multi-spot metering button. ¡Before using the vertical grip controls, turn on the vertical-grip on/off switch. ¡When you are not using the vertical grip, be sure to turn off the vertical-grip on/off switch to prevent inadvertent operation of the vertical grip controls. 31
Vertical Shooting For vertical shooting, the vertical grip (camera bottom) has a shutter button, Main Dial, AF point selection button, AE lock button, Assist button, and FE lock/multi-spot metering button. ¡Before using the vertical grip controls, turn on the vertical-grip on/off switch. ¡When you are not using the vertical grip, be sure to turn off the vertical-grip on/off switch to prevent inadvertent operation of the vertical grip controls. 31


