Users Manual - English
Page 7
... have with a copy of the proof of purchase (bill of Frequently Asked Questions, troubleshooting tips and service center locator is lost, stolen or requires service. FAX LIMITED WARRANTY v Follow the return instructions. Limitations: Repair or replacement as described above limitation may not apply to this Product. Now you . Brother is available for damage to or loss of any time, free technical support in which...
... have with a copy of the proof of purchase (bill of Frequently Asked Questions, troubleshooting tips and service center locator is lost, stolen or requires service. FAX LIMITED WARRANTY v Follow the return instructions. Limitations: Repair or replacement as described above limitation may not apply to this Product. Now you . Brother is available for damage to or loss of any time, free technical support in which...

Users Manual - English
Page 12
...a Single Line 2-13 On-Screen Programming 3-1 User-Friendly Programming 3-1 Menu Selection Table 3-1 Navigation Keys 3-2 Initial Setup 4-1 Getting Started 4-1 Setting Paper Size 4-1 Setting Date and Time 4-1 Setting Station IDs 4-2 Entering Text 4-2 Inserting Spaces 4-3 Making Corrections 4-3 Repeating Letters 4-3 Special Characters and Symbols 4-3 Setting the Ring Volume 4-4 Setting the Beeper Volume 4-4 Setting the Speaker Volume 4-4 Memory Storage 4-4 Turning On Automatic Daylight Savings Time 4-5 Toner Save 4-5 Sleep Mode 4-5 Setting Tone/Pulse Dialing Mode (For Canada...
...a Single Line 2-13 On-Screen Programming 3-1 User-Friendly Programming 3-1 Menu Selection Table 3-1 Navigation Keys 3-2 Initial Setup 4-1 Getting Started 4-1 Setting Paper Size 4-1 Setting Date and Time 4-1 Setting Station IDs 4-2 Entering Text 4-2 Inserting Spaces 4-3 Making Corrections 4-3 Repeating Letters 4-3 Special Characters and Symbols 4-3 Setting the Ring Volume 4-4 Setting the Beeper Volume 4-4 Setting the Speaker Volume 4-4 Memory Storage 4-4 Turning On Automatic Daylight Savings Time 4-5 Toner Save 4-5 Sleep Mode 4-5 Setting Tone/Pulse Dialing Mode (For Canada...

Users Manual - English
Page 15
... 1 11-7 4 in 1 11-7 Poster 11-7 Paper Type 11-7 Changing Default Copy Settings 11-8 Copy Mode (Type of Original 11-9 Copy Contrast 11-9 Paper Type 11-9 12 Using Brother Machine as a Printer 12-1 Special Printing Features 12-1 Windows® Printing 12-1 Bi-directional Parallel Interface 12-1 Printing from Your PC 12-1 Multi-purpose Sheet Feeder 12-1 Two-Sided Printing (Manual Duplex 12-2 Loading Envelopes in Multi-purpose Sheet Feeder .......... 12-2 Paper Tray 12-3 Simultaneous Printing/Faxing 12-3 Choosing Acceptable Paper 12-4 Printer Operations 12-4 Reset Key 12-4 xiii
... 1 11-7 4 in 1 11-7 Poster 11-7 Paper Type 11-7 Changing Default Copy Settings 11-8 Copy Mode (Type of Original 11-9 Copy Contrast 11-9 Paper Type 11-9 12 Using Brother Machine as a Printer 12-1 Special Printing Features 12-1 Windows® Printing 12-1 Bi-directional Parallel Interface 12-1 Printing from Your PC 12-1 Multi-purpose Sheet Feeder 12-1 Two-Sided Printing (Manual Duplex 12-2 Loading Envelopes in Multi-purpose Sheet Feeder .......... 12-2 Paper Tray 12-3 Simultaneous Printing/Faxing 12-3 Choosing Acceptable Paper 12-4 Printer Operations 12-4 Reset Key 12-4 xiii

Users Manual - English
Page 16
...-5 Toner Save 13-5 Print Setting (For Windows® 95/98/98SE/Me Users Only 13-6 Duplex Printing (*2 13-6 Manual Duplex 13-6 Binding Offset 13-6 Watermark (*3 13-7 Print Watermark 13-7 In background 13-7 Watermark Text 13-8 Watermark Bitmap 13-8 Position 13-8 Page Setting (*4 13-9 Device Options (*5 13-10 Quick Print Setup 13-11 Administrator (For Windows® 95/98/98SE/Me Users Only 13-11 Print Date & Time 13-12 Support 13-13 Brother Solutions Center 13-13 Web Update...
...-5 Toner Save 13-5 Print Setting (For Windows® 95/98/98SE/Me Users Only 13-6 Duplex Printing (*2 13-6 Manual Duplex 13-6 Binding Offset 13-6 Watermark (*3 13-7 Print Watermark 13-7 In background 13-7 Watermark Text 13-8 Watermark Bitmap 13-8 Position 13-8 Page Setting (*4 13-9 Device Options (*5 13-10 Quick Print Setup 13-11 Administrator (For Windows® 95/98/98SE/Me Users Only 13-11 Print Date & Time 13-12 Support 13-13 Brother Solutions Center 13-13 Web Update...

Users Manual - English
Page 63
... in the ADF, or face down on the scanner glass. 2 Enter the fax number using the dial pad, Speed Dial or Search). 4 When you 're sending a fax automatically and the line is busy, press Redial/Pause to cancel scanning. The LCD shows the new job number and available memory. Note If you get a OUT OF MEMORY message while scanning in a subsequent page, you'll have the option to press Fax Start to transmit the pages scanned so...
... in the ADF, or face down on the scanner glass. 2 Enter the fax number using the dial pad, Speed Dial or Search). 4 When you 're sending a fax automatically and the line is busy, press Redial/Pause to cancel scanning. The LCD shows the new job number and available memory. Note If you get a OUT OF MEMORY message while scanning in a subsequent page, you'll have the option to press Fax Start to transmit the pages scanned so...

Users Manual - English
Page 70
... press Menu/Set. 3.DELAYED TIMER 3 Press Stop/Exit. Transmission of these documents will wait until the time you have entered to send the fax. The number of documents you are finished choosing settings. 5 Enter the fax number. 6 Press Fax Start. Press Menu/Set to accept it in Delayed Fax. (See Delayed FAX, below.) 1 Press Menu/Set, 2, 2, 3. 2 Enter the time that delayed faxes will be sent (in Step 3, which shows the time you entered last. The MFC starts scanning the document into memory...
... press Menu/Set. 3.DELAYED TIMER 3 Press Stop/Exit. Transmission of these documents will wait until the time you have entered to send the fax. The number of documents you are finished choosing settings. 5 Enter the fax number. 6 Press Fax Start. Press Menu/Set to accept it in Delayed Fax. (See Delayed FAX, below.) 1 Press Menu/Set, 2, 2, 3. 2 Enter the time that delayed faxes will be sent (in Step 3, which shows the time you entered last. The MFC starts scanning the document into memory...

Users Manual - English
Page 76
... original into memory and then start sending faxes to help you entered. 7-5 AUTO DIAL NUMBERS AND DIALING OPTIONS I If the memory is to cancel all types of these locations. The LCD asks if you normally would. I To stop the broadcasting in the same broadcast. (See Setting Up Groups for broadcasting. if more than one location, so the number of locations used for Broadcasting, page 7-2.) You must press Broadcast between each key counts as you...
... original into memory and then start sending faxes to help you entered. 7-5 AUTO DIAL NUMBERS AND DIALING OPTIONS I If the memory is to cancel all types of these locations. The LCD asks if you normally would. I To stop the broadcasting in the same broadcast. (See Setting Up Groups for broadcasting. if more than one location, so the number of locations used for Broadcasting, page 7-2.) You must press Broadcast between each key counts as you...

Users Manual - English
Page 87
... can see at-a-glance how to print activity reports at which to begin the 7-day countdown.) 3 Enter the time to choose an interval, and then press Menu/Set. If you set the machine to quickly program every menu selection. The settings for 7:45 PM.) 4 Press Stop/Exit. RX means Receive. Prints a Transmission Verification Report for GENERAL SETUP, SETUP RECEIVE, SETUP SEND, PRINT REPORTS, and TEL SERVICE. Using the Reports Key Five reports are included. P R I N T I N G R E P O R T S 10 - 2 INTERVAL OFF SELECT...
... can see at-a-glance how to print activity reports at which to begin the 7-day countdown.) 3 Enter the time to choose an interval, and then press Menu/Set. If you set the machine to quickly program every menu selection. The settings for 7:45 PM.) 4 Press Stop/Exit. RX means Receive. Prints a Transmission Verification Report for GENERAL SETUP, SETUP RECEIVE, SETUP SEND, PRINT REPORTS, and TEL SERVICE. Using the Reports Key Five reports are included. P R I N T I N G R E P O R T S 10 - 2 INTERVAL OFF SELECT...
Users Manual - English
Page 98
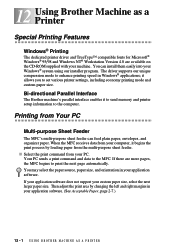
... application software. Bi-directional Parallel Interface The Brother machine's parallel interface enables it allows you to set various printer settings, including economy printing mode and custom paper size. I N T E R When the MFC receives data from Your PC Multi-purpose Sheet Feeder The MFC's multi-purpose sheet feeder can install them easily into your Windows® system using our installer program. The driver supports our unique compression mode to enhance printing speed in your machine. Printing from your PC. 12 Using Brother Machine as a 12 Printer Special Printing...
... application software. Bi-directional Parallel Interface The Brother machine's parallel interface enables it allows you to set various printer settings, including economy printing mode and custom paper size. I N T E R When the MFC receives data from Your PC Multi-purpose Sheet Feeder The MFC's multi-purpose sheet feeder can install them easily into your Windows® system using our installer program. The driver supports our unique compression mode to enhance printing speed in your machine. Printing from your PC. 12 Using Brother Machine as a 12 Printer Special Printing...

Users Manual - English
Page 99
.... If the paper "double-feeds" (sends two sheets at once), hold the blue lever on one side of paper except for the printer driver.) Please select LPT1 port in the direction shown below. Press down U S I N G B R O T H E R M A C H I N E A S A P R I N T E R 12 - 2 Make sure envelopes are inserted in the printer driver. Then, the Windows® driver instructs you load the envelops and slide the paper guides to 10 envelopes into the multi-purpose sheet feeder. Two-Sided Printing (Manual Duplex) The supplied printer drivers for Windows®...
.... If the paper "double-feeds" (sends two sheets at once), hold the blue lever on one side of paper except for the printer driver.) Please select LPT1 port in the direction shown below. Press down U S I N G B R O T H E R M A C H I N E A S A P R I N T E R 12 - 2 Make sure envelopes are inserted in the printer driver. Then, the Windows® driver instructs you load the envelops and slide the paper guides to 10 envelopes into the multi-purpose sheet feeder. Two-Sided Printing (Manual Duplex) The supplied printer drivers for Windows®...
Users Manual - English
Page 114
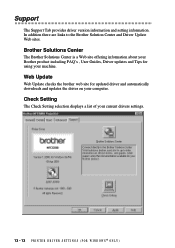
... your Brother product including FAQ's , User Guides, Driver updates and Tips for updated driver and automatically downloads and updates the driver on your machine. Web Update Web Update checks the brother web site for using your computer. Check Setting The Check Setting selection displays a list of your current drivers settings. 13 - 13 P R I N T E R D R I V E R S E T T I N G S ( F O R W I N D O W S ® O N L Y ) Support The Support Tab provides driver version information and setting information. In addition there are links to the Brother Solution Center and Driver Update Web...
... your Brother product including FAQ's , User Guides, Driver updates and Tips for updated driver and automatically downloads and updates the driver on your machine. Web Update Web Update checks the brother web site for using your computer. Check Setting The Check Setting selection displays a list of your current drivers settings. 13 - 13 P R I N T E R D R I V E R S E T T I N G S ( F O R W I N D O W S ® O N L Y ) Support The Support Tab provides driver version information and setting information. In addition there are links to the Brother Solution Center and Driver Update Web...
Users Manual - English
Page 154
..., do not support. To Install Automatic E-mail Printing (Optional Application) 1 Insert MFL Pro CD-ROM into your model and operating system, click View On-Line Documentation for a specified character string in the mail header. I Provides an "In Memory" printer driver: You can receive and print e-mail data at the specifed time: You can specify the time when the Brother Automatic E-Mail Printing automatically accesses the server to check for printing, faxing and scanning operations. minute important...
..., do not support. To Install Automatic E-mail Printing (Optional Application) 1 Insert MFL Pro CD-ROM into your model and operating system, click View On-Line Documentation for a specified character string in the mail header. I Provides an "In Memory" printer driver: You can receive and print e-mail data at the specifed time: You can specify the time when the Brother Automatic E-Mail Printing automatically accesses the server to check for printing, faxing and scanning operations. minute important...
Users Manual - English
Page 187
Try copying multiple pages to side. Make sure the MFC is printed on the scanner window. You may clear a blurred page by excessive exposure to replace it may disappear by changing the Print Density setting, page 5-4.-OR- Rough surfaces or thick media can cause a ghost image. Make sure you select the Paper Type that a torn piece of paper does not remain on the page. You must then replace the drum unit with a new one . Ghost images appear on...
Try copying multiple pages to side. Make sure the MFC is printed on the scanner window. You may clear a blurred page by excessive exposure to replace it may disappear by changing the Print Density setting, page 5-4.-OR- Rough surfaces or thick media can cause a ghost image. Make sure you select the Paper Type that a torn piece of paper does not remain on the page. You must then replace the drum unit with a new one . Ghost images appear on...

Users Manual - English
Page 202
... MFC's memory, eliminating the need for copying and faxing photographs. Fax Storage You can scan outgoing faxes or scheduled jobs into a separate wall jack. The Brother MFC uses the new number to the date and time when the machine is plugged into the EXT jack of gray available for making up cover pages manually. Fine mode Resolution is used for changing the settings of your MFC. It is 196 × 203 dpi. Menu mode The programming mode for small print...
... MFC's memory, eliminating the need for copying and faxing photographs. Fax Storage You can scan outgoing faxes or scheduled jobs into a separate wall jack. The Brother MFC uses the new number to the date and time when the machine is plugged into the EXT jack of gray available for making up cover pages manually. Fine mode Resolution is used for changing the settings of your MFC. It is 196 × 203 dpi. Menu mode The programming mode for small print...

Users Manual - English
Page 203
... in memory and cancel jobs individually. Real Time Transmission When memory is received into a printer and a scanner and enables PC faxing using the MFC. Remote Retrieval Access Code The four-digit code (159 ) that appears on a telephone line. Ring Volume Volume setting for easy dialing. scanning The process of sending an electronic image of gray for transmission while the Memory is not able to start the dialing process. You must press the Search/Speed Dial button and...
... in memory and cancel jobs individually. Real Time Transmission When memory is received into a printer and a scanner and enables PC faxing using the MFC. Remote Retrieval Access Code The four-digit code (159 ) that appears on a telephone line. Ring Volume Volume setting for easy dialing. scanning The process of sending an electronic image of gray for transmission while the Memory is not able to start the dialing process. You must press the Search/Speed Dial button and...

Users Manual - English
Page 210
... Search 7-3 Speed Dial numbers 7-3 document size and resolution 6-1 drivers Macintosh® 18-1 Windows® PC-FAX 16-14 Printer 12-1, 13-1 drum unit cleaning 20-19 installing 2-3 replacing 20-24 Dual Access 6-4 E Easy Receive 5-3 ECM (Error Correction Mode) 1-6 entering text 4-2 envelopes 2-7 error messages on LCD 20-1 CHECK PAPER 20-1 COMM.ERROR 20-1 NOT REGISTERED 20-3 OUT OF MEMORY 20-3 while scanning a document 6-4 extension telephone, using 5-4 external telephone answering device (TAD) 1-6, 2-9 external telephone, connecting 2-8 external two-line TAD 2-12 F fax codes Fax Receive Code...
... Search 7-3 Speed Dial numbers 7-3 document size and resolution 6-1 drivers Macintosh® 18-1 Windows® PC-FAX 16-14 Printer 12-1, 13-1 drum unit cleaning 20-19 installing 2-3 replacing 20-24 Dual Access 6-4 E Easy Receive 5-3 ECM (Error Correction Mode) 1-6 entering text 4-2 envelopes 2-7 error messages on LCD 20-1 CHECK PAPER 20-1 COMM.ERROR 20-1 NOT REGISTERED 20-3 OUT OF MEMORY 20-3 while scanning a document 6-4 extension telephone, using 5-4 external telephone answering device (TAD) 1-6, 2-9 external telephone, connecting 2-8 external two-line TAD 2-12 F fax codes Fax Receive Code...

Users Manual - English
Page 212
..., Fine, Super Fine, Photo) S-1 printing S-2 scanning 15-5 setting for next fax 6-7 S safety instructions 19-5 Search 7-3 shipping the machine 20-15 Sleep mode 4-5 Software using Brother Control Center 14-1 ScanSoft™ PaperPort® and TextBridge® OCR 15-1 special characters 4-3 Speed Dial 1-3, 7-3 changing 7-1 dialing 7-3 storing 7-1 Station ID 1-2, 4-2 Federal regulation 4-3 sending faxes 20-9 Windows® setup printing 20-12 machine 20-1 Two-Line Phone System 2-11, 2-12 converting wall jacks 2-11 V Volume setting beeper 4-4 ring 4-4 speaker 4-4 W warranties Canada vi...
..., Fine, Super Fine, Photo) S-1 printing S-2 scanning 15-5 setting for next fax 6-7 S safety instructions 19-5 Search 7-3 shipping the machine 20-15 Sleep mode 4-5 Software using Brother Control Center 14-1 ScanSoft™ PaperPort® and TextBridge® OCR 15-1 special characters 4-3 Speed Dial 1-3, 7-3 changing 7-1 dialing 7-3 storing 7-1 Station ID 1-2, 4-2 Federal regulation 4-3 sending faxes 20-9 Windows® setup printing 20-12 machine 20-1 Two-Line Phone System 2-11, 2-12 converting wall jacks 2-11 V Volume setting beeper 4-4 ring 4-4 speaker 4-4 W warranties Canada vi...
Quick Setup Guide - English
Page 1
... Drum Unit A. jack, you do not expose it into the MFC. Fax messages are sharing one phone line with the lever down 5 Install Power Cord and Phone Line Turn the power switch ON. For more details, see page 3-2 in Montreal) 1 Packing List Power Cord Telephone Wire Cord CD-ROM Drum Unit Assembly With Free Starter Toner Cartridge (Up to 10 envelopes. Enter your telephone number, then press Menu/Set. CONGRATULATIONS ON PURCHASING THE ULTIMATE BROTHER MACHINE. If you control the phone line...
... Drum Unit A. jack, you do not expose it into the MFC. Fax messages are sharing one phone line with the lever down 5 Install Power Cord and Phone Line Turn the power switch ON. For more details, see page 3-2 in Montreal) 1 Packing List Power Cord Telephone Wire Cord CD-ROM Drum Unit Assembly With Free Starter Toner Cartridge (Up to 10 envelopes. Enter your telephone number, then press Menu/Set. CONGRATULATIONS ON PURCHASING THE ULTIMATE BROTHER MACHINE. If you control the phone line...

Quick Setup Guide - English
Page 2
...-Line Documentation (Owner's Manual) on as a printer and scanner in any problem for viewing incoming faxes and scanned documents. This is a document management application for installation, visit us at: http://solutions.brother.com Use only a shielded parallel interface cable that is IEEE 1284-compliant and/or a USB cable that is an OCR application that converts an image into text and inserts it into your default word processor. *2 If an error message appears...
...-Line Documentation (Owner's Manual) on as a printer and scanner in any problem for viewing incoming faxes and scanned documents. This is a document management application for installation, visit us at: http://solutions.brother.com Use only a shielded parallel interface cable that is IEEE 1284-compliant and/or a USB cable that is an OCR application that converts an image into text and inserts it into your default word processor. *2 If an error message appears...

Quick Setup Guide - English
Page 4
... you have been installed and the installation is started. When the window appears, double-click MFL-PRO Suite Driver Installer to highlight the printer driver icon you click No, the Scan keys on the MFC will be disabled.*3 The Brother PC fax, Printer and Scanner drivers have the Control Center loaded each time Windows is now complete. Step 3. Help Helpful hints. Step 3. Step 6. Connect the MFC to print. Install Paper Port. 1. Turn on . Step 5. Step 4. Documentation View the Owner's Manual and other documentation. Select Yes to...
... you have been installed and the installation is started. When the window appears, double-click MFL-PRO Suite Driver Installer to highlight the printer driver icon you click No, the Scan keys on the MFC will be disabled.*3 The Brother PC fax, Printer and Scanner drivers have the Control Center loaded each time Windows is now complete. Step 3. Help Helpful hints. Step 3. Step 6. Connect the MFC to print. Install Paper Port. 1. Turn on . Step 5. Step 4. Documentation View the Owner's Manual and other documentation. Select Yes to...


