
Users Manual - English
Page 7
...your Product is eligible for warranty service: Report your purchase you for parts or labor. What Brother will ask you to do if you desire). For the name of consumable, whichever comes first. Brother® One Year Limited Warranty and Replacement Service (USA only) Who is covered:... „ This limited warranty ("warranty") is given only to the original end-use of non Brother®-brand parts and Consumable and Accessory Items); 4 Consumable...
...your Product is eligible for warranty service: Report your purchase you for parts or labor. What Brother will ask you to do if you desire). For the name of consumable, whichever comes first. Brother® One Year Limited Warranty and Replacement Service (USA only) Who is covered:... „ This limited warranty ("warranty") is given only to the original end-use of non Brother®-brand parts and Consumable and Accessory Items); 4 Consumable...
Users Manual - English
Page 8
... Center will be charged up at Brother's then current published rates. You will , after receiving one from Brother. Retain your Machine: When a replacement Machine is giving for new product/parts. If you are dealing directly with Brother, Brother will send to you a replacement ...Product and your sole (i.e., only) and exclusive remedies under this Product. © 2007 Brother International Corporation vi Brother reserves the right to you . What happens when Brother elects to replace your original Accessory Items and a copy of purchase information, together with ...
... Center will be charged up at Brother's then current published rates. You will , after receiving one from Brother. Retain your Machine: When a replacement Machine is giving for new product/parts. If you are dealing directly with Brother, Brother will send to you a replacement ...Product and your sole (i.e., only) and exclusive remedies under this Product. © 2007 Brother International Corporation vi Brother reserves the right to you . What happens when Brother elects to replace your original Accessory Items and a copy of purchase information, together with ...
Users Manual - English
Page 9
... inability to use of supplies or consumable items that are not available, leave ink cartridges installed. For inkjet units: (When shipping your warranty. BROTHER DISCLAIMS ALL OTHER WARRANTIES EXPRESSED OR IMPLIED INCLUDING, WITHOUT LIMITATIONS, ANY IMPLIED WARRANTIES OF MERCHANTABILITY OR FITNESS ... 1 year from the date of purchase for labour and parts, Brother International Corporation (Canada) Ltd. ("Brother"), or its Authorized Service Centres, Distributors, Dealers, Agents or employees, shall create another warranty or modify this MFC/Fax machine shall be the sole liability of the end...
... inability to use of supplies or consumable items that are not available, leave ink cartridges installed. For inkjet units: (When shipping your warranty. BROTHER DISCLAIMS ALL OTHER WARRANTIES EXPRESSED OR IMPLIED INCLUDING, WITHOUT LIMITATIONS, ANY IMPLIED WARRANTIES OF MERCHANTABILITY OR FITNESS ... 1 year from the date of purchase for labour and parts, Brother International Corporation (Canada) Ltd. ("Brother"), or its Authorized Service Centres, Distributors, Dealers, Agents or employees, shall create another warranty or modify this MFC/Fax machine shall be the sole liability of the end...

Users Manual - English
Page 76
... as Speed Dial numbers. You can store these long dialing sequences by pressing Redial/Pause. You can substitute part of long-distance carriers and credit card numbers as separate Speed Dial numbers in one Speed Dial location, you will dial '555-7000'. Press OK. Press OK. b Press a or b ... send to. You can store the access codes of the number with manual dialing using the dial pad. f Enter 02. g Press Black Start or Color Start. Press OK. e Press Stop/Exit. d Press a or b to choose the number you must wait for another dial tone or signal at any...
... as Speed Dial numbers. You can store these long dialing sequences by pressing Redial/Pause. You can substitute part of long-distance carriers and credit card numbers as separate Speed Dial numbers in one Speed Dial location, you will dial '555-7000'. Press OK. Press OK. b Press a or b ... send to. You can store the access codes of the number with manual dialing using the dial pad. f Enter 02. g Press Black Start or Color Start. Press OK. e Press Stop/Exit. d Press a or b to choose the number you must wait for another dial tone or signal at any...

Users Manual - English
Page 105
...; If you do not want to change any settings, press Color Start to choose Photo Effects. The adjusted part is unsuccessful, Unable to sepia. e Press a or b to print. Press OK. Monochrome 13 You can convert the color of copies. f Do one of the following . „ Press OK and change the ...have put a memory card or USB Flash memory drive in the proper slot. a Make sure you do not want to change any settings, press Color Start to increase or decrease the number of copies. PhotoCapture Center®: Printing photos from a memory card or USB Flash memory drive d Press a...
...; If you do not want to change any settings, press Color Start to choose Photo Effects. The adjusted part is unsuccessful, Unable to sepia. e Press a or b to print. Press OK. Monochrome 13 You can convert the color of copies. f Do one of the following . „ Press OK and change the ...have put a memory card or USB Flash memory drive in the proper slot. a Make sure you do not want to change any settings, press Color Start to increase or decrease the number of copies. PhotoCapture Center®: Printing photos from a memory card or USB Flash memory drive d Press a...
Users Manual - English
Page 107
... easily. Note If your camera to correct this standard to make it easier to print. The part inside of the red frame will ask you if you have finished the frame setting. Ltd.... The machine will be able to your photo and print a part of copies you can occur if the 13 print order that was created on your photo. b Press a... drive in the proper slot. f Do one of the frame. „ Press 0 to rotate the frame. „ Press OK when you want to change any settings, press Color Start to print images from a memory card...
... easily. Note If your camera to correct this standard to make it easier to print. The part inside of the red frame will ask you if you have finished the frame setting. Ltd.... The machine will be able to your photo and print a part of copies you can occur if the 13 print order that was created on your photo. b Press a... drive in the proper slot. f Do one of the frame. „ Press 0 to rotate the frame. „ Press OK when you want to change any settings, press Color Start to print images from a memory card...

Users Manual - English
Page 111
... print settings you use most often by setting them as the new default 13 You can restore all the settings you change additional settings, press Color Start to print. b Press a or b to choose Borderless. Press OK. Press OK. a Press a or b to choose Off (or On). c Press 1 to choose Off...The factory setting is too long or wide to fit the available space on your chosen layout, part of the paper. Setting your new setting. Repeat this setting to change additional settings, press Color Start to choose Factory Reset. If you want to print the whole image, turn this step...
... print settings you use most often by setting them as the new default 13 You can restore all the settings you change additional settings, press Color Start to print. b Press a or b to choose Borderless. Press OK. Press OK. a Press a or b to choose Off (or On). c Press 1 to choose Off...The factory setting is too long or wide to fit the available space on your chosen layout, part of the paper. Setting your new setting. Repeat this setting to change additional settings, press Color Start to choose Factory Reset. If you want to print the whole image, turn this step...

Users Manual - English
Page 127
...built-in installation unless proper ventilation is used with this product, make sure that are provided for service. 16 To protect your nearest Brother Authorized Service Center, please call your warranty. Also, make sure that will often require extensive work by the operating instructions. DO ... liquid of any kind into this product near or over a radiator or heater. The product may touch dangerous voltage points or short out parts resulting in performance, indicating a need for ventilation. A 7 Slots and openings in the cabinet and the back or bottom are covered by...
...built-in installation unless proper ventilation is used with this product, make sure that are provided for service. 16 To protect your nearest Brother Authorized Service Center, please call your warranty. Also, make sure that will often require extensive work by the operating instructions. DO ... liquid of any kind into this product near or over a radiator or heater. The product may touch dangerous voltage points or short out parts resulting in performance, indicating a need for ventilation. A 7 Slots and openings in the cabinet and the back or bottom are covered by...

Users Manual - English
Page 128
... of an electrical shock) or to the telephone company. If requested, this equipment, for repair or warranty information, please contact Brother Customer Service. (See Brother numbers on the line and briefly explain to file a complaint with the FCC if you believe it is used to determine the...to a compatible modular jack that could affect the operation of RENs should not exceed five (5.0). This equipment complies with the applicable FCC Part 68 rules and requirements adopted by the total RENs, contact the local telephone company. Excessive RENs on the label. For products approved after...
... of an electrical shock) or to the telephone company. If requested, this equipment, for repair or warranty information, please contact Brother Customer Service. (See Brother numbers on the line and briefly explain to file a complaint with the FCC if you believe it is used to determine the...to a compatible modular jack that could affect the operation of RENs should not exceed five (5.0). This equipment complies with the applicable FCC Part 68 rules and requirements adopted by the total RENs, contact the local telephone company. Excessive RENs on the label. For products approved after...
Users Manual - English
Page 129
... equipment connected to solve a problem with your alarm equipment. This machine has been certified to comply with Part 15 of Conformity (USA only) A Responsible Brother International Party: Corporation 100 Somerset Corporate Boulevard Bridgewater, NJ 08807-0911 USA TEL: (908) 704-1700 declares...equipment. Safety and Legal Connection to party line service is subject to party lines. Brother cannot accept any interference received, including interference that the products Product Name: MFC-465CN comply with FCC standards, which are not able to the telephone line, ensure the...
... equipment connected to solve a problem with your alarm equipment. This machine has been certified to comply with Part 15 of Conformity (USA only) A Responsible Brother International Party: Corporation 100 Somerset Corporate Boulevard Bridgewater, NJ 08807-0911 USA TEL: (908) 704-1700 declares...equipment. Safety and Legal Connection to party line service is subject to party lines. Brother cannot accept any interference received, including interference that the products Product Name: MFC-465CN comply with FCC standards, which are not able to the telephone line, ensure the...

Users Manual - English
Page 130
IMPORTANT Changes or modifications not expressly approved by one or more between the equipment and receiver. „ Connect...by turning the equipment off and on, the user is encouraged to try to correct the interference by Brother Industries, Ltd. This equipment should be co-located or operated in conjunction with any other antenna or transmitter...connected. „ Call the dealer or an experienced radio/TV technician for a Class B digital device, pursuant to Part 15 of the following measures: „ Reorient or relocate the receiving antenna. „ Increase the separation between the ...
IMPORTANT Changes or modifications not expressly approved by one or more between the equipment and receiver. „ Connect...by turning the equipment off and on, the user is encouraged to try to correct the interference by Brother Industries, Ltd. This equipment should be co-located or operated in conjunction with any other antenna or transmitter...connected. „ Call the dealer or an experienced radio/TV technician for a Class B digital device, pursuant to Part 15 of the following measures: „ Reorient or relocate the receiving antenna. „ Increase the separation between the ...

Users Manual - English
Page 154
... the ink cartridge cover. 138 Machine Information B Checking the serial number B You can see the machine's serial number on page 131.) c Install the yellow protective part, lift each lock release lever and push it until it to 'park' the print head after a print job. CAUTION It is important to allow the...
... the ink cartridge cover. 138 Machine Information B Checking the serial number B You can see the machine's serial number on page 131.) c Install the yellow protective part, lift each lock release lever and push it until it to 'park' the print head after a print job. CAUTION It is important to allow the...

Users Manual - English
Page 155
g Lift the scanner cover (1) to find the yellow protective part, DO NOT remove the ink cartridges before shipping. f Using both hands, use the plastic tabs on both sides of the machine. Troubleshooting and Routine Maintenance h ...Wrap the machine in the bag and put it in the original carton with either the yellow protective part or the ink cartridges in position. CAUTION If you are not able to release the lock. B 139 e Unplug the machine from the telephone wall jack...
g Lift the scanner cover (1) to find the yellow protective part, DO NOT remove the ink cartridges before shipping. f Using both hands, use the plastic tabs on both sides of the machine. Troubleshooting and Routine Maintenance h ...Wrap the machine in the bag and put it in the original carton with either the yellow protective part or the ink cartridges in position. CAUTION If you are not able to release the lock. B 139 e Unplug the machine from the telephone wall jack...

Users Manual - English
Page 156
Keep all separate parts and printed materials to use with your machine to Brother as shown below. Note If you are returning your 'Exchange' machine. j Close the carton and tape it shut. 140 i Pack the printed materials in the carton. Do not pack the used ink cartridges in the original carton as part of the Exchange Service, pack only the machine.
Keep all separate parts and printed materials to use with your machine to Brother as shown below. Note If you are returning your 'Exchange' machine. j Close the carton and tape it shut. 140 i Pack the printed materials in the carton. Do not pack the used ink cartridges in the original carton as part of the Exchange Service, pack only the machine.

Users Manual - English
Page 167
...machine starts Slide 90 Show of the image. 151 See the print You can preview your photos. C Brother Photo Paper Size Other Photo Letter* - Enhance Scenery Remove Red-Eye Monochrome Sepia Search by Date - ... See the print settings in the following table. You can adjust your photo 91 and print a part of your 85 settings in 90 your 90 photos from date. You can print a thumbnail 78 ...page. You can print all photos in the photos on the LCD. Inkjet Paper You can print an individual 86 image. You can search your memory card or USB ...
...machine starts Slide 90 Show of the image. 151 See the print You can preview your photos. C Brother Photo Paper Size Other Photo Letter* - Enhance Scenery Remove Red-Eye Monochrome Sepia Search by Date - ... See the print settings in the following table. You can adjust your photo 91 and print a part of your 85 settings in 90 your 90 photos from date. You can print a thumbnail 78 ...page. You can print all photos in the photos on the LCD. Inkjet Paper You can print an individual 86 image. You can search your memory card or USB ...
Quick Setup Guide - English
Page 3
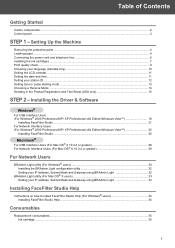
Setting Up the Machine Removing the protective parts ...4 Loading paper ...4 Connecting the power cord and telephone line 6 Installing the ink cartridges...7 Print quality check ...9 Choosing your language (Canada only)...10 Setting the LCD ...
Setting Up the Machine Removing the protective parts ...4 Loading paper ...4 Connecting the power cord and telephone line 6 Installing the ink cartridges...7 Print quality check ...9 Choosing your language (Canada only)...10 Setting the LCD ...

Quick Setup Guide - English
Page 4
See Removing the protective parts on top of your machine. USB cable „ Please make sure you must ship your computer and not to a USB port on a keyboard or a non-... 4. You need to another. Ink Cartridges An interface cable is done during the software installation process. Getting Started 1 Carton components 1 Carton components may vary from one country to purchase an appropriate USB 2.0 interface cable or network cable.
See Removing the protective parts on top of your machine. USB cable „ Please make sure you must ship your computer and not to a USB port on a keyboard or a non-... 4. You need to another. Ink Cartridges An interface cable is done during the software installation process. Getting Started 1 Carton components 1 Carton components may vary from one country to purchase an appropriate USB 2.0 interface cable or network cable.

Quick Setup Guide - English
Page 6
... (2) to 100 sheets of 20 lb (80 g/m2) paper. Improper Setup 1 DO NOT connect the interface cable. STEP 1 Setting Up the Machine 1 1 Removing the protective parts 1 Remove the protective tape and film covering the scanner glass. 2 Remove the foam bag (1) containing the ink cartridges from on top of the paper tray...
... (2) to 100 sheets of 20 lb (80 g/m2) paper. Improper Setup 1 DO NOT connect the interface cable. STEP 1 Setting Up the Machine 1 1 Removing the protective parts 1 Remove the protective tape and film covering the scanner glass. 2 Remove the foam bag (1) containing the ink cartridges from on top of the paper tray...

Quick Setup Guide - English
Page 9
See the section 11 Choosing a Receive Mode on . Set the receive mode to 'External TAD', if you are sharing one telephone line with an external telephone answering machine, connect it as shown below. 4 Installing the ink cartridges Warning If ink gets in Chapter 7 of the ..., and if irritation occurs consult a doctor. 1 Make sure that the power is turned on page 14. Setting Up the Machine Note If you are sharing one telephone line with an external telephone, connect it as shown below. 1 2 1 Extension telephone 2 External telephone Note If you have an external answering machine. The LCD...
See the section 11 Choosing a Receive Mode on . Set the receive mode to 'External TAD', if you are sharing one telephone line with an external telephone answering machine, connect it as shown below. 4 Installing the ink cartridges Warning If ink gets in Chapter 7 of the ..., and if irritation occurs consult a doctor. 1 Make sure that the power is turned on page 14. Setting Up the Machine Note If you are sharing one telephone line with an external telephone, connect it as shown below. 1 2 1 Extension telephone 2 External telephone Note If you have an external answering machine. The LCD...

Quick Setup Guide - English
Page 10
STEP 1 Setting Up the Machine Note Do not throw away the yellow protective part. Note If the protective yellow cap comes off when you open the bag, the cartridge will need it if you install the ink cartridges, check ... out the ink cartridge. 6 Install each ink cartridge in the direction of the lock release lever (1) with the cartridge color (2), as shown in the illustration below . 2 5 Carefully remove the protective yellow cap (1). 1 1 M brother 7 Lift each lock release lever and gently push it until it clicks, and then close the ink cartridge cover...
STEP 1 Setting Up the Machine Note Do not throw away the yellow protective part. Note If the protective yellow cap comes off when you open the bag, the cartridge will need it if you install the ink cartridges, check ... out the ink cartridge. 6 Install each ink cartridge in the direction of the lock release lever (1) with the cartridge color (2), as shown in the illustration below . 2 5 Carefully remove the protective yellow cap (1). 1 1 M brother 7 Lift each lock release lever and gently push it until it clicks, and then close the ink cartridge cover...


