
Quick Setup Guide - English
Page 3
Save all packing materials and the carton in case for any reason you must ship your machine. Getting Started 1 Carton components Carton components may vary from one country to another. Quick Setup Guide User's Guide Test Sheet (USA only) Accessory Order Form Telephone Line Cord Side Cover Telephone Handset (FAX-2480C only) One Touch Labels (FAX-2480C only) One Touch Labels (FAX-2580C only) Cordless Handset (FAX-2580C only) Battery and Battery Cover (FAX-2580C only) Black (LC51BK) Yellow (LC51Y) Cyan (LC51C) Ink Cartridges Magenta (LC51M) 1
Save all packing materials and the carton in case for any reason you must ship your machine. Getting Started 1 Carton components Carton components may vary from one country to another. Quick Setup Guide User's Guide Test Sheet (USA only) Accessory Order Form Telephone Line Cord Side Cover Telephone Handset (FAX-2480C only) One Touch Labels (FAX-2480C only) One Touch Labels (FAX-2580C only) Cordless Handset (FAX-2580C only) Battery and Battery Cover (FAX-2580C only) Black (LC51BK) Yellow (LC51Y) Cyan (LC51C) Ink Cartridges Magenta (LC51M) 1

Quick Setup Guide - English
Page 6
...battery cover and cordless handset from the carton. 3 Connecting the cradle power cord (FAX-2580C only) 1 Remove tape and plastic bag from on 1 the side of the paper tray. 2 Connecting the handset (FAX-2480C only) 1 Connect the curled handset cord to the handset. Then, plug the ...adapter into an AC power outlet. 4 Setting Up the Machine 1 1 Removing the protective parts 1 Remove the protective tape and film covering the scanner glass. 2 Remove the foam bag containing the ink cartridges from ...
...battery cover and cordless handset from the carton. 3 Connecting the cradle power cord (FAX-2580C only) 1 Remove tape and plastic bag from on 1 the side of the paper tray. 2 Connecting the handset (FAX-2480C only) 1 Connect the curled handset cord to the handset. Then, plug the ...adapter into an AC power outlet. 4 Setting Up the Machine 1 1 Removing the protective parts 1 Remove the protective tape and film covering the scanner glass. 2 Remove the foam bag containing the ink cartridges from ...
Software Users Guide
Page 130
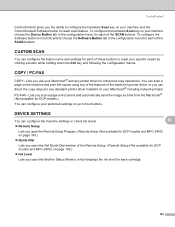
...four buttons. Lets you can direct the copy output to meet your machine choose the Device Button tab in the configuration menu for each cartridge. 124 To configure the hardware Scan key on your specific needs by clicking a button while holding down the Ctrl key and following ... a page or document and automatically send the image as a fax from the Macintosh®. (Not available for DCP models.) You can configure the machine settings or check ink levels. 10 „ Remote Setup Lets you open the Brother Status Monitor, which displays the ink level for each scan feature. COPY / PC...
...four buttons. Lets you can direct the copy output to meet your machine choose the Device Button tab in the configuration menu for each cartridge. 124 To configure the hardware Scan key on your specific needs by clicking a button while holding down the Ctrl key and following ... a page or document and automatically send the image as a fax from the Macintosh®. (Not available for DCP models.) You can configure the machine settings or check ink levels. 10 „ Remote Setup Lets you open the Brother Status Monitor, which displays the ink level for each scan feature. COPY / PC...


