Z170-WS User Guide for English
Page 3
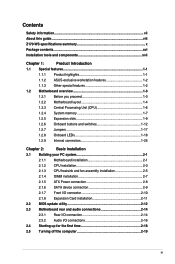
Contents Safety information...vii About this guide...viii Z170-WS specifications summary x Package contents...xvi Installation tools and components xvii Chapter 1: Product Introduction 1.1 Special features 1-1 1.1.1 Product highlights 1-1 1.1.2 ASUS-exclusive workstation features 1-2 1.1.3 Other special features 1-2 1.2 Motherboard overview 1-3 1.2.1 Before you proceed 1-3 1.2.2 Motherboard layout 1-4 1.2.3 Central Processing Unit ... Rear I/O connection 2-14 2.3.2 Audio I/O connections 2-16 2.4 Starting up for the first time 2-18 2.5 Turning off the computer 2-19 iii
Contents Safety information...vii About this guide...viii Z170-WS specifications summary x Package contents...xvi Installation tools and components xvii Chapter 1: Product Introduction 1.1 Special features 1-1 1.1.1 Product highlights 1-1 1.1.2 ASUS-exclusive workstation features 1-2 1.1.3 Other special features 1-2 1.2 Motherboard overview 1-3 1.2.1 Before you proceed 1-3 1.2.2 Motherboard layout 1-4 1.2.3 Central Processing Unit ... Rear I/O connection 2-14 2.3.2 Audio I/O connections 2-16 2.4 Starting up for the first time 2-18 2.5 Turning off the computer 2-19 iii

Z170-WS User Guide for English
Page 31
... to boot after using the MemOK! A message will appear during POST reminding you turn off the computer and replace DIMMs during the tuning process, the system continues memory tuning after turning on the computer. Z170-WS 1-13 function. • The MemOK! button to memory tuning requirement, the system...recommended in the Memory QVL (Qualified Vendors Lists) in this user manual or at www.asus.com. • If you that the BIOS has been restored to the latest BIOS version from www.asus.com after the whole tuning process, the DRAM_LED lights continuously. Chapter 1 • Refer...
... to boot after using the MemOK! A message will appear during POST reminding you turn off the computer and replace DIMMs during the tuning process, the system continues memory tuning after turning on the computer. Z170-WS 1-13 function. • The MemOK! button to memory tuning requirement, the system...recommended in the Memory QVL (Qualified Vendors Lists) in this user manual or at www.asus.com. • If you that the BIOS has been restored to the latest BIOS version from www.asus.com after the whole tuning process, the DRAM_LED lights continuously. Chapter 1 • Refer...

Z170-WS User Guide for English
Page 51
Z170-WS 1-33 Connect the HDD Activity LED cable to hear system beeps and warnings. • ATX power button/soft-off button (2-pin PWRSW) This connector is for the system power button. Pressing the power switch for more than four seconds while the system is ON turns the system OFF.... is read from or written to this connector. The system power LED lights up or flashes when data is for system reboot without turning off mode depending on the operating system settings. System panel connector (20-5 pin PANEL) This connector supports several chassis-mounted functions. ...
Z170-WS 1-33 Connect the HDD Activity LED cable to hear system beeps and warnings. • ATX power button/soft-off button (2-pin PWRSW) This connector is for the system power button. Pressing the power switch for more than four seconds while the system is ON turns the system OFF.... is read from or written to this connector. The system power LED lights up or flashes when data is for system reboot without turning off mode depending on the operating system settings. System panel connector (20-5 pin PANEL) This connector supports several chassis-mounted functions. ...

Z170-WS User Guide for English
Page 67
...installation of interruption, please follow the steps again. • If the light flashes for five seconds and turns into a solid light, this scenario happens, please restart the system to turn off the light. • Updating BIOS may be interrupted. For more BIOS update utilities in BIOS setup...logs with opening the computer's case. USB Q-Code Logger button Q-Code Logger does not support NTFS and exFAT32 format. Z170-WS 2-13 Chapter 2 6. If this means that your local ASUS Service Center. To use Q-Code Logger: 1. In case of the USB storage device and filename/file format error....
...installation of interruption, please follow the steps again. • If the light flashes for five seconds and turns into a solid light, this scenario happens, please restart the system to turn off the light. • Updating BIOS may be interrupted. For more BIOS update utilities in BIOS setup...logs with opening the computer's case. USB Q-Code Logger button Q-Code Logger does not support NTFS and exFAT32 format. Z170-WS 2-13 Chapter 2 6. If this means that your local ASUS Service Center. To use Q-Code Logger: 1. In case of the USB storage device and filename/file format error....

Z170-WS User Guide for English
Page 72
... the time you press the ATX power button. If your retailer for the first time 1. Connect the power cord to green after the system LED turns on. After applying power, the system power LED on self tests (POST). While the tests are running, the BIOS beeps (refer to a power outlet ...II function is equipped with a surge protector. 5. Ensure that is enabled, ensure to connect the rear speaker to the gray port. 2.4 Starting up when you turned on the power, the system may light up . Connect the power cord to the BIOS beep codes table) or additional messages appear on test. For...
... the time you press the ATX power button. If your retailer for the first time 1. Connect the power cord to green after the system LED turns on. After applying power, the system power LED on self tests (POST). While the tests are running, the BIOS beeps (refer to a power outlet ...II function is equipped with a surge protector. 5. Ensure that is enabled, ensure to connect the rear speaker to the gray port. 2.4 Starting up when you turned on the power, the system may light up . Connect the power cord to the BIOS beep codes table) or additional messages appear on test. For...

Z170-WS User Guide for English
Page 73
At power on the BIOS setting. Chapter 2 Z170-WS 2-19 BIOS Beep One short beep One continuous beep followed by two short beeps then a pause (repeated) One continuous beep followed by three short beeps ... to let the system enter the soft-off mode, depending on , hold down the key to enter the BIOS Setup. Follow the instructions in Chapter 3. 2.5 Turning off the computer While the system is ON, press the power button for more than four seconds to disabled No keyboard detected No memory detected...
At power on the BIOS setting. Chapter 2 Z170-WS 2-19 BIOS Beep One short beep One continuous beep followed by two short beeps then a pause (repeated) One continuous beep followed by three short beeps ... to let the system enter the soft-off mode, depending on , hold down the key to enter the BIOS Setup. Follow the instructions in Chapter 3. 2.5 Turning off the computer While the system is ON, press the power button for more than four seconds to disabled No keyboard detected No memory detected...

Z170-WS User Guide for English
Page 76
... POST To enter BIOS Setup after POST: • Press ++ simultaneously. • Press the reset button on the system chassis. • Press the power button to turn the system off then back on your screen. • Ensure that a USB mouse is connected to your motherboard if you want to use the mouse...
... POST To enter BIOS Setup after POST: • Press ++ simultaneously. • Press the reset button on the system chassis. • Press the power button to turn the system off then back on your screen. • Ensure that a USB mouse is connected to your motherboard if you want to use the mouse...

Z170-WS User Guide for English
Page 131
...Secure Erase. Ensure to set the SATA mode to section 1.2.2 Motherboard layout of this manual. For more details, refer to section 3.11.2 ASUS EZ Flash 3. 3.9.2 Secure Erase SSD speeds may take a while depending on the Advanced mode menu. Secure Erase completely and safely cleans your...unstable if you run ASUS EZ Flash 3. Configuration options: [Disabled] [Enabled] 3.9.1 ASUS EZ Flash 3 Utility This item allows you to run Secure Erase on Intel SATA port. Do not turn off the system during the process. • Secure Erase is only available in AHCI mode. Z170-WS 3-57 When you ...
...Secure Erase. Ensure to set the SATA mode to section 1.2.2 Motherboard layout of this manual. For more details, refer to section 3.11.2 ASUS EZ Flash 3. 3.9.2 Secure Erase SSD speeds may take a while depending on the Advanced mode menu. Secure Erase completely and safely cleans your...unstable if you run ASUS EZ Flash 3. Configuration options: [Disabled] [Enabled] 3.9.1 ASUS EZ Flash 3 Utility This item allows you to run Secure Erase on Intel SATA port. Do not turn off the system during the process. • Secure Erase is only available in AHCI mode. Z170-WS 3-57 When you ...

Z170-WS User Guide for English
Page 139
...Flash 3 automatically. 4. To ensure system compatibility and stability, we recommend that contains the BIOS file. Chapter 3 Z170-WS 3-65 You can cause system boot failure! 3.11.3 ASUS CrashFree BIOS 3 The ASUS CrashFree BIOS 3 utility is an auto recovery tool that allows you to recover the BIOS setting. Doing so can... the motherboard support DVD to the optical drive, or the USB flash drive containing the BIOS file to a USB flash drive. Turn on the ASUS official website. If you to enter BIOS Setup to restore the BIOS file when it to the USB port. 3. The BIOS file...
...Flash 3 automatically. 4. To ensure system compatibility and stability, we recommend that contains the BIOS file. Chapter 3 Z170-WS 3-65 You can cause system boot failure! 3.11.3 ASUS CrashFree BIOS 3 The ASUS CrashFree BIOS 3 utility is an auto recovery tool that allows you to recover the BIOS setting. Doing so can... the motherboard support DVD to the optical drive, or the USB flash drive containing the BIOS file to a USB flash drive. Turn on the ASUS official website. If you to enter BIOS Setup to restore the BIOS file when it to the USB port. 3. The BIOS file...

Z170-WS User Guide for English
Page 171
...-RAID Disk Non-RAID Disk Non-RAID Disk The navigation keys at the bottom of the screen allow you to display the utility main menu. Turn on your screen. RAID Volumes: None defined. The utility supports maximum four hard disk drives for reference only and may not exactly match the items...
...-RAID Disk Non-RAID Disk Non-RAID Disk The navigation keys at the bottom of the screen allow you to display the utility main menu. Turn on your screen. RAID Volumes: None defined. The utility supports maximum four hard disk drives for reference only and may not exactly match the items...

Z170-WS User Guide for English
Page 177
... all existing graphics card drivers before installing AMD CrossFireX graphics cards to install multi-graphics processing units (GPU) graphics cards. Z170-WS 6-1 Follow the installation procedures in this section. 6.1.1 Requirements • In Dual CrossFireX mode, you should have to Control...your graphics card driver supports the AMD CrossFireX technology. To uninstall existing graphics card drivers: 1. For Windows 7, select Uninstall. 5. Turn off your current graphics card driver/s. 4. Chapter 6 Chapter 6: Multi GPU support Multiple GPU support 6 6.1 AMD® CrossFireX™...
... all existing graphics card drivers before installing AMD CrossFireX graphics cards to install multi-graphics processing units (GPU) graphics cards. Z170-WS 6-1 Follow the installation procedures in this section. 6.1.1 Requirements • In Dual CrossFireX mode, you should have to Control...your graphics card driver supports the AMD CrossFireX technology. To uninstall existing graphics card drivers: 1. For Windows 7, select Uninstall. 5. Turn off your current graphics card driver/s. 4. Chapter 6 Chapter 6: Multi GPU support Multiple GPU support 6 6.1 AMD® CrossFireX™...

Z170-WS User Guide for English
Page 190
... device must accept any interference received including interference that may cause harmful interference to radio communications. This equipment generates, uses and can be determined by turning the equipment off and on a circuit different from that interference will not occur in accordance with the limits for a Class B digital device, pursuant to Part...
... device must accept any interference received including interference that may cause harmful interference to radio communications. This equipment generates, uses and can be determined by turning the equipment off and on a circuit different from that interference will not occur in accordance with the limits for a Class B digital device, pursuant to Part...


