
AI2201 English Version E-manual
Page 4
... like Home Zen Home features...19 Home screen...19 Quick settings...20 Notifications...21 Personalizing your Home screen 22 Widgets ...22 Wallpapers...23 Editing your Home screen...24 Setting up the date and time...24 Setting up your ringtone and alert sounds 24 Lock Screen...25 Customizing your lock screen...25 Fingerprint ID sensor 26 Starting your ROG Phone for the first time 26 Setting up fingerprint ID from Settings 27 Face Unlock...28 Setting up face unlock from Settings 28 3 Work hard, play...
... like Home Zen Home features...19 Home screen...19 Quick settings...20 Notifications...21 Personalizing your Home screen 22 Widgets ...22 Wallpapers...23 Editing your Home screen...24 Setting up the date and time...24 Setting up your ringtone and alert sounds 24 Lock Screen...25 Customizing your lock screen...25 Fingerprint ID sensor 26 Starting your ROG Phone for the first time 26 Setting up fingerprint ID from Settings 27 Face Unlock...28 Setting up face unlock from Settings 28 3 Work hard, play...
AI2201 English Version E-manual
Page 5
... the Camera app...53 Photo Locations...54 Advanced camera features...54 Time lapse...55 Using the Gallery...56 Viewing the photo location...56 Editing images...56 Sharing files from the Gallery...56 Deleting files from the Gallery...57 7 Staying connected Mobile network...58 Enabling the mobile network...58 Wi-Fi...58 Enabling Wi-Fi...58 Connecting to a Wi-Fi network...59 Disabling Wi-Fi...59 Bluetooth® ...59 Enabling Bluetooth®...59 Pairing your ROG Phone to a Bluetooth® device 60...
... the Camera app...53 Photo Locations...54 Advanced camera features...54 Time lapse...55 Using the Gallery...56 Viewing the photo location...56 Editing images...56 Sharing files from the Gallery...56 Deleting files from the Gallery...57 7 Staying connected Mobile network...58 Enabling the mobile network...58 Wi-Fi...58 Enabling Wi-Fi...58 Connecting to a Wi-Fi network...59 Disabling Wi-Fi...59 Bluetooth® ...59 Enabling Bluetooth®...59 Pairing your ROG Phone to a Bluetooth® device 60...
AI2201 English Version E-manual
Page 7
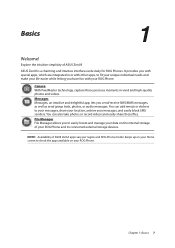
... data on your Home screen to check the apps available on the internal storage of ASUS ZenUI apps vary per region and ROG Phone model. You can also take photos or record videos and easily share these files. Swipe up on your ROG Phone. You can add emojis or stickers to fit your unique individual needs and make your life easier while letting you send/receive SMS/MMS messages, as well as send group texts, photos, or audio messages. ASUS...
... data on your Home screen to check the apps available on the internal storage of ASUS ZenUI apps vary per region and ROG Phone model. You can also take photos or record videos and easily share these files. Swipe up on your ROG Phone. You can add emojis or stickers to fit your unique individual needs and make your life easier while letting you send/receive SMS/MMS messages, as well as send group texts, photos, or audio messages. ASUS...

AI2201 English Version E-manual
Page 13
... master and the charging current or OTG device on the left side of your ROG Phone has DisplayPort functionality. • If you plug the USB Type-C cable to your computer's USB port. • Avoid charging your ROG Phone in battery mode for the first time. • The status of battery charge is plugged to a power outlet, the grounded power outlet must be near to the unit and easily accessible...
... master and the charging current or OTG device on the left side of your ROG Phone has DisplayPort functionality. • If you plug the USB Type-C cable to your computer's USB port. • Avoid charging your ROG Phone in battery mode for the first time. • The status of battery charge is plugged to a power outlet, the grounded power outlet must be near to the unit and easily accessible...

AI2201 English Version E-manual
Page 14
... device in sleep mode, press the power button once until the screen turns off. Power key NOTE: When your system is locked, unlock the device screen. 2. Turning your device off To turn your phone. Sleep mode To put your device vibrates and starts up. If this doesn't work, try again by pressing and holding the keys again for 8 seconds to turn it on , press and hold the power button, then when prompted, tap Power off. Turning your ROG Phone...
... device in sleep mode, press the power button once until the screen turns off. Power key NOTE: When your system is locked, unlock the device screen. 2. Turning your device off To turn your phone. Sleep mode To put your device vibrates and starts up. If this doesn't work, try again by pressing and holding the keys again for 8 seconds to turn it on , press and hold the power button, then when prompted, tap Power off. Turning your ROG Phone...
AI2201 English Version E-manual
Page 15
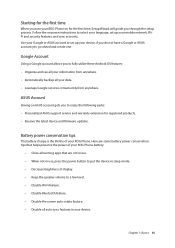
... ASUS support service and warranty extension for the first time, Setup Wizard will guide you do not have a Google or ASUS account yet, go ahead and create one. Disable the screen auto-rotate feature. - Battery power conservation tips The battery charge is the lifeline of display. - When not in sleep mode. - Google Account Using a Google account allows you to select your language, set up your mobile network, WiFi and security features, and sync accounts. Disable Bluetooth feature. - Keep the speaker volume to set...
... ASUS support service and warranty extension for the first time, Setup Wizard will guide you do not have a Google or ASUS account yet, go ahead and create one. Disable the screen auto-rotate feature. - Battery power conservation tips The battery charge is the lifeline of display. - When not in sleep mode. - Google Account Using a Google account allows you to select your language, set up your mobile network, WiFi and security features, and sync accounts. Disable Bluetooth feature. - Keep the speaker volume to set...
AI2201 English Version E-manual
Page 24
... your phone ringtone, notifications such as text messages, emails, and event alerts. Scroll down the Settings screen and select System > Date & time. 3. Tap Date and Time to select the time zone. 6. You can also choose to enable or disable the dial pad touch tones, touch sounds, screen lock sound, or you can opt to edit your preferred sound settings. 24 Chapter 2: There's no place like Home Setting up your ringtone and alert sounds Set up your Home screen. Select Sound & vibration and set up...
... your phone ringtone, notifications such as text messages, emails, and event alerts. Scroll down the Settings screen and select System > Date & time. 3. Tap Date and Time to select the time zone. 6. You can also choose to enable or disable the dial pad touch tones, touch sounds, screen lock sound, or you can opt to edit your preferred sound settings. 24 Chapter 2: There's no place like Home Setting up your ringtone and alert sounds Set up your Home screen. Select Sound & vibration and set up...

AI2201 English Version E-manual
Page 25
... lock screen settings from sleep mode. NOTE: For more details, see Securing your lock screen If you would like Home 25 Select Security & lock screen. 3. From the lock screen, you can also be customized to regulate access to the following : • Launch Quick Settings then tap . • Swipe up on your device and while waking it up from the default Swipe option, refer to your mobile data and apps. Customizing your ROG Phone...
... lock screen settings from sleep mode. NOTE: For more details, see Securing your lock screen If you would like Home 25 Select Security & lock screen. 3. From the lock screen, you can also be customized to regulate access to the following : • Launch Quick Settings then tap . • Swipe up on your device and while waking it up from the default Swipe option, refer to your mobile data and apps. Customizing your ROG Phone...

AI2201 English Version E-manual
Page 26
... cover different areas of your finger repeatedly until your finger are clean and dry. 2. You can use your fingerprint to the Protect your ROG Phone for the first time To set up your fingerprint ID when using your ROG Phone without your phone calls and data. From the Welcome page, follow the instructions to complete the setup. 26 Chapter 2: There's no place like Home
... cover different areas of your finger repeatedly until your finger are clean and dry. 2. You can use your fingerprint to the Protect your ROG Phone for the first time To set up your fingerprint ID when using your ROG Phone without your phone calls and data. From the Welcome page, follow the instructions to complete the setup. 26 Chapter 2: There's no place like Home

AI2201 English Version E-manual
Page 27
... the instructions to complete the setup. Repeatedly place-and-lift your finger on your backup screen lock method. Launch the Settings screen by doing either of the following: • Launch Quick Settings then tap . • Swipe up on the scanner until your ROG Phone. 5. Scroll down the Settings screen and select Security & lock screen > Fingerprint. 4. Setting up fingerprint ID from Settings: 1. Tap Add fingerprint. 6. Chapter 2: There's no place like Home...
... the instructions to complete the setup. Repeatedly place-and-lift your finger on your backup screen lock method. Launch the Settings screen by doing either of the following: • Launch Quick Settings then tap . • Swipe up on the scanner until your ROG Phone. 5. Scroll down the Settings screen and select Security & lock screen > Fingerprint. 4. Setting up fingerprint ID from Settings: 1. Tap Add fingerprint. 6. Chapter 2: There's no place like Home...

AI2201 English Version E-manual
Page 38
... SIM cards on your ROG Phone so that you can enable/disable Nano SIM cards, assign SIM names, or set one as a preferred network. If both SIMs have different mobile service providers, we recommend you to use the mobile numbers for your SIM names. 38 Chapter 4: Keeping in touch Renaming your Nano SIM cards Change the names of your Nano SIM cards, tap SIM 1 or SIM 2 then key in the names for your Nano SIM cards. NOTE: If your SIMs...
... SIM cards on your ROG Phone so that you can enable/disable Nano SIM cards, assign SIM names, or set one as a preferred network. If both SIMs have different mobile service providers, we recommend you to use the mobile numbers for your SIM names. 38 Chapter 4: Keeping in touch Renaming your Nano SIM cards Change the names of your Nano SIM cards, tap SIM 1 or SIM 2 then key in the names for your Nano SIM cards. NOTE: If your SIMs...

AI2201 English Version E-manual
Page 39
... ROG Phone automatically uses the preferred SIM card to connect the call from your preferred SIM for voice calls, tap Voice call then tap the SIM that you want to use this feature if you make a call . You can only use . SIM card for SMS messages To assign a SIM card for data service, tap Data service network then select from SIM 1 or SIM 2. SIM card for data service To assign a SIM card for SMS messages, tap SMS messages then select from SIM 1 or SIM 2. To assign a SIM card for voice calls, SMS messages, and data services. IMPORTANT! Chapter 4: Keeping in touch...
... ROG Phone automatically uses the preferred SIM card to connect the call from your preferred SIM for voice calls, tap Voice call then tap the SIM that you want to use this feature if you make a call . You can only use . SIM card for SMS messages To assign a SIM card for data service, tap Data service network then select from SIM 1 or SIM 2. SIM card for data service To assign a SIM card for SMS messages, tap SMS messages then select from SIM 1 or SIM 2. To assign a SIM card for voice calls, SMS messages, and data services. IMPORTANT! Chapter 4: Keeping in touch...

AI2201 English Version E-manual
Page 45
.... You can also sync your contacts with your email or social network accounts, link contacts' info for easy access in touch with phones, sorting list by first/last name, or viewing contact names as first/last names first. Launch the Contacts app then tap Set up your contacts as mobile or home number. Such display options include displaying only those contacts with them, or group them via calls, SMS messages, emails, or social networks. Group your profile...
.... You can also sync your contacts with your email or social network accounts, link contacts' info for easy access in touch with phones, sorting list by first/last name, or viewing contact names as first/last names first. Launch the Contacts app then tap Set up your contacts as mobile or home number. Such display options include displaying only those contacts with them, or group them via calls, SMS messages, emails, or social networks. Group your profile...

AI2201 English Version E-manual
Page 46
... as name, mobile or home number, and email address. 4. When dialing the contact number, you want to add other email accounts and fill in more . 1. NOTES: • You can add a contact's extension number to skip the voice prompts when making a call. 1. There'll be prompted to confirm the extension number. Tap Yes on the confirmation message. 2. Launch the Contacts app then tap . 2. When you don't have an email account, tap Add account then create one...
... as name, mobile or home number, and email address. 4. When dialing the contact number, you want to add other email accounts and fill in more . 1. NOTES: • You can add a contact's extension number to skip the voice prompts when making a call. 1. There'll be prompted to confirm the extension number. Tap Yes on the confirmation message. 2. Launch the Contacts app then tap . 2. When you don't have an email account, tap Add account then create one...

AI2201 English Version E-manual
Page 49
... to send your message. Start composing your messages, and easily block SMS senders. Sending messages 1. You can also take photos or record videos and easily share these files. When you 're going to send your message in the message field. 5. When you send/receive SMS/MMS messages, as well as send group texts, photos, or audio messages. Syncing your social network account Sync your social network account to add the social network accounts of your contacts to your contacts list. Send messages and more Messages Messages, an intuitive and delightful app...
... to send your message. Start composing your messages, and easily block SMS senders. Sending messages 1. You can also take photos or record videos and easily share these files. When you 're going to send your message in the message field. 5. When you send/receive SMS/MMS messages, as well as send group texts, photos, or audio messages. Syncing your social network account Sync your social network account to add the social network accounts of your contacts to your contacts list. Send messages and more Messages Messages, an intuitive and delightful app...

AI2201 English Version E-manual
Page 54
... your ROG Phone. Camera home screen Your ROG Phone's camera is equipped with auto-scene detection and auto-image stabilizer features. Tap the icons to on the location access from Settings > Location and slide Use location to start using the advanced camera features of your location to the following steps: 1. It also features a video stabilization function that you take the photo. Tap to select a flash type or flashlight Tap to use Google Lens Tap to select a screen mode...
... your ROG Phone. Camera home screen Your ROG Phone's camera is equipped with auto-scene detection and auto-image stabilizer features. Tap the icons to on the location access from Settings > Location and slide Use location to start using the advanced camera features of your location to the following steps: 1. It also features a video stabilization function that you take the photo. Tap to select a flash type or flashlight Tap to use Google Lens Tap to select a screen mode...

AI2201 English Version E-manual
Page 58
.... Enabling the mobile network 1. Update your social media accounts, browse the Internet, or exchange data and messages wirelessly from Quick Settings screen. Enabling Wi-Fi 1. Do either of the following to launch the Settings screen: • Launch Quick Settings then tap . • Swipe up on how to launch Quick Settings screen. 58 Chapter 7: Staying connected Slide Mobile data to turn on , and configure the other mobile network settings, if necessary. NOTE: You can enable your ROG Phone. Slide the Wi-Fi switch...
.... Enabling the mobile network 1. Update your social media accounts, browse the Internet, or exchange data and messages wirelessly from Quick Settings screen. Enabling Wi-Fi 1. Do either of the following to launch the Settings screen: • Launch Quick Settings then tap . • Swipe up on how to launch Quick Settings screen. 58 Chapter 7: Staying connected Slide Mobile data to turn on , and configure the other mobile network settings, if necessary. NOTE: You can enable your ROG Phone. Slide the Wi-Fi switch...

AI2201 English Version E-manual
Page 61
... to use your ROG Phone as a modem or turn it to help save battery power. Do either of the following: • Launch Quick Settings then tap > Network & internet. • Swipe up on Wi-Fi hotspot. 3. Tap Wi-Fi hotspot > Hotspot name to assign a unique SSID or network name, and tap Hotspot password to assign a strong 8-character password for your mobile service provider about availing of mobile devices can use the...
... to use your ROG Phone as a modem or turn it to help save battery power. Do either of the following: • Launch Quick Settings then tap > Network & internet. • Swipe up on Wi-Fi hotspot. 3. Tap Wi-Fi hotspot > Hotspot name to assign a unique SSID or network name, and tap Hotspot password to assign a strong 8-character password for your mobile service provider about availing of mobile devices can use the...
AI2201 English Version E-manual
Page 88
... pages 32 - SIM card for voice calls 39 E Extension number 40 - viewing the photo location 56 Gmail 33 Google Calendar 34 - turning on/off 14 B Backup and reset 72 Beauty - redial your ASUS phone for the first time 26 - clearing the browser data 32 - answering 42 - dialing a phone number 40 - setting up fingerprint ID from Contacts 41 - setting up 24...
... pages 32 - SIM card for voice calls 39 E Extension number 40 - viewing the photo location 56 Gmail 33 Google Calendar 34 - turning on/off 14 B Backup and reset 72 Beauty - redial your ASUS phone for the first time 26 - clearing the browser data 32 - answering 42 - dialing a phone number 40 - setting up fingerprint ID from Contacts 41 - setting up 24...

AI2201 English Version E-manual
Page 89
... SIM cards 38 - removing features 20 R Ringtone 24 - launching Sound Recorder 69 - zooming out 18 W Wallpapers 23 Weather 63 - enabling 58 Y YT Music 51 - connecting 50 Home screen 19 - see also Advanced camera features 55 Q Quick settings 20 - saving to messages 49 - setting up your YT Music 51 Z ZenUI 7 recording List 70 Storage...
... SIM cards 38 - removing features 20 R Ringtone 24 - launching Sound Recorder 69 - zooming out 18 W Wallpapers 23 Weather 63 - enabling 58 Y YT Music 51 - connecting 50 Home screen 19 - see also Advanced camera features 55 Q Quick settings 20 - saving to messages 49 - setting up your YT Music 51 Z ZenUI 7 recording List 70 Storage...


