
K8 series Quick Setup Guide
Page 10
... modules are properly inserted into the sockets. • Make sure that the drive cables are connected properly. • Update the motherboard BIOS. Troubleshooting If you encounter any of the following conditions when powering up , but no display Memory error Floppy disk error Hard disk drive...press and select Yes. If necessary, format your hard disk drive and install an operating system. NOTE: If you encounter any BIOS related problems, enter the BIOS setup by pressing during startup. CONDITIONS PC won't start up PC starts up the system, try performing one of the monitor...
... modules are properly inserted into the sockets. • Make sure that the drive cables are connected properly. • Update the motherboard BIOS. Troubleshooting If you encounter any of the following conditions when powering up , but no display Memory error Floppy disk error Hard disk drive...press and select Yes. If necessary, format your hard disk drive and install an operating system. NOTE: If you encounter any BIOS related problems, enter the BIOS setup by pressing during startup. CONDITIONS PC won't start up PC starts up the system, try performing one of the monitor...

K8V User Manual
Page 4
... a bootable floppy disk 2-2 2.1.2 Using AFUDOS to update the BIOS 2-3 2.1.3 Using AFUDOS to copy BIOS from PC 2-4 2.1.4 Using ASUS EZ Flash to update the BIOS 2-5 2.1.5 Recovering the BIOS with CrashFree BIOS 2 ....... 2-6 2.2 BIOS Setup program 2-8 2.2.1 BIOS menu screen 2-9 2.2.2 Menu bar 2-9 2.2.3 Navigation keys 2-9 2.2.4 Menu items 2-10 2.2.5 Sub-menu items 2-10 2.2.6 Configuration fields 2-10 2.2.7 Pop-up window 2-10 2.2.8 Scroll bar 2-10 2.2.9 General...
... a bootable floppy disk 2-2 2.1.2 Using AFUDOS to update the BIOS 2-3 2.1.3 Using AFUDOS to copy BIOS from PC 2-4 2.1.4 Using ASUS EZ Flash to update the BIOS 2-5 2.1.5 Recovering the BIOS with CrashFree BIOS 2 ....... 2-6 2.2 BIOS Setup program 2-8 2.2.1 BIOS menu screen 2-9 2.2.2 Menu bar 2-9 2.2.3 Navigation keys 2-9 2.2.4 Menu items 2-10 2.2.5 Sub-menu items 2-10 2.2.6 Configuration fields 2-10 2.2.7 Pop-up window 2-10 2.2.8 Scroll bar 2-10 2.2.9 General...

K8V User Manual
Page 5
... 3.1 Install an operating system 3-2 3.2 Support CD information 3-2 3.2.1 Running the support CD 3-2 3.2.2 Drivers menu 3-3 3.2.3 Utilities menu 3-3 3.2.4 ASUS Contact Information 3-4 3.3 ASUS Instant Music Lite 3-5 3.4 VIA RAID configurations 3-7 3.4.1 Installing the Serial ATA (SATA) hard disks 3-7 3.4.2 Entering VIA Tech RAID BIOS Utility 3-8 3.4.3 Create Array 3-9 3.4.4 Delete Array 3-11 3.4.5 Select Boot Array 3-12 3.4.6 Serial Number View 3-12 3.5 Promise®...
... 3.1 Install an operating system 3-2 3.2 Support CD information 3-2 3.2.1 Running the support CD 3-2 3.2.2 Drivers menu 3-3 3.2.3 Utilities menu 3-3 3.2.4 ASUS Contact Information 3-4 3.3 ASUS Instant Music Lite 3-5 3.4 VIA RAID configurations 3-7 3.4.1 Installing the Serial ATA (SATA) hard disks 3-7 3.4.2 Entering VIA Tech RAID BIOS Utility 3-8 3.4.3 Create Array 3-9 3.4.4 Delete Array 3-11 3.4.5 Select Boot Array 3-12 3.4.6 Serial Number View 3-12 3.5 Promise®...

K8V User Manual
Page 10
x K8V specifications summary Back panel I/O Internal I/O BIOS features Industry standard Manageability Power Requirement Form Factor Support CD contents 1 x Parallel port 1 x Serial port 1 x PS/2 keyboard port 1 x PS/2 mouse port 4 x USB 2.0 ports 1 x S/PDIF out ...-pin/4-pin ATX 12V power connectors CD/AUX connectors S/PDIF out connector GAME/MIDI connector 4Mb Flash EEPROM AMI BIOS with enhanced ACPI, PnP, DMI2.0, ASUS EZ Flash, ASUS MyLogo2, ASUS Q-Fan, SM BIOS 2.3, Multi-Language BIOS, CrashFree BIOS 2 PCI 2.2, USB 2.0/1.1 WOL by PME, WOR by PME ATX power supply (with 4-pin 12V plug) ATX...
x K8V specifications summary Back panel I/O Internal I/O BIOS features Industry standard Manageability Power Requirement Form Factor Support CD contents 1 x Parallel port 1 x Serial port 1 x PS/2 keyboard port 1 x PS/2 mouse port 4 x USB 2.0 ports 1 x S/PDIF out ...-pin/4-pin ATX 12V power connectors CD/AUX connectors S/PDIF out connector GAME/MIDI connector 4Mb Flash EEPROM AMI BIOS with enhanced ACPI, PnP, DMI2.0, ASUS EZ Flash, ASUS MyLogo2, ASUS Q-Fan, SM BIOS 2.3, Multi-Language BIOS, CrashFree BIOS 2 PCI 2.2, USB 2.0/1.1 WOL by PME, WOR by PME ATX power supply (with 4-pin 12V plug) ATX...

K8V User Manual
Page 14
...add style to your system with the net-diagnosing utility VCT (Virtual Cable Tester), that lets you to restore the original BIOS data from the ASUS support CD in case the system hangs due to overclocking. The higher bandwidth of USB 2.0 allows connection of the motherboard... BIOS allows automatic re-setting to the BIOS default settings in case when the BIOS codes and data are corrupted. See pages 2-31. 1-4 Chapter 1: Product introduction...
...add style to your system with the net-diagnosing utility VCT (Virtual Cable Tester), that lets you to restore the original BIOS data from the ASUS support CD in case the system hangs due to overclocking. The higher bandwidth of USB 2.0 allows connection of the motherboard... BIOS allows automatic re-setting to the BIOS default settings in case when the BIOS codes and data are corrupted. See pages 2-31. 1-4 Chapter 1: Product introduction...

K8V User Manual
Page 15
... system to static electricity. 3. Onboard LED The motherboard comes with the component. 5. K8V ® K8V Onboard LED SB_PWR ON Standby Power OFF Powered Off ASUS K8V motherboard 1-5 Use a grounded wrist strap or touch a safely grounded object or to ...a metal object, such as the power supply case, before handling components to avoid damaging them . 4. Failure to do so may cause severe damage to use a DOS-based utility or boot from a floppy disk. ASUS EZ Flash BIOS With the ASUS...
... system to static electricity. 3. Onboard LED The motherboard comes with the component. 5. K8V ® K8V Onboard LED SB_PWR ON Standby Power OFF Powered Off ASUS K8V motherboard 1-5 Use a grounded wrist strap or touch a safely grounded object or to ...a metal object, such as the power supply case, before handling components to avoid damaging them . 4. Failure to do so may cause severe damage to use a DOS-based utility or boot from a floppy disk. ASUS EZ Flash BIOS With the ASUS...

K8V User Manual
Page 16
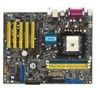
...-45 Top:Line In Center:Line Out Below:Mic In VIA K8T800 Marvell Gigabit LAN SPDIF_OUT CD ADI AD1980 AUX FP_AUDIO Accelerated Graphics Port (AGP) K8V PCI1 CLRTC PCI2 PCI3 CR2032 3V Lithium Cell CMOS Power PCI4 ® PCI5 USBPWR56 USBPWR78 USB78 USB56 RAID Promise PDC20376 FLOPPY VIA VT8237 SATA2 PRI_RAID...
...-45 Top:Line In Center:Line Out Below:Mic In VIA K8T800 Marvell Gigabit LAN SPDIF_OUT CD ADI AD1980 AUX FP_AUDIO Accelerated Graphics Port (AGP) K8V PCI1 CLRTC PCI2 PCI3 CR2032 3V Lithium Cell CMOS Power PCI4 ® PCI5 USBPWR56 USBPWR78 USB78 USB56 RAID Promise PDC20376 FLOPPY VIA VT8237 SATA2 PRI_RAID...

K8V User Manual
Page 23
...Refer to avoid damaging the DIMM. 1.8 Expansion slots To install and configure an expansion card: 1. ASUS K8V motherboard 1-13 DDR DIMM Unlocked A DDR DIMM is properly seated. See Chapter 2 for BIOS information. 3. Install the drivers and/or software applications for the expansion card according to install a DIMM.... 1. Align a DIMM on the system and change the necessary BIOS settings, if any. Turn on the socket such that it fits in place and the DIMM is keyed with the chassis. 2. ...
...Refer to avoid damaging the DIMM. 1.8 Expansion slots To install and configure an expansion card: 1. ASUS K8V motherboard 1-13 DDR DIMM Unlocked A DDR DIMM is properly seated. See Chapter 2 for BIOS information. 3. Install the drivers and/or software applications for the expansion card according to install a DIMM.... 1. Align a DIMM on the system and change the necessary BIOS settings, if any. Turn on the socket such that it fits in place and the DIMM is keyed with the chassis. 2. ...

K8V User Manual
Page 26
...Product introduction You can automatically reset parameter settings to overclocking, use the C.P.R. (CPU Parameter Recall) feature. Hold down and reboot the system so BIOS can clear the CMOS memory of date, time, and system setup parameters by the onboard button cell battery. Removing the cap will cause system... boot failure! Move the jumper cap from pins 1-2 (default) to re-enter data. K8V ® K8V Clear RTC RAM CLRTC 2 1 Normal (Default) 3 2 Clear CMOS You do not need to clear the RTC when the system hangs due to...
...Product introduction You can automatically reset parameter settings to overclocking, use the C.P.R. (CPU Parameter Recall) feature. Hold down and reboot the system so BIOS can clear the CMOS memory of date, time, and system setup parameters by the onboard button cell battery. Removing the cap will cause system... boot failure! Move the jumper cap from pins 1-2 (default) to re-enter data. K8V ® K8V Clear RTC RAM CLRTC 2 1 Normal (Default) 3 2 Clear CMOS You do not need to clear the RTC when the system hangs due to...

K8V User Manual
Page 27
...to +5V to wake up the computer from S3 and S4 sleep modes (no power to CPU, DRAM in slow refresh, power supply in the BIOS. Otherwise, the system would not power up feature requires a power supply that can provide 500mA on the +5VSB lead for each USB port. ... in reduced power mode). Set this jumper to pins 2-3 (+5VSB) if you wish to wake up the computer when you to wake up feature. ASUS K8V motherboard 1-17 2. K8V ® K8V USB Device Wake Up USBPWR12 USBPWR34 2 1 +5V (Default) 3 2 +5VSB 12 +5V (Default) 23 +5VSB USBPWR56 USBPWR78 12 23 +5V (Default) +5VSB •...
...to +5V to wake up the computer from S3 and S4 sleep modes (no power to CPU, DRAM in slow refresh, power supply in the BIOS. Otherwise, the system would not power up feature requires a power supply that can provide 500mA on the +5VSB lead for each USB port. ... in reduced power mode). Set this jumper to pins 2-3 (+5VSB) if you wish to wake up the computer when you to wake up feature. ASUS K8V motherboard 1-17 2. K8V ® K8V USB Device Wake Up USBPWR12 USBPWR34 2 1 +5V (Default) 3 2 +5VSB 12 +5V (Default) 23 +5VSB USBPWR56 USBPWR78 12 23 +5V (Default) +5VSB •...

K8V User Manual
Page 35
PWR Ground Reset Ground K8V ® K8V System Panel Connectors Reset SW ATX Power IDE_LED Switch* * Requires an ATX power supply. • System Power LED Lead (Green 3-1 pin PLED) This 3-1 pin connector .... • System Warning Speaker Lead (Orange 4-pin SPKR) This 4-pin connector connects to the case-mounted speaker and allows you turn on the BIOS or OS settings. 13. ASUS K8V motherboard 1-25 Pressing the power switch turns the system between ON and SLEEP, or ON and SOFT OFF, depending on the system power...
PWR Ground Reset Ground K8V ® K8V System Panel Connectors Reset SW ATX Power IDE_LED Switch* * Requires an ATX power supply. • System Power LED Lead (Green 3-1 pin PLED) This 3-1 pin connector .... • System Warning Speaker Lead (Orange 4-pin SPKR) This 4-pin connector connects to the case-mounted speaker and allows you turn on the BIOS or OS settings. 13. ASUS K8V motherboard 1-25 Pressing the power switch turns the system between ON and SLEEP, or ON and SOFT OFF, depending on the system power...

K8V User Manual
Page 37
BIOS information ASUS K8V motherboard 2-1 Chapter 2 This chapter tells how to change system settings through the BIOS Setup menus. Detailed descriptions of the BIOS parameters are also provided.
BIOS information ASUS K8V motherboard 2-1 Chapter 2 This chapter tells how to change system settings through the BIOS Setup menus. Detailed descriptions of the BIOS parameters are also provided.

K8V User Manual
Page 38
...If you are using Windows® XP, select Create an MS-DOS startup disk from PC") • Visit the ASUS website and download the latest BIOS file for details on Start, then select My Computer. 2.1 Managing and updating your Windows desktop, click on these utilities... a bootable floppy disk in case you to manage and update the motherboard Basic Input/Output System (BIOS) setup. 1. Select the 3 1/2 Floppy Drive icon. ASUS AFUDOS - ASUS CrashFree BIOS 2 - Refer to the corresponding sections for this motherboard using Windows® 98SE/ME/2000, select Full option button from ...
...If you are using Windows® XP, select Create an MS-DOS startup disk from PC") • Visit the ASUS website and download the latest BIOS file for details on Start, then select My Computer. 2.1 Managing and updating your Windows desktop, click on these utilities... a bootable floppy disk in case you to manage and update the motherboard Basic Input/Output System (BIOS) setup. 1. Select the 3 1/2 Floppy Drive icon. ASUS AFUDOS - ASUS CrashFree BIOS 2 - Refer to the corresponding sections for this motherboard using Windows® 98SE/ME/2000, select Full option button from ...

K8V User Manual
Page 39
... floppy disk that you see on your motherboard. Press . The BIOS information on a piece of the update process. A:\>afudos /iK8VB.ROM AMI Firmware Update Utility - Doing so may not be exactly the same as shown. ASUS K8V motherboard 2-3 You need to a bootable floppy disk. Boot the system... from the support CD to download the latest BIOS file for reference only. At the DOS prompt, type the command line: afudos /i[filename...
... floppy disk that you see on your motherboard. Press . The BIOS information on a piece of the update process. A:\>afudos /iK8VB.ROM AMI Firmware Update Utility - Doing so may not be exactly the same as shown. ASUS K8V motherboard 2-3 You need to a bootable floppy disk. Boot the system... from the support CD to download the latest BIOS file for reference only. At the DOS prompt, type the command line: afudos /i[filename...

K8V User Manual
Page 40
... the same as a backup in case the system BIOS fails or gets corrupted. To copy the BIOS from PC You can use it as shown. The BIOS information on your PC using AFUDOS.EXE: 1. When the BIOS update process is for the extension name. 2. What... complete, the utility returns to a floppy or hard disk and use the AFUDOS.EXE utility to copy the current system BIOS to the DOS prompt. Reading flash ..... 0x0008CC00 (9%) 2-4 Chapter 2: BIOS Setup Press . All rights reserved. done Writing flash .... 0x0008CC00 (9%) Verifying flash .. done A:\> 5. Version 1.10 Copyright...
... the same as a backup in case the system BIOS fails or gets corrupted. To copy the BIOS from PC You can use it as shown. The BIOS information on your PC using AFUDOS.EXE: 1. When the BIOS update process is for the extension name. 2. What... complete, the utility returns to a floppy or hard disk and use the AFUDOS.EXE utility to copy the current system BIOS to the DOS prompt. Reading flash ..... 0x0008CC00 (9%) 2-4 Chapter 2: BIOS Setup Press . All rights reserved. done Writing flash .... 0x0008CC00 (9%) Verifying flash .. done A:\> 5. Version 1.10 Copyright...

K8V User Manual
Page 41
...(POST). User recovery requested. ASUS K8V motherboard 2-5 3. All rights reserved. Make sure to the floppy disk. A:\>afudos /oMYBIOS03.ROM AMI Firmware Update Utility - done A:\> When the copy process is accessible by default to rename the downloaded BIOS file as K8VB.ROM. The...from a diskette and using ASUS EZ Flash: 1. Starting BIOS recovery... Make sure that contains the BIOS file. Version 1.10 Copyright (C) 2002 American Megatrends, Inc. Visit the ASUS website (www.asus.com) to a floppy disk. 2. appears. • If the correct BIOS file is not write-protected...
...(POST). User recovery requested. ASUS K8V motherboard 2-5 3. All rights reserved. Make sure to the floppy disk. A:\>afudos /oMYBIOS03.ROM AMI Firmware Update Utility - done A:\> When the copy process is accessible by default to rename the downloaded BIOS file as K8VB.ROM. The...from a diskette and using ASUS EZ Flash: 1. Starting BIOS recovery... Make sure that contains the BIOS file. Version 1.10 Copyright (C) 2002 American Megatrends, Inc. Visit the ASUS website (www.asus.com) to a floppy disk. 2. appears. • If the correct BIOS file is not write-protected...

K8V User Manual
Page 42
... Flashed successfully. To recover the BIOS from a floppy disk that contains the motherboard BIOS before proceeding with the BIOS update process. • If you have saved a copy of the original motherboard BIOS to a bootable floppy disk, you to restore the BIOS. If all the necessary files are... disk that contains the BIOS file, in the floppy disk, the BIOS update process continues. When a corrupted BIOS is renamed as "K8VB.ROM". 2-6 Chapter 2: BIOS Setup Make sure that contains the original or the latest BIOS file for this disk to restore BIOS from the motherboard support CD...
... Flashed successfully. To recover the BIOS from a floppy disk that contains the motherboard BIOS before proceeding with the BIOS update process. • If you have saved a copy of the original motherboard BIOS to a bootable floppy disk, you to restore the BIOS. If all the necessary files are... disk that contains the BIOS file, in the floppy disk, the BIOS update process continues. When a corrupted BIOS is renamed as "K8VB.ROM". 2-6 Chapter 2: BIOS Setup Make sure that contains the original or the latest BIOS file for this disk to restore BIOS from the motherboard support CD...

K8V User Manual
Page 43
... CD in the drive, the system automatically checks the CD-ROM. 3. Bad BIOS checksum. Checking for floppy... Start flashing... Doing so may not be the latest BIOS version for this motherboard. ASUS K8V motherboard 2-7 When a corrupted BIOS is no floppy disk found ! Starting BIOS recovery... Start flashing... DO NOT shut down or reset the system while...
... CD in the drive, the system automatically checks the CD-ROM. 3. Bad BIOS checksum. Checking for floppy... Start flashing... Doing so may not be the latest BIOS version for this motherboard. ASUS K8V motherboard 2-7 When a corrupted BIOS is no floppy disk found ! Starting BIOS recovery... Start flashing... DO NOT shut down or reset the system while...

K8V User Manual
Page 44
....asus.com) to ensure system compatibility and stability. When you start up the computer, the system provides you can scroll through the various sub-menus and make it as possible. The default BIOS settings for this motherboard apply for reference purposes only, and may want to reconfigure your system using the BIOS Setup...
....asus.com) to ensure system compatibility and stability. When you start up the computer, the system provides you can scroll through the various sub-menus and make it as possible. The default BIOS settings for this motherboard apply for reference purposes only, and may want to reconfigure your system using the BIOS Setup...

K8V User Manual
Page 45
Select Screen Select Item +- Some of a menu screen are the navigation keys for that particular menu. ASUS K8V motherboard 2-9 Use [+] or [-] to another. Change Field Tab Select Field F1 General Help F10 Save and Exit ESC Exit Sub-menu items Navigation keys ... the bottom right corner of the navigation keys differ from one screen to configure system time. Use the navigation keys to select a field. 2.2.1 BIOS menu screen Menu items Menu bar Configuration fields General help System Time System Date Legacy Diskette A Language Primary IDE Master Primary IDE Slave Secondary IDE...
Select Screen Select Item +- Some of a menu screen are the navigation keys for that particular menu. ASUS K8V motherboard 2-9 Use [+] or [-] to another. Change Field Tab Select Field F1 General Help F10 Save and Exit ESC Exit Sub-menu items Navigation keys ... the bottom right corner of the navigation keys differ from one screen to configure system time. Use the navigation keys to select a field. 2.2.1 BIOS menu screen Menu items Menu bar Configuration fields General help System Time System Date Legacy Diskette A Language Primary IDE Master Primary IDE Slave Secondary IDE...


