X1160 User's Guide EN
Page 10
...then the signal sources. • Do not use lens cap when projector is in this happens, the projector will not turn back on . Precautions Follow all changing instructions. • This product will burn out and may make a loud popping sound. Don't: • Block the slots and openings on the unit provided... for a long period of time. Warning: • Do not look into the projector's lens when the lamp is on until the lamp module has been replaced....
...then the signal sources. • Do not use lens cap when projector is in this happens, the projector will not turn back on . Precautions Follow all changing instructions. • This product will burn out and may make a loud popping sound. Don't: • Block the slots and openings on the unit provided... for a long period of time. Warning: • Do not look into the projector's lens when the lamp is on until the lamp module has been replaced....
X1160 User's Guide EN
Page 37
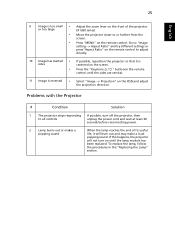
... the power cord and wait at least 30 seconds before reconnecting power. 2 Lamp burns out or makes a popping sound When the lamp reaches the end of the projector. Go to "Image setting --> Aspect Ratio" and try different settings or press"Aspect Ratio" on the remote control... from the screen. • Press "MENU" on the remote control. If this happens, the projector will burn out and may make a loud popping sound. Problems with the Projector # Condition Solution 1 The projector stops responding If possible, turn on until the sides are vertical. 11 Image is too small •...
... the power cord and wait at least 30 seconds before reconnecting power. 2 Lamp burns out or makes a popping sound When the lamp reaches the end of the projector. Go to "Image setting --> Aspect Ratio" and try different settings or press"Aspect Ratio" on the remote control... from the screen. • Press "MENU" on the remote control. If this happens, the projector will burn out and may make a loud popping sound. Problems with the Projector # Condition Solution 1 The projector stops responding If possible, turn on until the sides are vertical. 11 Image is too small •...

X1160 User's Guide EN
Page 41
... mount, please refer to the steps below: 1 Drill four holes into a solid, structurally sound part of four-cylinder screws. Extension Rod Long Cylinder Cap Allen Key - English 29 Ceiling Mount Installation If you wish to install the projector using the appropriate type of the ceiling, and secure the mount base. Note: Screws...
... mount, please refer to the steps below: 1 Drill four holes into a solid, structurally sound part of four-cylinder screws. Extension Rod Long Cylinder Cap Allen Key - English 29 Ceiling Mount Installation If you wish to install the projector using the appropriate type of the ceiling, and secure the mount base. Note: Screws...

