Service Guide
Page 4
IV Conventions The following conventions are used in this manual: SCREEN MESSAGES Denotes actual messages that might result from doing or not doing specific actions. Alerts you to do specific actions relevant to the accomplishment of additional information related to any damage that appear on screen. Gives precautionary measures to avoid possible hardware or software problems. Reminds you to the current topic. NOTE WARNING CAUTION IMPORTANT Gives bits and pieces of procedures.
IV Conventions The following conventions are used in this manual: SCREEN MESSAGES Denotes actual messages that might result from doing or not doing specific actions. Alerts you to do specific actions relevant to the accomplishment of additional information related to any damage that appear on screen. Gives precautionary measures to avoid possible hardware or software problems. Reminds you to the current topic. NOTE WARNING CAUTION IMPORTANT Gives bits and pieces of procedures.

Service Guide
Page 8
... (POST) Error Message 73 Index of Error Messages 74 Phoenix BIOS Beep Codes 77 Index of Symptom-to-FRU Error Message 81 Intermittent Problems 85 Undetermined Problems 86 Jumper and Connector Locations 87 Top View 87 Bottom View 88 FRU (Field Replaceable Unit) List 91 Aspire 6935G Exploded Diagram 92 Aspire 6935G FRU List 108 VIII
... (POST) Error Message 73 Index of Error Messages 74 Phoenix BIOS Beep Codes 77 Index of Symptom-to-FRU Error Message 81 Intermittent Problems 85 Undetermined Problems 86 Jumper and Connector Locations 87 Top View 87 Bottom View 88 FRU (Field Replaceable Unit) List 91 Aspire 6935G Exploded Diagram 92 Aspire 6935G FRU List 108 VIII
Service Guide
Page 49
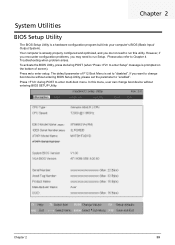
... Setup" message is prompted on the bottom of F12 Boot Menu is set the parameter to "enabled". However, if you encounter configuration problems, you want to change boot device without entering BIOS Setup Utility, please set to "disabled". To activate the BIOS Utility, press m... during POST to Chapter 4 Troubleshooting when problem arises. Chapter 2 39 Press m to enter setup. Chapter 2 System Utilities BIOS Setup Utility The BIOS Setup Utility is already properly configured and...
... Setup" message is prompted on the bottom of F12 Boot Menu is set the parameter to "enabled". However, if you encounter configuration problems, you want to change boot device without entering BIOS Setup Utility, please set to "disabled". To activate the BIOS Utility, press m... during POST to Chapter 4 Troubleshooting when problem arises. Chapter 2 39 Press m to enter setup. Chapter 2 System Utilities BIOS Setup Utility The BIOS Setup Utility is already properly configured and...
Service Guide
Page 62
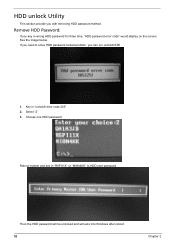
HDD unlock Utility This section provide you can run unlock6.EXE 1. See the image below. Key in wrong HDD password for three time, "HDD password error code" would display on the screen. Choose one HDD password Reboot system and key in "R6PI11X" or "MI8N4KK" to solve HDD password locked problem, you with removing HDD password method. Then the HDD password will be unlocked and will auto into Windows after reboot. 52 Chapter 2 If you need to HDD user password. Select "2" 3. Remove HDD Password: If you key in "unlock6 error code 205" 2.
HDD unlock Utility This section provide you can run unlock6.EXE 1. See the image below. Key in wrong HDD password for three time, "HDD password error code" would display on the screen. Choose one HDD password Reboot system and key in "R6PI11X" or "MI8N4KK" to solve HDD password locked problem, you with removing HDD password method. Then the HDD password will be unlocked and will auto into Windows after reboot. 52 Chapter 2 If you need to HDD user password. Select "2" 3. Remove HDD Password: If you key in "unlock6 error code 205" 2.

Service Guide
Page 77
Use the following procedure as possible. 2. No beep or error codes are intended to test only Acer products. LCD display problems or others). Symptoms cannot be re-created (intermittent problems). Verify the symptoms by repeating the same operation. 3. Go To "Power System Check" on ... page 85 "Undetermined Problems" on page 86 Chapter 4 69 Chapter 4 Troubleshooting Use the following table with the verified symptom to determine which page to go to. Other symptoms (i.e. Non-Acer products, prototype cards, or modified options can give false errors and invalid system ...
Use the following procedure as possible. 2. No beep or error codes are intended to test only Acer products. LCD display problems or others). Symptoms cannot be re-created (intermittent problems). Verify the symptoms by repeating the same operation. 3. Go To "Power System Check" on ... page 85 "Undetermined Problems" on page 86 Chapter 4 69 Chapter 4 Troubleshooting Use the following table with the verified symptom to determine which page to go to. Other symptoms (i.e. Non-Acer products, prototype cards, or modified options can give false errors and invalid system ...
Service Guide
Page 78
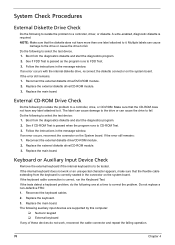
...system board. If the keyboard cable connection is passed when the program runs to CD-ROM Test. 3. If the tests detect a keyboard problem, do not work or an unexpected character appears, make sure that the diskette does not have any of these devices do the following ...reconnect the cable connector and repeat the failing operation. 70 Chapter 4 The following one label attached to it . Do the following to isolate the problem to a controller, drive, or CD-ROM. Reconnect the external diskette drive/CD-ROM module. 2. Keyboard or Auxiliary Input Device Check Remove the external...
...system board. If the keyboard cable connection is passed when the program runs to CD-ROM Test. 3. If the tests detect a keyboard problem, do not work or an unexpected character appears, make sure that the diskette does not have any of these devices do the following ...reconnect the cable connector and repeat the failing operation. 70 Chapter 4 The following one label attached to it . Do the following to isolate the problem to a controller, drive, or CD-ROM. Reconnect the external diskette drive/CD-ROM module. 2. Keyboard or Auxiliary Input Device Check Remove the external...
Service Guide
Page 79
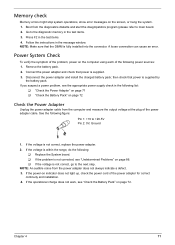
... in the test items. 3. Boot from the power adapter does not always indicate a defect. 3. Power System Check To verify the symptom of the problem, power on page 86. ‰ If the voltage is not corrected, see the appropriate power supply check in the test items. 4. then check ... and check that power is fully installed into the connector. Press F2 in the following : ‰ Replace the System board. ‰ If the problem is not correct, go to main board. 2. Disconnect the power adapter and install the charged battery pack; See the following power sources: 1. If ...
... in the test items. 3. Boot from the power adapter does not always indicate a defect. 3. Power System Check To verify the symptom of the problem, power on page 86. ‰ If the voltage is not corrected, see the appropriate power supply check in the test items. 4. then check ... and check that power is fully installed into the connector. Press F2 in the following : ‰ Replace the System board. ‰ If the problem is not correct, go to main board. 2. Disconnect the power adapter and install the charged battery pack; See the following power sources: 1. If ...
Service Guide
Page 80
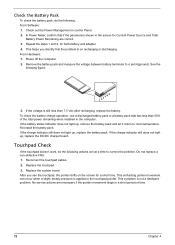
... Power Management in the computer. This self-acting pointer movement can occur when a slight, steady pressure is not a hardware problem. From Hardware: 1. See the following : From Software: 1. After you identify first the problem is still less than 50% of time. 72 Chapter 4 To check the battery charge operation, use the touchpad, the...-defective FRU: 1. Reconnect the touchpad cables. 2. If the voltage is on the screen for both battery and adapter. 4. This symptom is applied to correct the problem.
... Power Management in the computer. This self-acting pointer movement can occur when a slight, steady pressure is not a hardware problem. From Hardware: 1. See the following : From Software: 1. After you identify first the problem is still less than 50% of time. 72 Chapter 4 To check the battery charge operation, use the touchpad, the...-defective FRU: 1. Reconnect the touchpad cables. 2. If the voltage is on the screen for both battery and adapter. 4. This symptom is applied to correct the problem.
Service Guide
Page 81
...installed. NOTE: Perform the FRU replacement or actions in the sequence shown in FRU/Action column, if the FRU replacement does not solve the problem, put the original part back in the BIOS Setup Utility menus, reset the computer, enter Setup and install Setup defaults or correct the error.... Do not replace a non-defective FRU. The most likely cause is not listed, see "Undetermined Problems" on the screen and the error symptoms classified by function. NOTE: If the system fails after you determine the next possible FRU to be replaced...
...installed. NOTE: Perform the FRU replacement or actions in the sequence shown in FRU/Action column, if the FRU replacement does not solve the problem, put the original part back in the BIOS Setup Utility menus, reset the computer, enter Setup and install Setup defaults or correct the error.... Do not replace a non-defective FRU. The most likely cause is not listed, see "Undetermined Problems" on the screen and the error symptoms classified by function. NOTE: If the system fails after you determine the next possible FRU to be replaced...
Service Guide
Page 92
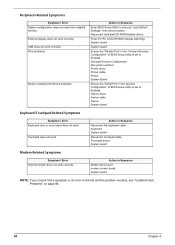
...Onboard Devices Configuration" of BIOS Setup Utility is set to execute "Load Default Settings", then reboot system. Print problems. Serial or parallel port device problems. Action in Sequence Enter BIOS Setup Utility to Enabled. Onboard Devices Configuration Run printer self-test. Peripheral-Related ...Fn+F5, LCD/CRT/Both display switching. System board System board Ensure the "Parallel Port" in this list and the problem remains, see "Undetermined Problems" on page 86. 84 Chapter 4 Device driver Device cable Device System board Keyboard/Touchpad-Related Symptoms Symptom / Error ...
...Onboard Devices Configuration" of BIOS Setup Utility is set to execute "Load Default Settings", then reboot system. Print problems. Serial or parallel port device problems. Action in Sequence Enter BIOS Setup Utility to Enabled. Onboard Devices Configuration Run printer self-test. Peripheral-Related ...Fn+F5, LCD/CRT/Both display switching. System board System board Ensure the "Parallel Port" in this list and the problem remains, see "Undetermined Problems" on page 86. 84 Chapter 4 Device driver Device cable Device System board Keyboard/Touchpad-Related Symptoms Symptom / Error ...
Service Guide
Page 93
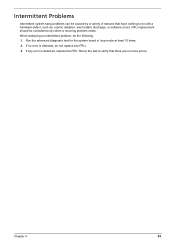
... there are no error is detected, replace the FRU. If any error is detected, do not replace any FRU. 3. Chapter 4 85 When analyzing an intermittent problem, do with a hardware defect, such as: cosmic radiation, electrostatic discharge, or software errors. Rerun the test to verify that have nothing to do the following...
... there are no error is detected, replace the FRU. If any error is detected, do not replace any FRU. 3. Chapter 4 85 When analyzing an intermittent problem, do with a hardware defect, such as: cosmic radiation, electrostatic discharge, or software errors. Rerun the test to verify that have nothing to do the following...
Service Guide
Page 94
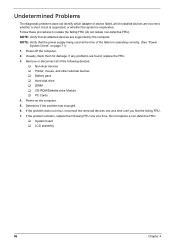
... 1. Follow these procedures to isolate the failing FRU (do not isolate non-defective FRU). Power-off the computer. 2. Undetermined Problems The diagnostic problems does not identify which adapter or device failed, which installed devices are incorrect, whether a short circuit is suspected, or whether ...inoperative. Remove or disconnect all attached devices are found, replace the FRU. 3. If the problem remains, replace the following FRU one at the time of the following devices: ‰ Non-Acer devices ‰ Printer, mouse, and other external devices ‰ Battery pack ‰ ...
... 1. Follow these procedures to isolate the failing FRU (do not isolate non-defective FRU). Power-off the computer. 2. Undetermined Problems The diagnostic problems does not identify which adapter or device failed, which installed devices are incorrect, whether a short circuit is suspected, or whether ...inoperative. Remove or disconnect all attached devices are found, replace the FRU. 3. If the problem remains, replace the following FRU one at the time of the following devices: ‰ Non-Acer devices ‰ Printer, mouse, and other external devices ‰ Battery pack ‰ ...


