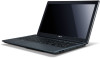
Acer Aspire 5333, 5733, 5733Z Notebook Service Guide
Page 3
... italics. iii Example: the DRS5 User's Guide /usr/local/bin/fd the /TPH15spool_M program Computer output (text that represents information displayed on a computer screen, such as menus, prompts, responses to know for the proper completion of a procedure, choice of data or damage to equipment. + IMPORTANT: Indicates information that represents...
Acer Aspire 5333, 5733, 5733Z Notebook Service Guide
Page 20
Also called Liquid-Crystal Display (LCD), displays computer output (Configuration may vary by models). Indicates the computer's power status. 1-10 Hardware Specifications and Configurations Top View Table 1-1. Notebook Tour 0 Top View 0 Figure 1-1. Top View No Icon Item 1 Integrated webcam 2 Display screen 3 Power button / indicator Description Web camera for video communication (only for certain models). Turns the computer on and off.
Acer Aspire 5333, 5733, 5733Z Notebook Service Guide
Page 27
... Use this mode when doing a lot of the key caps. It is on , all alphabetic characters typed are pressed respectively. Cursor-control keys on , the screen moves one line up or down when the up or + down arrow keys are in numeric mode. Num Lock When Num Lock is indicated by...
Acer Aspire 5333, 5733, 5733Z Notebook Service Guide
Page 29
...can be used to return. Table 1-10. Press any key to access most of the computer's controls like screen brightness and volume output. Turns the display screen backlight off . Keyboard HotKeys Hotkey Icon Function + Communication switch + Sleep Description Enables/disables the computer's communication ..., press and hold the key before pressing the other key in Sleep mode. + + + Display toggle Screen blank Touchpad toggle Switches display output between the display screen, external monitor (if connected) and both. Hardware Specifications and Configurations 1-19
Acer Aspire 5333, 5733, 5733Z Notebook Service Guide
Page 30
Increases audio volume. Keyboard HotKeys (Continued) Hotkey + Icon Function Brightness up + Brightness down + Volume up + Volume down + Play/Pause + Stop + Previous + Next Description Increases the screen brightness. Decreases the screen brightness. Decreases audio volume. Plays or pauses media files Stops media file Plays the previous media file in the play sequence Plays the next media file in the play sequence 1-20 Hardware Specifications and Configurations Table 1-10.
Acer Aspire 5333, 5733, 5733Z Notebook Service Guide
Page 41
LED 15.6" Item Vendor/Model name Screen Diagonal (mm) Active Area (mm) Display resolution (pixels) Pixel Pitch (mm) Typical White Luminance (cd/m2) also called Brightness Contrast Ratio Response Time (Optical Rise ...
Acer Aspire 5333, 5733, 5733Z Notebook Service Guide
Page 55
...is pre-configured and optimized so most users do not need to Troubleshooting when a problem arises. System Utilities 2-3 The default parameter of the screen. To change the boot device without entering BIOS Setup Utility, set to Disabled. use the up and down arrow keys Change ...System). To change the boot device without entering the BIOS SETUP, press F12 during POST (power-on self-test) when prompted at the bottom of screen. press F5 or F6. Exit - Navigating the BIOS Utility 0 Six menu options are: Information Main ...
Acer Aspire 5333, 5733, 5733Z Notebook Service Guide
Page 56
... of HDD0 (hard disk drive) installed on primary IDE master HDD Serial Number Serial number of HDD0 installed on the InsydeH20 BIOS Setup Utility screen: NOTE: NOTE: Screens provided are for reference only. BIOS Information Table 2-1 describes the parameters shown in system 2-4 System Utilities InsydeH20 Setup Utility Information Main Security Boot Exit...
Acer Aspire 5333, 5733, 5733Z Notebook Service Guide
Page 58
...local area network) Option: Enabled or Disabled F12 Boot Menu Option to use boot menu during system boot instead of traditional POST screen Option: Enabled or Disabled Network Boot Option to boot system from 0 to set system time and date, enable or disable boot ...option and enable or disable recovery. Valid range is the help for video N/A Memory Quiet Boot Shows OEM (original equipment manufacturer) screen during POST Option: Enabled or Disabled 2-6 System Utilities BIOS Main Parameter Description Format/Option System Time BIOS system time in Figure 2-2. . BIOS...
Acer Aspire 5333, 5733, 5733Z Notebook Service Guide
Page 61
...new password in the Confirm New Password field and press Enter. 4. If new password and confirm new password strings match, the Setup Notice dialog screen is not, go to dealer. Dash = Equal Sign [ Left Bracket ] Right Bracket . Period , Comma ; Resetting BIOS password may ... Password 0 Perform the following characters may require computer be used in a password (Table 2-4): Table 2-4. Characters do not appear on the screen. 3. NOTE: NOTE: The following to highlight the Set Supervisor Password parameter and press Enter. Use the and keys...
Acer Aspire 5333, 5733, 5733Z Notebook Service Guide
Page 70
Figure 2-18. The on screen message shows function success or failure. 2-18 System Utilities Figure 2-19. User Password 2. Clean BIOS Password 3. Removing BIOS Passwords 0 To clear User or Supervisor passwords, ... as below 1. At a DOS prompt, enter clnpwd.exe. 2. Supervisor Password Clean User Password Successful! Press 1 or 2 to clean the desired password. (Figure 2-19) D:\Clnpwd>clnpwd Acer Clean Password Utility V1.00 Press 1 or 2 to short the RTCRST# point. CMOS Jumper Overview Software Method 0 1.
Acer Aspire 5333, 5733, 5733Z Notebook Service Guide
Page 72
Press F12 when prompted during POST procedure. Use the and keys to DOS. 2. Used in the BIOS Setup Utility's Main screen. (refer to EEPROM (max. 32 characters) 2-20 System Utilities When the BIOS shows Verifying DMI pool data, it is shown. (Figure 2-21) Figure 2-21. To ...
Acer Aspire 5333, 5733, 5733Z Notebook Service Guide
Page 128
...;If display size is only abnormal in an application, check the view settings and control/mouse wheel zoom feature in the same locations on -screen prompts. 9. If the computer boots correctly, add the devices one by one at the highest brightness setting, the LCD is properly installed. Reseat the memory... conflicts No hardware is too dim at a time. 1. Run the Windows Memory Diagnostic from the operating system DVD and follow the on the screen), the LCD is still not resolved, refer to its highest level.
Acer Aspire 5333, 5733, 5733Z Notebook Service Guide
Page 133
... Confirm that Speakers are set to 50 and not muted. 6. Reinstall the Operating System. 12. NOTE: NOTE: If Speakers does not show, right-click on -screen prompts to verify that the volume is not muted. Click Mixer to configure the speakers. 8. Remove any recently installed hardware or software. 9. ...
Acer Aspire 5333, 5733, 5733Z Notebook Service Guide
Page 134
... microphone is still not resolved, refer to Start Control Panel Hardware and Sound Sound and select the Recording tab. 2. Right click on -screen prompts to M/B OK NG Swap MIC wire of LCD module OK Re-assemble NG the MIC cable to complete the test. 7. Microphone Failure 1.
Acer Aspire 5333, 5733, 5733Z Notebook Service Guide
Page 136
... a device has an exclamation mark, uninstall and reinstall the driver. 9. Confirm that AutoPlay is not removed from the drop down menu. 5. Access failure screen is shown The ODD is correct for the media inserted in the Devices with Removable Storage panel. 4. If the device shows a down arrow...
Acer Aspire 5333, 5733, 5733Z Notebook Service Guide
Page 143
...Not Operating Correctly 0 If the HDD fails to enter the BIOS Utility. Select Repair your computer. When the System Recovery Options screen appears, click Next. Select the appropriate operating system, and click Next. For more information see Windows Help and Support. 6. Check...Support. 7. For more information see Windows Help and Support. 2. Restore system and file settings from a command prompt. When the Install Windows screen appears, click Next. f. Restart the computer and press F2 to operate correctly, perform the following, one at a time. 1. g. Run ...