Acer Aspire 5332 / 5732Z Series Service Guide
Page 12
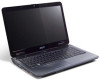
... inches) • 2.7 kg (6.0 lbs.) with 6-cell battery pack Communication • Integrated Acer Crystal Eye webcam* • Wireless • Acer InviLink™ 802.11b/g* • Acer InviLink™ Nplify™ 802.11b/g/Draft-N • LAN • Fast Ethernet; Wake-...on-LAN ready Privacy control • BIOS user, supervisor, HDD passwords • Kensington lock slot Power subsystem • ACPI 3.0 • 48.8 W 4400 mAh • 3-pin 65 W AC adapter...
... inches) • 2.7 kg (6.0 lbs.) with 6-cell battery pack Communication • Integrated Acer Crystal Eye webcam* • Wireless • Acer InviLink™ 802.11b/g* • Acer InviLink™ Nplify™ 802.11b/g/Draft-N • LAN • Fast Ethernet; Wake-...on-LAN ready Privacy control • BIOS user, supervisor, HDD passwords • Kensington lock slot Power subsystem • ACPI 3.0 • 48.8 W 4400 mAh • 3-pin 65 W AC adapter...
Acer Aspire 5332 / 5732Z Series Service Guide
Page 58
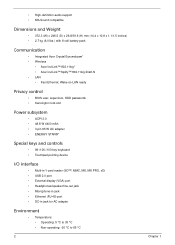
...5D 3.2L K 6D NI + 17 86.N2802.006 48 Chapter 3 Remove the battery pack. If any of the hardware components. Unplug the AC adapter and all peripherals. 2. The disassembly process is faulty, such as the camera, antenna or LCD panel, the whole module must first remove the keyboard,...the order of the sequence to avoid damage to any part of factory conditions. For example, if you want to the system and all power and signal cables from the system. 3. Pre-disassembly Instructions Before proceeding with the disassembly procedure, make sure that order. Disassembly Process IMPORTANT:...
...5D 3.2L K 6D NI + 17 86.N2802.006 48 Chapter 3 Remove the battery pack. If any of the hardware components. Unplug the AC adapter and all peripherals. 2. The disassembly process is faulty, such as the camera, antenna or LCD panel, the whole module must first remove the keyboard,...the order of the sequence to avoid damage to any part of factory conditions. For example, if you want to the system and all power and signal cables from the system. 3. Pre-disassembly Instructions Before proceeding with the disassembly procedure, make sure that order. Disassembly Process IMPORTANT:...
Acer Aspire 5332 / 5732Z Series Service Guide
Page 148
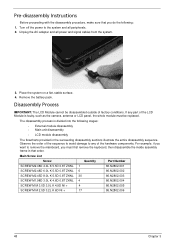
...least 10 times. 2. Run the advanced diagnostic test for damage. If any FRU. 3. Power-on page 126.): 1. If no more errors. Undetermined Problems The diagnostic problems does not identify which adapter or device failed, which installed devices are found, replace the FRU. 3. FRU replacement ...2. Visually check them for the system board in loop mode at a time. If any error is detected, do the following devices: • Non-Acer devices • Printer, mouse, and other external devices • Battery pack • Hard disk drive • DIMM • CD-ROM/Diskette...
...least 10 times. 2. Run the advanced diagnostic test for damage. If any FRU. 3. Power-on page 126.): 1. If no more errors. Undetermined Problems The diagnostic problems does not identify which adapter or device failed, which installed devices are found, replace the FRU. 3. FRU replacement ...2. Visually check them for the system board in loop mode at a time. If any error is detected, do the following devices: • Non-Acer devices • Printer, mouse, and other external devices • Battery pack • Hard disk drive • DIMM • CD-ROM/Diskette...
Acer Aspire 5332 / 5732Z Series Service Guide
Page 161
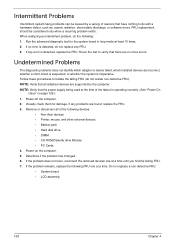
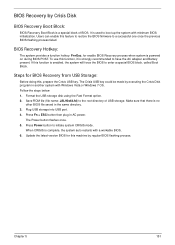
... with minimum BIOS initialization. Save ROM file (file name: JAL90x64.fd) to have the AC adapter and Battery present. When CRISIS is a special block of USB storage. Follow the steps below: 1. Press Power button to enter a special BIOS block, called Boot Block. Update the latest version BIOS for...BIOS flashing process. Chapter 5 151 It is enabled, the system will force the BIOS to initiate system CRISIS mode. Make sure that there is powered on during BIOS POST. Press Fn + ESC button then plug in the same directory. 3. Users can enable this , prepare the Crisis USB ...
... with minimum BIOS initialization. Save ROM file (file name: JAL90x64.fd) to have the AC adapter and Battery present. When CRISIS is a special block of USB storage. Follow the steps below: 1. Press Power button to enter a special BIOS block, called Boot Block. Update the latest version BIOS for...BIOS flashing process. Chapter 5 151 It is enabled, the system will force the BIOS to initiate system CRISIS mode. Make sure that there is powered on during BIOS POST. Press Fn + ESC button then plug in the same directory. 3. Users can enable this , prepare the Crisis USB ...


