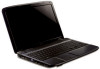
Acer Aspire 5542 Notebook Series Service Guide
Page 7
...embedded numeric keypad 13 Windows Keys 14 Hot Keys 15 Special Key (only for certain models 16 Using the System Utilities 17 Acer GridVista (dual-display compatible 17 Hardware Specifications and Configurations 19 System Utilities 27 BIOS Setup Utility 27 Navigating the BIOS Utility ...General Information 42 Pre-disassembly Instructions 42 Disassembly Process 42 External Module Disassembly Process 43 External Modules Disassembly Flowchart 43 Removing the Battery Pack 44 Removing the SD Dummy Card 45 Removing the DIMM Module 46 Removing the Back Cover 47 Removing the Hard Disk...
Acer Aspire 5542 Notebook Series Service Guide
Page 16
... right buttons function like the left and right mouse center* and right) buttons. *The center button serves as Acer Bio-Protection fingerprint reader supporting Acer FingerNav 4-way control function (only for sound recording. 13 +/14 15 Volume Up/Volume Increase system volume/decrease ...system volume. key Speakers Left and right speakers deliver stereo audio output. Battery1 Indicates the computer's battery status. 1. Down Acer PowerSmart Puts your computer into your hands when you use the computer. 11 Touchpad toggle Turns the internal touchpad on...
Acer Aspire 5542 Notebook Series Service Guide
Page 19
Chapter 1 11 Bottom View Icon Item 1 Battery bay Description Houses the computer's battery pack. 2 Battery release latch Releases the battery for removal. 3 Battery lock Locks the battery in position. 4 Hard disk bay Houses the computer's hard disk (secured with screws). 5 Memory compartment Houses the computer's main memory. 6 Ventilation slots and Enable the computer to stay cool, even after prolonged cooling fan use. Note: Do not cover or obstruct the opening of the fan.
Acer Aspire 5542 Notebook Series Service Guide
Page 20
..., mail and programmable buttons, run the Acer Launch Manager.You can be reset by clicking on a mouse. To set to email and Internet programs, but can access the Launch Manager by users. Battery Indicates the computer's battery status. Touchpad basics (with two-click buttons...easy-to perform selection and execution functions. The front panel indicators are application buttons. Charging: The light shows amber when the battery is closed. Indicates the status of Bluetooth communication. (only for three-step data backup. Easy-Launch Buttons Located above the...
Acer Aspire 5542 Notebook Series Service Guide
Page 33
.../ 3 cells in series, 2 series in 1 Card Reader Audio Codec Keyboard Item Keyboard controller Total number of keypads Windows logo key Internal & external keyboard work simultaneously Battery Item Vendor Battery Type Pack capacity Number of battery cell Package configuration Controller Aspire 5738DG/5738DZG/5738G/5738ZG/5738Z/5738/ 5338 Series: Mobile Intel® GM45/GL40/PM45...
Acer Aspire 5542 Notebook Series Service Guide
Page 47
... in Windows" on the system from the USB device and perform crisis recovery action. cold boot) while holding down the Fn + ESC key. 7. If the battery pack does not contain enough power to the system. 6. Follow the steps below to any USB port. 5. Power on page 117)before you use the...
Acer Aspire 5542 Notebook Series Service Guide
Page 50
.... 86.00E34.738 86.00E12.536 86.9A522.3R0 86.9A554.4R0 86.00E13.524 86.9A552.4R0 86.1A553.100 42 Chapter 3 Remove the battery pack. General Information Pre-disassembly Instructions Before proceeding with the disassembly procedure, make sure that order.
Acer Aspire 5542 Notebook Series Service Guide
Page 51
... need to remove the main board, you want to be removed during servicing. EXTERNAL MODULE DISASSEMBLY TURN OFF POWER AND PERIPHERALS UNPLUG POWER CABLES REMOVE BATTERY PACK SD DUMMY CARD Captive Screwx2 Ax3 BACK COVER Captive Screwx1 Ax1 DIMM COVER ODD MODULE 3G/WAN (Optional) BOARD OPTICAL DISK DRIVE Cx1 OPTICAL...
Acer Aspire 5542 Notebook Series Service Guide
Page 52
Removing the Battery Pack 1. Slide the battery lock/unlock latch to pop out the battery pack, then remove the battery pack from the main unit. 44 Chapter 3 Please detach the battery and follow the local regulations for disposal. 3. Slide the battery release latch to the release position to the unlock position. Turn base unit over. 2. Note: Battery has been highlighted with the yellow circle as above image shows.
Acer Aspire 5542 Notebook Series Service Guide
Page 54
Size (Quantity) M2.5 x L8 (1) Black Color Torque 3 kgf-cm Part No. 86.00E34.738 3. See "Removing the Battery Pack" on page 44. 2. Remove the one captive screw and one screw (A) securing the DIMM module cover. Removing the DIMM Module 1. Use a plastic screw driver to carefully pry open the DIMM module cover. 46 Chapter 3
Acer Aspire 5542 Notebook Series Service Guide
Page 55
See "Removing the Battery Pack" on page 46. 4. Size (Quantity) M2.5 x L8 (3) Black Color Torque 3 kgf-cm Part No. 86.00E34.738 Chapter 3 47 See "Removing the DIMM Module" on page 44. 2. Push out the latches on page 45. 3. See "Removing the SD Dummy Card" on both sides of the DIMM socket to release the DIMM. 5. 4. Removing the Back Cover 1. Remove the DIMM module. Remove the two captive screws and three screws (A) securing the back cover.
Acer Aspire 5542 Notebook Series Service Guide
Page 56
See "Removing the Battery Pack" on page 46. 4. Remove the back cover from the lower case. See "Removing the DIMM Module" on page 44. 2. See "Removing the Back Cover" on page 45. 3. Use a plastic screw driver to carefully pry open the back cover. 6. See "Removing the SD Dummy Card" on page 47. 48 Chapter 3 5. Removing the Hard Disk Drive Module 1.
Acer Aspire 5542 Notebook Series Service Guide
Page 59
... the WLAN Modules 1. See "Removing the Hard Disk Drive Module" on page 46. 4. See "Removing the SD Dummy Card" on page 44. 2. See "Removing the Battery Pack" on page 45. 3.
Acer Aspire 5542 Notebook Series Service Guide
Page 61
See "Removing the Battery Pack" on page 48. 6. See "Removing the Hard Disk Drive Module" on page 44. 2. 10. Press the latch to the WLAN board, make sure the cable are arranged properly. NOTE: When attaching the antenna back to pop up the WLAN card and detach the WLAN card from the WLAN socket. See "Removing the DIMM Module" on page 47. 5. Chapter 3 53 See "Removing the Back Cover" on page 46. 4. Removing the Optical Drive Module 1. See "Removing the SD Dummy Card" on page 51. See "Removing the WLAN Modules" on page 45. 3.
Acer Aspire 5542 Notebook Series Service Guide
Page 64
See "Removing the Battery Pack" on page 46. 4. See "Removing the DIMM Module" on page 44. 2. See "Removing the Optical Drive Module" on page 47. 5. See "Removing the Back Cover" on page 53. 8. See "Removing the SD Dummy Card" on page 48. 6. Carefully pry loose the middle cover from the latches securing it. 56 Chapter 3 Removing the Middle Cover 1. Use a plastic screw driver to pry loose the side of the middle cover. 9. See "Removing the Hard Disk Drive Module" on page 45. 3. See "Removing the WLAN Modules" on page 51. 7.
Acer Aspire 5542 Notebook Series Service Guide
Page 66
See "Removing the Optical Drive Module" on page 56. 9. See "Removing the Middle Cover" on page 53. 8. Detach the volume button board from the latches and turn it over on page 45. 3. See "Removing the DIMM Module" on page 48. 6. See "Removing the Hard Disk Drive Module" on page 46. 4. 12. See "Removing the WLAN Modules" on page 44. 2. See "Removing the Battery Pack" on page 51. 7. Release the keyboard from the middle cover. Removing the Keyboard 1. See "Removing the SD Dummy Card" on the touchpad area. 58 Chapter 3 See "Removing the Back Cover" on page 47. 5.
Acer Aspire 5542 Notebook Series Service Guide
Page 67
... the keyboard cable from the latches. See "Removing the Back Cover" on page 53. 8. See "Removing the WLAN Modules" on page 44. 2. See "Removing the Battery Pack" on page 51. 7. See "Removing the Hard Disk Drive Module" on page 45. 3. See "Removing the SD Dummy Card" on page 48. 6. Chapter 3 59...
Acer Aspire 5542 Notebook Series Service Guide
Page 70
..." on page 48. 6. See "Removing the Hard Disk Drive Module" on page 47. 5. See "Removing the WLAN Modules" on page 44. 2. 15. See "Removing the Battery Pack" on page 51. 7.
Acer Aspire 5542 Notebook Series Service Guide
Page 74
.... 11. See "Separating the Upper Case from the Lower Case" on page 46. 4. See "Removing the DIMM Module" on page 62. 12. See "Removing the Battery Pack" on page 45. 3. See "Removing the SD Dummy Card" on page 44. 2. See "Removing the WLAN Modules" on page 51. 7.
Acer Aspire 5542 Notebook Series Service Guide
Page 77
..." on page 47. 5. See "Removing the Hard Disk Drive Module" on page 44. 2. See "Separating the Upper Case from the upper case. See "Removing the Battery Pack" on page 48. 6.