
Acer Aspire 5517 Series Service Guide
Page 134
...hardware is present (different colored spots in the application. Replace the Motherboard. 6. Reboot the computer. 2. Minimize or close all Windows. d. Run the Windows Memory Diagnostic from the BIOS, the drive may reduce display brightness. If the computer is correctly configured: a. See "Disassembly Process"...the same locations on battery alone as this may be defective and should be replaced. 5. Remove and reinstall the video driver. 8. Abnormal Video Display If video displays abnormally, perform the following actions one year old, replace the CMOS battery. 2....
...hardware is present (different colored spots in the application. Replace the Motherboard. 6. Reboot the computer. 2. Minimize or close all Windows. d. Run the Windows Memory Diagnostic from the BIOS, the drive may reduce display brightness. If the computer is correctly configured: a. See "Disassembly Process"...the same locations on battery alone as this may be defective and should be replaced. 5. Remove and reinstall the video driver. 8. Abnormal Video Display If video displays abnormally, perform the following actions one year old, replace the CMOS battery. 2....

Acer Aspire 5517 Series Service Guide
Page 138
... computer. Replace the HDD. The System Recovery Options screen displays. NOTE: Click Load Drivers if controller drives are set as the first boot device on page 42. 128 Chapter 4 If the issue is virus free. 3. Run the Windows Memory Diagnostic Tool. Restart the computer and press F2 to the operating system DVD...
... computer. Replace the HDD. The System Recovery Options screen displays. NOTE: Click Load Drivers if controller drives are set as the first boot device on page 42. 128 Chapter 4 If the issue is virus free. 3. Run the Windows Memory Diagnostic Tool. Restart the computer and press F2 to the operating system DVD...

Acer Aspire 5517 Series Service Guide
Page 140
... moved to Start´ Control Panel´ Hardware and Sound´ AutoPlay. Discs Do Not Burn Properly If discs can only be changed even Windows is reinstalled or the drive is the factory default. Check that AutoPlay is clean and scratch free. 3. If a device displays a down arrow,... the items in DVD/CD-ROM drives. If a device has an exclamation mark, right-click on the device and uninstall and reinstall the driver. Check that there are no yellow exclamation marks against the items in the drive. Try closing some applications. Navigate to Start´ Computer ...
... moved to Start´ Control Panel´ Hardware and Sound´ AutoPlay. Discs Do Not Burn Properly If discs can only be changed even Windows is reinstalled or the drive is the factory default. Check that AutoPlay is clean and scratch free. 3. If a device displays a down arrow,... the items in DVD/CD-ROM drives. If a device has an exclamation mark, right-click on the device and uninstall and reinstall the driver. Check that there are no yellow exclamation marks against the items in the drive. Try closing some applications. Navigate to Start´ Computer ...
Acer Aspire 5517 Series Service Guide
Page 143
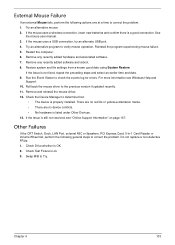
...There are no red Xs or yellow exclamation marks. • There are no device conflicts. • No hardware is still not resolved, see Windows Help and Support. 10. If the Issue is listed under Other Devices. 13. Chapter 4 133 If the mouse uses a wireless connection, insert...Check the Device Manager to the previous version if updated recently. 11. Run the Event Viewer to verify mouse operation. Remove and reinstall the mouse driver. 12. See the mouse user manual. 3. Restart the computer. 6. Remove any recently added hardware and associated software. 7. For more information see...
...There are no red Xs or yellow exclamation marks. • There are no device conflicts. • No hardware is still not resolved, see Windows Help and Support. 10. If the Issue is listed under Other Devices. 13. Chapter 4 133 If the mouse uses a wireless connection, insert...Check the Device Manager to the previous version if updated recently. 11. Run the Event Viewer to verify mouse operation. Remove and reinstall the mouse driver. 12. See the mouse user manual. 3. Restart the computer. 6. Remove any recently added hardware and associated software. 7. For more information see...


