User Manual
Page 3
...Precautions 14 2.1 CPU Installation 15 2.2 Installation of CPU Fan and Heatsink 15 2.3 Installation of Memory Modules (DIMM 16 2.4 Expansion Slots (PCI and PCI Express Slots 17 2.5 Easy Multi Monitor Feature 18 2.6 Jumpers Setup 19 2.7 Onboard Headers and Connectors 20 2.8 SATAII Hard Disk Setup Guide 24... Configuration 41 3.4.5 PCIPnP Configuration 43 3.4.6 Super IO Configuration 44 3 Contents 1 . Introduction 5 1.1 Package Contents 5 1.2 Specifications 6 1.3 Motherboard Layout (N68-VGS3 FX / N68-VS3 FX 11 1.4 I/O Panel (N68-VGS3 FX 12 1.5 I/O Panel (N68-VS3 FX 13 2 .
...Precautions 14 2.1 CPU Installation 15 2.2 Installation of CPU Fan and Heatsink 15 2.3 Installation of Memory Modules (DIMM 16 2.4 Expansion Slots (PCI and PCI Express Slots 17 2.5 Easy Multi Monitor Feature 18 2.6 Jumpers Setup 19 2.7 Onboard Headers and Connectors 20 2.8 SATAII Hard Disk Setup Guide 24... Configuration 41 3.4.5 PCIPnP Configuration 43 3.4.6 Super IO Configuration 44 3 Contents 1 . Introduction 5 1.1 Package Contents 5 1.2 Specifications 6 1.3 Motherboard Layout (N68-VGS3 FX / N68-VS3 FX 11 1.4 I/O Panel (N68-VGS3 FX 12 1.5 I/O Panel (N68-VS3 FX 13 2 .
User Manual
Page 6
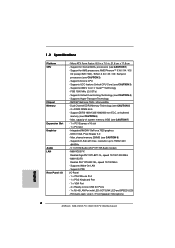
Support DDR3 1600/1333/1066/800 non-ECC, un-buffered memory (see CAUTION 4) - N68-VS3 FX Realtek PHY RTL8201EL, speed 10/100 Mb/s - Supports PXE I /O - Supports Untied Overclocking Technology (see CAUTION 6) - NVIDIA® GeForce 7025 /...FSB 1000 MHz (2.0 GT/s) - capacity of system memory: 8GB (see CAUTION 3) - Max. N68-VGS3 FX Realtek Giga PHY RTL8211CL, speed 10/100/1000 Mb/s - Supports UCC feature (Unlock CPU Core) (see CAUTION 7) - 1 x PCI Express x16 slot - 1 x PCI slot - DX9.0 VGA, Pixel Shader 3.0 - Integrated NVIDIA® GeForce 7025 graphics - HD...
Support DDR3 1600/1333/1066/800 non-ECC, un-buffered memory (see CAUTION 4) - N68-VS3 FX Realtek PHY RTL8201EL, speed 10/100 Mb/s - Supports PXE I /O - Supports Untied Overclocking Technology (see CAUTION 6) - NVIDIA® GeForce 7025 /...FSB 1000 MHz (2.0 GT/s) - capacity of system memory: 8GB (see CAUTION 3) - Max. N68-VGS3 FX Realtek Giga PHY RTL8211CL, speed 10/100/1000 Mb/s - Supports UCC feature (Unlock CPU Core) (see CAUTION 7) - 1 x PCI Express x16 slot - 1 x PCI slot - DX9.0 VGA, Pixel Shader 3.0 - Integrated NVIDIA® GeForce 7025 graphics - HD...

User Manual
Page 11
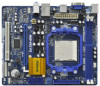
... Fan Connector (CHA_FAN1) 20 Serial Port Connector (COM1) 21 PCI Slot (PCI1) 22 PCI Express x16 Slot (PCIE1) 23 Front Panel Audio Header (HD_AUDIO1, Lime) 24 ATX 12V Power Connector (ATX12V1) 25 AM3 CPU Socket 26 ATX Power Connector (ATXPWR1) 11 1.3 Motherboard Layout (N68-VGS3 FX / N68-VS3 FX) 26 USB 2.0 T: USB2 B: USB3 VGA1 PS2 Mouse PS2 Keyboard...
... Fan Connector (CHA_FAN1) 20 Serial Port Connector (COM1) 21 PCI Slot (PCI1) 22 PCI Express x16 Slot (PCIE1) 23 Front Panel Audio Header (HD_AUDIO1, Lime) 24 ATX 12V Power Connector (ATX12V1) 25 AM3 CPU Socket 26 ATX Power Connector (ATXPWR1) 11 1.3 Motherboard Layout (N68-VGS3 FX / N68-VS3 FX) 26 USB 2.0 T: USB2 B: USB3 VGA1 PS2 Mouse PS2 Keyboard...
User Manual
Page 17
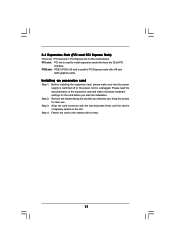
2.4 Expansion Slots (PCI and PCI Express Slots) There are 1 PCI slot and 1 PCI Express slot on the slot. Installing an expansion card Step 1. Step 3. Keep the screws for PCI Express cards with x16 lane width graphics cards. Step 2. Fasten the card to use . Please read the documentation ...PCIE x16 slot) is used for later use . Step 4. Remove the bracket facing the slot that have the 32-bit PCI interface. PCI slot: PCI slot is used to install expansion cards that you start the installation. Before installing the expansion card, please make necessary hardware ...
2.4 Expansion Slots (PCI and PCI Express Slots) There are 1 PCI slot and 1 PCI Express slot on the slot. Installing an expansion card Step 1. Step 3. Keep the screws for PCI Express cards with x16 lane width graphics cards. Step 2. Fasten the card to use . Please read the documentation ...PCIE x16 slot) is used for later use . Step 4. Remove the bracket facing the slot that have the 32-bit PCI interface. PCI slot: PCI slot is used to install expansion cards that you start the installation. Before installing the expansion card, please make necessary hardware ...
User Manual
Page 18
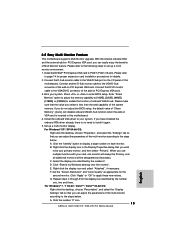
..."Apply" or "OK" to PCIE1 (PCIE x16 slot). A. With the internal onboard VGA and the external add-on PCI Express VGA card, you can adjust the parameters of the add-on PCI Express VGA card. Connect another D-Sub monitor cable to display a large number on the I/O panel of the system memory. ...the VGA/DVI-D connector of "Share Memory", [Auto], will be Primary, and all additional monitors will disable onboard VGA/D-Sub function when the add-on PCI Express VGA card. 3. Enter "Share Memory" option to adjust the memory capability to [16MB], [32MB], [64MB], [128MB] or [256MB] to this ...
..."Apply" or "OK" to PCIE1 (PCIE x16 slot). A. With the internal onboard VGA and the external add-on PCI Express VGA card, you can adjust the parameters of the add-on PCI Express VGA card. Connect another D-Sub monitor cable to display a large number on the I/O panel of the system memory. ...the VGA/DVI-D connector of "Share Memory", [Auto], will be Primary, and all additional monitors will disable onboard VGA/D-Sub function when the add-on PCI Express VGA card. 3. Enter "Share Memory" option to adjust the memory capability to [16MB], [32MB], [64MB], [128MB] or [256MB] to this ...

User Manual
Page 39
... allows you to enable or disable the onboard LAN feature. Onboard HD Audio Select [Auto], [Enabled] or [Disabled] for video card. Configuration options: [PCI], [Onboard] and [PCI Express]. 39 If you to set share memory feature. Front Panel Select [Auto] or [Disabled] for the onboard HD Audio Front Panel. The default value of...
... allows you to enable or disable the onboard LAN feature. Onboard HD Audio Select [Auto], [Enabled] or [Disabled] for video card. Configuration options: [PCI], [Onboard] and [PCI Express]. 39 If you to set share memory feature. Front Panel Select [Auto] or [Disabled] for the onboard HD Audio Front Panel. The default value of...
Quick Installation Guide
Page 2
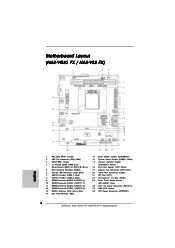
Motherboard Layout (N68-VGS3 FX / N68-VS3 FX) English 1 PS2_USB_PWR1 Jumper 2 CPU Fan Connector (CPU_FAN1) 3 USB_PWR2 Jumper 4 2 x 240-pin DDR3 DIMM Slots (Dual Channel: DDR3_A1, DDR3_B1; Blue) 5 CPU Heatsink Retention Module 6 Primary ... (SPEAKER 1, White) 18 Print Port Header (LPT1, White) 19 Chassis Fan Connector (CHA_FAN1) 20 Serial Port Connector (COM1) 21 PCI Slot (PCI1) 22 PCI Express x16 Slot (PCIE1) 23 Front Panel Audio Header (HD_AUDIO1, Lime) 24 ATX 12V Power Connector (ATX12V1) 25 AM3 CPU Socket 26 ATX Power Connector (ATXPWR1) 2 ASRock N68-VGS3 FX / N68-VS3 FX Motherboard
Motherboard Layout (N68-VGS3 FX / N68-VS3 FX) English 1 PS2_USB_PWR1 Jumper 2 CPU Fan Connector (CPU_FAN1) 3 USB_PWR2 Jumper 4 2 x 240-pin DDR3 DIMM Slots (Dual Channel: DDR3_A1, DDR3_B1; Blue) 5 CPU Heatsink Retention Module 6 Primary ... (SPEAKER 1, White) 18 Print Port Header (LPT1, White) 19 Chassis Fan Connector (CHA_FAN1) 20 Serial Port Connector (COM1) 21 PCI Slot (PCI1) 22 PCI Express x16 Slot (PCIE1) 23 Front Panel Audio Header (HD_AUDIO1, Lime) 24 ATX 12V Power Connector (ATX12V1) 25 AM3 CPU Socket 26 ATX Power Connector (ATXPWR1) 2 ASRock N68-VGS3 FX / N68-VS3 FX Motherboard
Quick Installation Guide
Page 6
... CAUTION 1) - Supports UCC feature (Unlock CPU Core) (see CAUTION 7) - 1 x PCI Express x16 slot - 1 x PCI slot - Supports D-Sub with LED (ACT/LINK LED and SPEED LED) - Micro ATX Form Factor: 8.5-in x 7.0-in / Front Speaker / Microphone English 6 ASRock N68-VGS3 FX / N68-VS3 FX Motherboard capacity of system memory: 8GB (see CAUTION 3) - N68-VS3 FX Realtek PHY RTL8201EL, speed 10/100 Mb/s - Supports Wake...
... CAUTION 1) - Supports UCC feature (Unlock CPU Core) (see CAUTION 7) - 1 x PCI Express x16 slot - 1 x PCI slot - Supports D-Sub with LED (ACT/LINK LED and SPEED LED) - Micro ATX Form Factor: 8.5-in x 7.0-in / Front Speaker / Microphone English 6 ASRock N68-VGS3 FX / N68-VS3 FX Motherboard capacity of system memory: 8GB (see CAUTION 3) - N68-VS3 FX Realtek PHY RTL8201EL, speed 10/100 Mb/s - Supports Wake...
Quick Installation Guide
Page 14
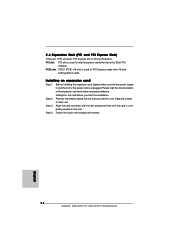
...PCI and PCI Express Slots) There are 1 PCI slot and 1 PCI Express slot on the slot. Remove the bracket facing the slot that you start the installation. PCI slot: PCI slot is used to use . Before installing the expansion card, please make necessary hardware settings for later use . Step 4. Step 2. Align the card connector with screws. 14 ASRock N68-VGS3 FX / N68-VS3 FX... Motherboard English Fasten the card to the chassis with the slot and press firmly until the card is unplugged. PCIE slot: PCIE1 (PCIE x16 slot) is used for PCI Express ...
...PCI and PCI Express Slots) There are 1 PCI slot and 1 PCI Express slot on the slot. Remove the bracket facing the slot that you start the installation. PCI slot: PCI slot is used to use . Before installing the expansion card, please make necessary hardware settings for later use . Step 4. Step 2. Align the card connector with screws. 14 ASRock N68-VGS3 FX / N68-VS3 FX... Motherboard English Fasten the card to the chassis with the slot and press firmly until the card is unplugged. PCIE slot: PCIE1 (PCIE x16 slot) is used for PCI Express ...
Quick Installation Guide
Page 15
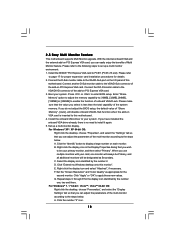
... proper expansion card installation procedures for details. 2. G. Repeat steps C through E for the second monitor. Click the number "2" icon. 15 ASRock N68-VGS3 FX / N68-VS3 FX Motherboard English Connect another D-Sub monitor cable to your system. A. When you do not adjust the BIOS setup, the default value of the ...Multi Monitor upgrade. Please make sure that you select is inserted to set up a multi-monitor display. Install the NVIDIA® PCI Express VGA card to the steps below . Select the display icon identified by the number one monitor will always be Primary, and ...
... proper expansion card installation procedures for details. 2. G. Repeat steps C through E for the second monitor. Click the number "2" icon. 15 ASRock N68-VGS3 FX / N68-VS3 FX Motherboard English Connect another D-Sub monitor cable to your system. A. When you do not adjust the BIOS setup, the default value of the ...Multi Monitor upgrade. Please make sure that you select is inserted to set up a multi-monitor display. Install the NVIDIA® PCI Express VGA card to the steps below . Select the display icon identified by the number one monitor will always be Primary, and ...


