
User Manual
Page 4
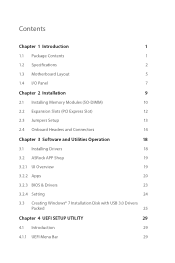
... Slot) 12 2.3 Jumpers Setup 13 2.4 Onboard Headers and Connectors 14 Chapter 3 Software and Utilities Operation 18 3.1 Installing Drivers 18 3.2 ASRock APP Shop 19 3.2.1 UI Overview 19 3.2.2 Apps 20 3.2.3 BIOS & Drivers 23 3.2.4 Setting 24 3.3 Creating Windows® 7 Installation Disk with USB 3.0 Drivers Packed 25 Chapter 4 UEFI SETUP UTILITY 29 4.1 Introduction 29 4.1.1 UEFI Menu Bar 29
... Slot) 12 2.3 Jumpers Setup 13 2.4 Onboard Headers and Connectors 14 Chapter 3 Software and Utilities Operation 18 3.1 Installing Drivers 18 3.2 ASRock APP Shop 19 3.2.1 UI Overview 19 3.2.2 Apps 20 3.2.3 BIOS & Drivers 23 3.2.4 Setting 24 3.3 Creating Windows® 7 Installation Disk with USB 3.0 Drivers Packed 25 Chapter 4 UEFI SETUP UTILITY 29 4.1 Introduction 29 4.1.1 UEFI Menu Bar 29

User Manual
Page 8
...Audio, it is required to use an HD front panel audio module and enable the multi-channel audio feature through the audio driver. • Supports Surge Protection (ASRock Full Spike Protection) • ELNA Audio Caps LAN • PCIE x1 Gigabit LAN 10/100/1000 Mb/s • Realtek... RTL8111GR • Supports Wake-On-WAN • Supports Wake-On-LAN • Supports Lightning/ESD Protection (ASRock Full Spike Protection) • Supports LAN Cable Detection • Supports Energy Eicient Ethernet 802.3az • Supports PXE Rear Panel I/O • 1 x...
...Audio, it is required to use an HD front panel audio module and enable the multi-channel audio feature through the audio driver. • Supports Surge Protection (ASRock Full Spike Protection) • ELNA Audio Caps LAN • PCIE x1 Gigabit LAN 10/100/1000 Mb/s • Realtek... RTL8111GR • Supports Wake-On-WAN • Supports Wake-On-LAN • Supports Lightning/ESD Protection (ASRock Full Spike Protection) • Supports LAN Cable Detection • Supports Energy Eicient Ethernet 802.3az • Supports PXE Rear Panel I/O • 1 x...

User Manual
Page 9
... RAM to page 25 for more detailed instructions. * For the updated Windows® 10 driver, please visit ASRock's website for system usage under Windows® 32-bit operating systems. Windows® 64-bit operating systems do... N3150B-ITX N3050B-ITX • 1 x 24 pin ATX Power Connector • 1 x Front Panel Audio Connector • 2 x USB 2.0 Headers (Support 4 USB 2.0 ports) (Supports ESD Protection (ASRock Full Spike Protection)) • 1 x USB 3.0 Header (Supports 2 USB 3.0 ports) (Supports ESD Protection (ASRock Full Spike Protection)) * USB3_1_2 is shared with xHCI drivers packed...
... RAM to page 25 for more detailed instructions. * For the updated Windows® 10 driver, please visit ASRock's website for system usage under Windows® 32-bit operating systems. Windows® 64-bit operating systems do... N3150B-ITX N3050B-ITX • 1 x 24 pin ATX Power Connector • 1 x Front Panel Audio Connector • 2 x USB 2.0 Headers (Support 4 USB 2.0 ports) (Supports ESD Protection (ASRock Full Spike Protection)) • 1 x USB 3.0 Header (Supports 2 USB 3.0 ports) (Supports ESD Protection (ASRock Full Spike Protection)) * USB3_1_2 is shared with xHCI drivers packed...

User Manual
Page 13
N3150B-ITX N3050B-ITX ** To conigure 7.1 CH HD Audio, it is required to "7.1 Speaker"in 7.1-channel Coniguration: Port Light Blue (Rear panel) Lime (Rear panel) Pink (Rear panel) Lime (Front panel) Function Rear Speaker Out Front Speaker Out Central /Subwoofer Speaker Out Side Speaker Out 8 English Please set Speaker Coniguration to use an HD front panel audio module and enable the multichannel audio feature through the audio driver. Function of the Audio Ports in the Realtek HD Audio Manager.
N3150B-ITX N3050B-ITX ** To conigure 7.1 CH HD Audio, it is required to "7.1 Speaker"in 7.1-channel Coniguration: Port Light Blue (Rear panel) Lime (Rear panel) Pink (Rear panel) Lime (Front panel) Function Rear Speaker Out Front Speaker Out Central /Subwoofer Speaker Out Side Speaker Out 8 English Please set Speaker Coniguration to use an HD front panel audio module and enable the multichannel audio feature through the audio driver. Function of the Audio Ports in the Realtek HD Audio Manager.

User Manual
Page 23
...bottom to display the menu. Please click Install All or follow the installation wizard to your computer. he drivers compatible to install it. Drivers Menu he CD automatically displays the Main Menu if "AUTORUN" is enabled in the Support CD to install ...those required drivers. Chapter 3 Software and Utilities Operation 3.1 Installing Drivers he Utilities Menu shows the application sotware that enhance the motherboard's features. herefore, the drivers you install can work properly. "KB2720599": http://support.microsot.com/...
...bottom to display the menu. Please click Install All or follow the installation wizard to your computer. he drivers compatible to install it. Drivers Menu he CD automatically displays the Main Menu if "AUTORUN" is enabled in the Support CD to install ...those required drivers. Chapter 3 Software and Utilities Operation 3.1 Installing Drivers he Utilities Menu shows the application sotware that enhance the motherboard's features. herefore, the drivers you install can work properly. "KB2720599": http://support.microsot.com/...

User Manual
Page 28
Click on Step 2 to see a list of recommended or critical updates for the BIOS or drivers. Click to select one or more items you will see more details. Step 3 Click Update to start the update process. 23 English Please update them all soon. N3150B-ITX N3050B-ITX 3.2.3 BIOS & Drivers Installing BIOS or Drivers When the "BIOS & Drivers" tab is selected, you want to update. Step 1 Please check the item information before update.
Click on Step 2 to see a list of recommended or critical updates for the BIOS or drivers. Click to select one or more items you will see more details. Step 3 Click Update to start the update process. 23 English Please update them all soon. N3150B-ITX N3050B-ITX 3.2.3 BIOS & Drivers Installing BIOS or Drivers When the "BIOS & Drivers" tab is selected, you want to update. Step 1 Please check the item information before update.

User Manual
Page 30
... the "Sources" folder in Step 1. Due to the "asrock" folder created in the Windows® 7 installation disk to the Windows® 7 installation disk does not include the USB 3.0 drivers, please create a Windows® 7 installation disk with USB 3.0 Drivers Packed he USB 3.0 ports on your computer. N3150B-ITX N3050B-ITX 3.3 Creating Windows® 7 Installation Disk with the...
... the "Sources" folder in Step 1. Due to the "asrock" folder created in the Windows® 7 installation disk to the Windows® 7 installation disk does not include the USB 3.0 drivers, please create a Windows® 7 installation disk with USB 3.0 Drivers Packed he USB 3.0 ports on your computer. N3150B-ITX N3050B-ITX 3.3 Creating Windows® 7 Installation Disk with the...

User Manual
Page 31
Step 6 Copy all 12 iles under the folders "HCSwitch" (x64) and "Win7" (x64) in the "Drivers" to the screenshot below. Refer to the subfolder "usb3" created in Step 1, by inputting "cd.." Step 7 Open the "Start" menu and type "command" or "cmd" to the upper level "cd (folder name)" : enter the assigned folder 26 English Step 8 Enter the folder created in Step 2. "cd.." : go to launch the command prompt as an administrator. and "cd (folder name)" commands.
Step 6 Copy all 12 iles under the folders "HCSwitch" (x64) and "Win7" (x64) in the "Drivers" to the screenshot below. Refer to the subfolder "usb3" created in Step 1, by inputting "cd.." Step 7 Open the "Start" menu and type "command" or "cmd" to the upper level "cd (folder name)" : enter the assigned folder 26 English Step 8 Enter the folder created in Step 2. "cd.." : go to launch the command prompt as an administrator. and "cd (folder name)" commands.

User Manual
Page 32
..." in order to install Windows® 7 by lash3.0, please input the following commands in order and wait until the each process completes. N3150B-ITX N3050B-ITX Step 9 To add USB 3.0 drivers into the "install.wim" image ile, please input the following commands in order and wait until the each process completes. dism /mount-wim...
..." in order to install Windows® 7 by lash3.0, please input the following commands in order and wait until the each process completes. N3150B-ITX N3050B-ITX Step 9 To add USB 3.0 drivers into the "install.wim" image ile, please input the following commands in order and wait until the each process completes. dism /mount-wim...

Quick Installation Guide
Page 6
** To conigure 7.1 CH HD Audio, it is required to "7.1 Speaker"in 7.1-channel Coniguration: Port Light Blue (Rear panel) Lime (Rear panel) Pink (Rear panel) Lime (Front panel) Function Rear Speaker Out Front Speaker Out Central /Subwoofer Speaker Out Side Speaker Out 4 English Function of the Audio Ports in the Realtek HD Audio Manager. Please set Speaker Coniguration to use an HD front panel audio module and enable the multichannel audio feature through the audio driver.
** To conigure 7.1 CH HD Audio, it is required to "7.1 Speaker"in 7.1-channel Coniguration: Port Light Blue (Rear panel) Lime (Rear panel) Pink (Rear panel) Lime (Front panel) Function Rear Speaker Out Front Speaker Out Central /Subwoofer Speaker Out Side Speaker Out 4 English Function of the Audio Ports in the Realtek HD Audio Manager. Please set Speaker Coniguration to use an HD front panel audio module and enable the multichannel audio feature through the audio driver.

Quick Installation Guide
Page 9
N3150B-ITX N3050B-ITX Audio • 7.1 CH HD Audio (Realtek ALC887 Audio Codec) * To conigure 7.1 CH HD Audio, it is required to use an HD front panel audio module and enable the multi-channel audio feature through the audio driver. • Supports Surge Protection (ASRock Full Spike Protection) • ELNA Audio Caps LAN • PCIE x1...
N3150B-ITX N3050B-ITX Audio • 7.1 CH HD Audio (Realtek ALC887 Audio Codec) * To conigure 7.1 CH HD Audio, it is required to use an HD front panel audio module and enable the multi-channel audio feature through the audio driver. • Supports Surge Protection (ASRock Full Spike Protection) • ELNA Audio Caps LAN • PCIE x1...

Quick Installation Guide
Page 10
... x USB 2.0 Headers (Support 4 USB 2.0 ports) (Supports ESD Protection (ASRock Full Spike Protection)) • 1 x USB 3.0 Header (Supports 2 USB 3.0 ports) (Supports ESD Protection (ASRock Full Spike Protection)) * USB3_1_2 is shared with xHCI drivers packed into the ISO ile is required) * For detailed product information, please visit...cannot use. 8 Please refer to page 121 for more detailed instructions. * For the updated Windows® 10 driver, please visit ASRock's website for system usage under Windows® 32-bit operating systems. Windows® 64-bit operating systems do ...
... x USB 2.0 Headers (Support 4 USB 2.0 ports) (Supports ESD Protection (ASRock Full Spike Protection)) • 1 x USB 3.0 Header (Supports 2 USB 3.0 ports) (Supports ESD Protection (ASRock Full Spike Protection)) * USB3_1_2 is shared with xHCI drivers packed into the ISO ile is required) * For detailed product information, please visit...cannot use. 8 Please refer to page 121 for more detailed instructions. * For the updated Windows® 10 driver, please visit ASRock's website for system usage under Windows® 32-bit operating systems. Windows® 64-bit operating systems do ...

Quick Installation Guide
Page 123
....wim" iles from the "Sources" folder in Step 1. N3150B-ITX N3050B-ITX Creating Windows® 7 Installation Disk with the Intel® USB 3.0 eXtensible Host Controller (xHCI) drivers packed into the ISO ile of your own. Here we name the folder "asrock" as examples. Due to the "asrock" folder created in the Windows® 7 installation disk to...
....wim" iles from the "Sources" folder in Step 1. N3150B-ITX N3050B-ITX Creating Windows® 7 Installation Disk with the Intel® USB 3.0 eXtensible Host Controller (xHCI) drivers packed into the ISO ile of your own. Here we name the folder "asrock" as examples. Due to the "asrock" folder created in the Windows® 7 installation disk to...

Quick Installation Guide
Page 124
Step 7 Open the "Start" menu and type "command" or "cmd" to the upper level "cd (folder name)" : enter the assigned folder 122 English and "cd (folder name)" commands. Step 8 Enter the folder created in Step 2. "cd.." : go to launch the command prompt as an administrator. Refer to the screenshot below. Step 6 Copy all 12 iles under the folders "HCSwitch" (x64) and "Win7" (x64) in the "Drivers" to the subfolder "usb3" created in Step 1, by inputting "cd.."
Step 7 Open the "Start" menu and type "command" or "cmd" to the upper level "cd (folder name)" : enter the assigned folder 122 English and "cd (folder name)" commands. Step 8 Enter the folder created in Step 2. "cd.." : go to launch the command prompt as an administrator. Refer to the screenshot below. Step 6 Copy all 12 iles under the folders "HCSwitch" (x64) and "Win7" (x64) in the "Drivers" to the subfolder "usb3" created in Step 1, by inputting "cd.."

Quick Installation Guide
Page 125
..." in order to install Windows® 7 by lash3.0, please input the following commands in order and wait until the each process completes. N3150B-ITX N3050B-ITX Step 9 To add USB 3.0 drivers into the "install.wim" image ile, please input the following commands in order and wait until the each process completes. dism /mount-wim...
..." in order to install Windows® 7 by lash3.0, please input the following commands in order and wait until the each process completes. N3150B-ITX N3050B-ITX Step 9 To add USB 3.0 drivers into the "install.wim" image ile, please input the following commands in order and wait until the each process completes. dism /mount-wim...


