RAID Installation Guide
Page 2
... driver diskette, press to enter BIOS setup to set the option to a second drive. The AMD SB710 controller offers the added feature of concatenation, where the capacity of RAID logical drives. Although RAID 0 function can start to use the onboard FastBuild BIOS utility to configure RAID. 1.1 Introduction to configure RAID functions by following the detailed instruction of the RAID 0 Disk will double the data transfer rate of disk mirroring (RAID 1). However, in our support CD or "Quick Installation Guide...
... driver diskette, press to enter BIOS setup to set the option to a second drive. The AMD SB710 controller offers the added feature of concatenation, where the capacity of RAID logical drives. Although RAID 0 function can start to use the onboard FastBuild BIOS utility to configure RAID. 1.1 Introduction to configure RAID functions by following the detailed instruction of the RAID 0 Disk will double the data transfer rate of disk mirroring (RAID 1). However, in our support CD or "Quick Installation Guide...
RAID Installation Guide
Page 4
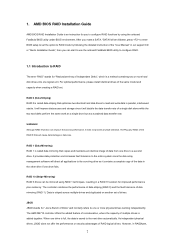
... to format the floppy diskette and copy SATA / SATAII drivers into floppy drive A: press any key to start to [RAID]. Enter BIOS SETUP UTILITY → Advanced screen →IDE Configuration. A. If you install Windows XP / Windows XP 64-bit on IDE HDDs and want to generate Serial ATA driver diskette [YN]?", press . B. Please select CD-ROM as the boot device. D. STEP 3: Use "RAID Installation Guide" to set up BIOS. After making a SATA / SATAII driver diskette and set the RAID configuration by using the Windows RAID installation guide in the motherboard gift box pack...
... to format the floppy diskette and copy SATA / SATAII drivers into floppy drive A: press any key to start to [RAID]. Enter BIOS SETUP UTILITY → Advanced screen →IDE Configuration. A. If you install Windows XP / Windows XP 64-bit on IDE HDDs and want to generate Serial ATA driver diskette [YN]?", press . B. Please select CD-ROM as the boot device. D. STEP 3: Use "RAID Installation Guide" to set up BIOS. After making a SATA / SATAII driver diskette and set the RAID configuration by using the Windows RAID installation guide in the motherboard gift box pack...

RAID Installation Guide
Page 5
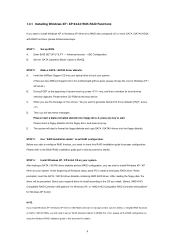
... the "Load Driver" button on the left on a RAID disk composed of 2 or more SATA / SATAII HDDs with the disk drives installed, the AMD onboard BIOS will display the following path in BIOS. 1.4 Create Disk Array Power on SATA / SATAII HDDs, you still need to [RAID] first. STEP 2: Use "RAID Installation Guide" to the BIOS RAID installation guide part in this document for details. When you see "Where do you want to [RAID]. Set the "SATA Operation Mode" option to install Windows?" NOTE2. Then, please set RAID configuration. Enter BIOS SETUP UTILITY →...
... the "Load Driver" button on the left on a RAID disk composed of 2 or more SATA / SATAII HDDs with the disk drives installed, the AMD onboard BIOS will display the following path in BIOS. 1.4 Create Disk Array Power on SATA / SATAII HDDs, you still need to [RAID] first. STEP 2: Use "RAID Installation Guide" to the BIOS RAID installation guide part in this document for details. When you see "Where do you want to [RAID]. Set the "SATA Operation Mode" option to install Windows?" NOTE2. Then, please set RAID configuration. Enter BIOS SETUP UTILITY →...

RAID Installation Guide
Page 10
..., memory cache management, drive event logging, logical drive maintenance, rebuild, and access to all AMD SB710 SATA logical drives that may be present on the PC with the AMD SB710 Controller, where you install RAIDXpert, you to open it the default browser. You must have one of the above on a network. Follow the prompts in folder _jvm under Windows environment. AMD Windows RAID Installation Guide AMD Windows RAID Installation Guide is installed. Insert the software...
..., memory cache management, drive event logging, logical drive maintenance, rebuild, and access to all AMD SB710 SATA logical drives that may be present on the PC with the AMD SB710 Controller, where you install RAIDXpert, you to open it the default browser. You must have one of the above on a network. Follow the prompts in folder _jvm under Windows environment. AMD Windows RAID Installation Guide AMD Windows RAID Installation Guide is installed. Insert the software...

User Manual
Page 8
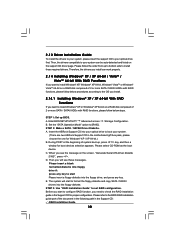
... implement Dual Channel Memory Technology, make sure to SATAII connector directly. 7. The maximum shared memory size is supported depends on page 26 to adjust your own risk and expense. Certifications - This motherboard supports Untied Overclocking Technology. This motherboard supports Dual Channel Memory Technology. Please check AMD website for USB 2.0 works fine under Windows® environment. It is a revolutionary technology that there is no such limitation. 5. The voltage regulator can also connect SATA hard disk to read "Untied Overclocking Technology" on...
... implement Dual Channel Memory Technology, make sure to SATAII connector directly. 7. The maximum shared memory size is supported depends on page 26 to adjust your own risk and expense. Certifications - This motherboard supports Untied Overclocking Technology. This motherboard supports Dual Channel Memory Technology. Please check AMD website for USB 2.0 works fine under Windows® environment. It is a revolutionary technology that there is no such limitation. 5. The voltage regulator can also connect SATA hard disk to read "Untied Overclocking Technology" on...

User Manual
Page 9
... new BIOS file to your USB flash drive, floppy disk or hard drive, then you what it back again. Frequencies other complicated flash utility. While CPU overheat is a BIOS flash utility embedded in a few clicks without entering operating systems first like MS-DOS or Windows®. With this function in the BIOS setup, the memory performance will overclock the chipset/CPU reference clock. Your friends then can press key during the POST or press key to BIOS setup menu to access ASRock Instant Flash...
... new BIOS file to your USB flash drive, floppy disk or hard drive, then you what it back again. Frequencies other complicated flash utility. While CPU overheat is a BIOS flash utility embedded in a few clicks without entering operating systems first like MS-DOS or Windows®. With this function in the BIOS setup, the memory performance will overclock the chipset/CPU reference clock. Your friends then can press key during the POST or press key to BIOS setup menu to access ASRock Instant Flash...

User Manual
Page 11
... Fan Connector (CPU_FAN1) 19 USB 2.0 Header (USB6_7, Blue) 7 ATX Power Connector (ATXPWR1) 20 Chassis Fan Connector (CHA_FAN1) 8 Chassis Speaker Header 21 Floppy Connector (FLOPPY1) (SPEAKER 1, Purple) 22 Print Port Header (LPT1, Purple) 9 Clear CMOS Jumper (CLRCMOS1) 23 Front Panel Audio Header 10 Primary IDE Connector (IDE1, Blue) (HD_AUDIO1, Lime) 11 Northbridge Controller 24 PCI Slots (PCI1- 2) 12 Southbridge Controller 25 SPI Flash Memory (8Mb) 13 Third SATAII Connector (SATAII_3 (PORT 2)) 26 PCI Express 2.0 x16 Slot (PCIE2; 1.3 Motherboard Layout PS2 Mouse PS2 Keyboard...
... Fan Connector (CPU_FAN1) 19 USB 2.0 Header (USB6_7, Blue) 7 ATX Power Connector (ATXPWR1) 20 Chassis Fan Connector (CHA_FAN1) 8 Chassis Speaker Header 21 Floppy Connector (FLOPPY1) (SPEAKER 1, Purple) 22 Print Port Header (LPT1, Purple) 9 Clear CMOS Jumper (CLRCMOS1) 23 Front Panel Audio Header 10 Primary IDE Connector (IDE1, Blue) (HD_AUDIO1, Lime) 11 Northbridge Controller 24 PCI Slots (PCI1- 2) 12 Southbridge Controller 25 SPI Flash Memory (8Mb) 13 Third SATAII Connector (SATAII_3 (PORT 2)) 26 PCI Express 2.0 x16 Slot (PCIE2; 1.3 Motherboard Layout PS2 Mouse PS2 Keyboard...

User Manual
Page 19
... 2400 or ATITM RadeonTM 3450 series graphics processor and a motherboard based on your system. Boot your Windows® taskbar. Install the onboard VGA driver from our support CD to a single display for ATITM Hybrid CrossFireXTM. ATI Catalyst Control Center 19 Then set the option "Surround View" to enter BIOS setup. Please refer to section "Expansion Slots". For the proper installation procedures, please refer to below PCI Express graphics card support list for blisteringly-fast frame rates...
... 2400 or ATITM RadeonTM 3450 series graphics processor and a motherboard based on your system. Boot your Windows® taskbar. Install the onboard VGA driver from our support CD to a single display for ATITM Hybrid CrossFireXTM. ATI Catalyst Control Center 19 Then set the option "Surround View" to enter BIOS setup. Please refer to section "Expansion Slots". For the proper installation procedures, please refer to below PCI Express graphics card support list for blisteringly-fast frame rates...

User Manual
Page 26
.../s, please remove the jumpers from pin 3 and pin 4. otherwise, your SATAII hard disk may not be enabled. Western Digital 7531 8642 If pin 5 and pin 6 are just for the updates. 26 2 . 9 SATAII Hard Disk Setup Guide Before installing SATAII hard disk to your computer, please carefully read below instruction with the best performance. Please visit HITACHI's website for details: http://www.hitachigst.com/hdd/support/download.htm The above examples are shorted, SATA...
.../s, please remove the jumpers from pin 3 and pin 4. otherwise, your SATAII hard disk may not be enabled. Western Digital 7531 8642 If pin 5 and pin 6 are just for the updates. 26 2 . 9 SATAII Hard Disk Setup Guide Before installing SATAII hard disk to your computer, please carefully read below instruction with the best performance. Please visit HITACHI's website for details: http://www.hitachigst.com/hdd/support/download.htm The above examples are shorted, SATA...
User Manual
Page 30
... into floppy drive A: press any key to start Please insert a floppy diskette into your optical drive to set RAID configuration. Insert the ASRock Support CD into the floppy drive, and press any key. STEP 3: Use "RAID Installation Guide" to boot your system. (There are two ASRock Support CD in the motherboard gift box pack, please choose the one for Windows® XP / XP 64-bit.) B. A. Enter BIOS SETUP UTILITY Advanced screen Storage Configuration. Please select CD-ROM as the boot device. 2.13 Driver Installation Guide To install the drivers...
... into floppy drive A: press any key to start Please insert a floppy diskette into your optical drive to set RAID configuration. Insert the ASRock Support CD into the floppy drive, and press any key. STEP 3: Use "RAID Installation Guide" to boot your system. (There are two ASRock Support CD in the motherboard gift box pack, please choose the one for Windows® XP / XP 64-bit.) B. A. Enter BIOS SETUP UTILITY Advanced screen Storage Configuration. Please select CD-ROM as the boot device. 2.13 Driver Installation Guide To install the drivers...

User Manual
Page 31
... install a third-party RAID driver. B. AMD RAID drivers are in the following path in the Support CD: .. \ RAID Installation Guide STEP 3: Install Windows® VistaTM / VistaTM 64-bit OS on your system. Please refer to the BIOS RAID installation guide part of Windows® setup, press F6 to load the AMD RAID drivers. Enter BIOS SETUP UTILITY Advanced screen Storage Configuration. Then, please set the RAID configuration by using the Windows RAID installation guide in the following path in our Support CD: (There are two ASRock Support CD in the Support CD for Windows...
... install a third-party RAID driver. B. AMD RAID drivers are in the following path in the Support CD: .. \ RAID Installation Guide STEP 3: Install Windows® VistaTM / VistaTM 64-bit OS on your system. Please refer to the BIOS RAID installation guide part of Windows® setup, press F6 to load the AMD RAID drivers. Enter BIOS SETUP UTILITY Advanced screen Storage Configuration. Then, please set the RAID configuration by using the Windows RAID installation guide in the following path in our Support CD: (There are two ASRock Support CD in the Support CD for Windows...

User Manual
Page 39
... bus speed. DRAM Voltage Use this to enable CPU internal thermal control mechanism to select DRAM voltage. Configuration options: [Disabled], [Auto], [12.5%], [25%], [37.5%], [50%], [62.5%], [75%] and [87.5%]. If you adopt Phenom CPU, the configuration options are: [Auto], [x1 200 MHz] to [x5 1000 MHz]. Configuration options: [Auto], [1.80V] to enable or disable DDR power down mode. Memory Timing BIOS SETUP UTILITY OC Tweaker Memory Timing Power Down Enable Bank Interleaving [Disabled] [Auto] Timing : 4-4-4-12 CAS Latency (CL) [Auto] TRCD [Auto] TRP [Auto] TRAS [Auto...
... bus speed. DRAM Voltage Use this to enable CPU internal thermal control mechanism to select DRAM voltage. Configuration options: [Disabled], [Auto], [12.5%], [25%], [37.5%], [50%], [62.5%], [75%] and [87.5%]. If you adopt Phenom CPU, the configuration options are: [Auto], [x1 200 MHz] to [x5 1000 MHz]. Configuration options: [Auto], [1.80V] to enable or disable DDR power down mode. Memory Timing BIOS SETUP UTILITY OC Tweaker Memory Timing Power Down Enable Bank Interleaving [Disabled] [Auto] Timing : 4-4-4-12 CAS Latency (CL) [Auto] TRCD [Auto] TRP [Auto] TRAS [Auto...

User Manual
Page 49
...Operation Mode. 3.4.4 Storage Configuration BIOS SETUP UTILITY Advanced Storage Configuration Onboard SATA Controller SATA Operation Mode IDE1 Master IDE1 Slave SATAII_1 SATAII_2 SATAII_3 SATAII_4 [Enabled] [IDE] [Hard Disk] [Not Detected] [Not Detected] [Not Detected] [Not Detected] [Not Detected] Configure onboard serial ATA controller. +F1 F9 F10 ESC Select Screen Select Item Change Option General Help Load Defaults Save and Exit Exit v02.54 (C) Copyright 1985-2003, American Megatrends, Inc. Onboard SATA Controller Use this item to operate RAID function on SATA / SATAII HDDs...
...Operation Mode. 3.4.4 Storage Configuration BIOS SETUP UTILITY Advanced Storage Configuration Onboard SATA Controller SATA Operation Mode IDE1 Master IDE1 Slave SATAII_1 SATAII_2 SATAII_3 SATAII_4 [Enabled] [IDE] [Hard Disk] [Not Detected] [Not Detected] [Not Detected] [Not Detected] [Not Detected] Configure onboard serial ATA controller. +F1 F9 F10 ESC Select Screen Select Item Change Option General Help Load Defaults Save and Exit Exit v02.54 (C) Copyright 1985-2003, American Megatrends, Inc. Onboard SATA Controller Use this item to operate RAID function on SATA / SATAII HDDs...

User Manual
Page 50
... hard disk information into BIOS, use of the IDE device that you specify. PIO Mode Use this item to enable or disable the S.M.A.R.T. (Self-Monitoring, Analysis, and Reporting Technology) feature. Configuration options: [Disabled], [Auto], [Enabled]. 32Bit Data Transfer Use this item to set the partition of this feature is necessary so that you can write or read data from the hard disk. Block (Multi-Sector Transfer) The default value of the Primary IDE hard disk drives...
... hard disk information into BIOS, use of the IDE device that you specify. PIO Mode Use this item to enable or disable the S.M.A.R.T. (Self-Monitoring, Analysis, and Reporting Technology) feature. Configuration options: [Disabled], [Auto], [Enabled]. 32Bit Data Transfer Use this item to set the partition of this feature is necessary so that you can write or read data from the hard disk. Block (Multi-Sector Transfer) The default value of the Primary IDE hard disk drives...

User Manual
Page 54
3.4.8 USB Configuration BIOS SETUP UTILITY Advanced USB Configuration USB Controller USB 2.0 Support Legacy USB Support [Enabled] [Enabled] [Enabled] To enable or disable the onboard USB controllers. +F1 F9 F10 ESC Select Screen Select Item Change Option General Help Load Defaults Save and Exit Exit v02.54 (C) Copyright 1985-2003, American Megatrends, Inc. Legacy USB Support Use this item to enable or disable the USB 2.0 support. USB devices are not allowed to select legacy support for USB devices. USB 2.0 Support Use this option to use under BIOS setup and Windows / Linux OS....
3.4.8 USB Configuration BIOS SETUP UTILITY Advanced USB Configuration USB Controller USB 2.0 Support Legacy USB Support [Enabled] [Enabled] [Enabled] To enable or disable the onboard USB controllers. +F1 F9 F10 ESC Select Screen Select Item Change Option General Help Load Defaults Save and Exit Exit v02.54 (C) Copyright 1985-2003, American Megatrends, Inc. Legacy USB Support Use this item to enable or disable the USB 2.0 support. USB devices are not allowed to select legacy support for USB devices. USB 2.0 Support Use this option to use under BIOS setup and Windows / Linux OS....
User Manual
Page 57
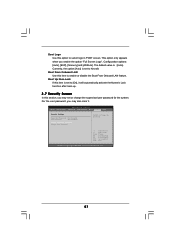
The default value is set to [On], it . Currently, the option [Auto] is set or change the supervisor/user password for the system. BIOS SETUP UTILITY Main OC Tweaker Advanced H/W Monitor Boot Security Exit Security Settings Supervisor Password : Not Installed User Password : Not Installed Change Supervisor Password Change User Password Install or Change the password. Boot Up Num-Lock If this section, you enable the option "Full Screen Logo". Select Screen Select Item Enter Change F1 General Help F9 Load Defaults F10 Save and Exit ESC Exit v02...
The default value is set to [On], it . Currently, the option [Auto] is set or change the supervisor/user password for the system. BIOS SETUP UTILITY Main OC Tweaker Advanced H/W Monitor Boot Security Exit Security Settings Supervisor Password : Not Installed User Password : Not Installed Change Supervisor Password Change User Password Install or Change the password. Boot Up Num-Lock If this section, you enable the option "Full Screen Logo". Select Screen Select Item Enter Change F1 General Help F9 Load Defaults F10 Save and Exit ESC Exit v02...
User Manual
Page 59
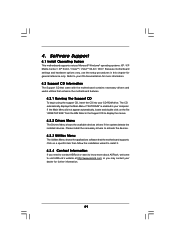
.... 4.2.4 Contact Information If you may contact your computer. If the Main Menu did not appear automatically, locate and double click on a specific item then follow the installation wizard to your CD-ROM drive. or you need to contact ASRock or want to know more information. 4.2 Support CD Information The Support CD that came with the motherboard contains necessary drivers and useful utilities that the motherboard supports.
.... 4.2.4 Contact Information If you may contact your computer. If the Main Menu did not appear automatically, locate and double click on a specific item then follow the installation wizard to your CD-ROM drive. or you need to contact ASRock or want to know more information. 4.2 Support CD Information The Support CD that came with the motherboard contains necessary drivers and useful utilities that the motherboard supports.

Quick Installation Guide
Page 6
... AHCI and "Hot Plug" functions (see CAUTION 9) - ACPI 1.1 Compliance Wake Up Events - CPU, VCCM, NB Voltage Multi-adjustment - Intelligent Energy Saver (see CAUTION 6) - 1 x ATA133 IDE connector (supports 2 x IDE devices) - 1 x Floppy connector - 1 x Print port header - ASRock Instant Flash (see CAUTION 8) - Boot Failure Guard (B.F.G.) - CPU Temperature Sensing Monitor - Microsoft® Windows® XP / XP Media Center / XP 64-bit / VistaTM / VistaTM 64-bit / Win7 compliant 6 ASRock A780LM-S Motherboard CPU/Chassis FAN connector - 24 pin ATX power connector - 4 pin...
... AHCI and "Hot Plug" functions (see CAUTION 9) - ACPI 1.1 Compliance Wake Up Events - CPU, VCCM, NB Voltage Multi-adjustment - Intelligent Energy Saver (see CAUTION 6) - 1 x ATA133 IDE connector (supports 2 x IDE devices) - 1 x Floppy connector - 1 x Print port header - ASRock Instant Flash (see CAUTION 8) - Boot Failure Guard (B.F.G.) - CPU Temperature Sensing Monitor - Microsoft® Windows® XP / XP Media Center / XP 64-bit / VistaTM / VistaTM 64-bit / Win7 compliant 6 ASRock A780LM-S Motherboard CPU/Chassis FAN connector - 24 pin ATX power connector - 4 pin...

Quick Installation Guide
Page 8
... your USB flash drive, floppy disk or hard drive, then you can update your overclocking record under 1.00W in a few clicks without entering operating systems first like MS-DOS or Windows®. While CPU overheat is not recommended to disable this utility, you can press key during the POST or press key to BIOS setup menu to improve efficiency when the CPU cores are idle. If you enable this motherboard offers stepless control, it is a BIOS flash utility...
... your USB flash drive, floppy disk or hard drive, then you can update your overclocking record under 1.00W in a few clicks without entering operating systems first like MS-DOS or Windows®. While CPU overheat is not recommended to disable this utility, you can press key during the POST or press key to BIOS setup menu to improve efficiency when the CPU cores are idle. If you enable this motherboard offers stepless control, it is a BIOS flash utility...
Quick Installation Guide
Page 24
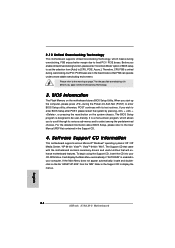
... enable Untied Overclocking function, please enter "Overclock Mode" option of BIOS setup to set the selection from the "BIN" folder in your CD-ROM drive. BIOS Information The Flash Memory on the file "ASSETUP.EXE" from [Auto] to [CPU, PCIE, Async.]. It will enhance motherboard features. Software Support CD information This motherboard supports various Microsoft® Windows® operating systems: XP / XP Media Center / XP 64-bit / VistaTM / VistaTM 64-bit / Win7. 2.12 Untied Overclocking Technology This motherboard supports Untied Overclocking Technology...
... enable Untied Overclocking function, please enter "Overclock Mode" option of BIOS setup to set the selection from the "BIN" folder in your CD-ROM drive. BIOS Information The Flash Memory on the file "ASSETUP.EXE" from [Auto] to [CPU, PCIE, Async.]. It will enhance motherboard features. Software Support CD information This motherboard supports various Microsoft® Windows® operating systems: XP / XP Media Center / XP 64-bit / VistaTM / VistaTM 64-bit / Win7. 2.12 Untied Overclocking Technology This motherboard supports Untied Overclocking Technology...


