User Manual
Page 3
... Basic OS 9 1.4 Supported PCI Express VGA Card List for SATA / SATAII HDDs 28 2.14 SATA / SATAII HDD Hot Plug Feature and Operation Guide 29 2.15 Driver Installation Guide 31 2.16 Installing Windows® 2000 / XP / XP 64-bit / VistaTM / VistaTM 64-bit With RAID Functions 31 2.16.1 Installing Windows® 2000...
... Basic OS 9 1.4 Supported PCI Express VGA Card List for SATA / SATAII HDDs 28 2.14 SATA / SATAII HDD Hot Plug Feature and Operation Guide 29 2.15 Driver Installation Guide 31 2.16 Installing Windows® 2000 / XP / XP 64-bit / VistaTM / VistaTM 64-bit With RAID Functions 31 2.16.1 Installing Windows® 2000...
User Manual
Page 4
... 3.5.1 Boot Settings Configuration 49 3.6 Security Screen 49 3.7 Exit Screen 50 4. Software Support 51 4.1 Install Operating System 51 4.2 Support CD Information 51 4.2.1 Running Support CD 51 4.2.2 Drivers Menu 51 4.2.3 Utilities Menu 51 4.2.4 Contact Information 51 4
... 3.5.1 Boot Settings Configuration 49 3.6 Security Screen 49 3.7 Exit Screen 50 4. Software Support 51 4.1 Install Operating System 51 4.2 Support CD Information 51 4.2.1 Running Support CD 51 4.2.2 Drivers Menu 51 4.2.3 Utilities Menu 51 4.2.4 Contact Information 51 4
User Manual
Page 7
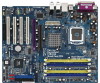
... 2.0 headers (support 4 USB 2.0 ports) (see CAUTION 10) - 2 x ATA133 IDE connectors (support 4 x IDE devices) - 1 x Floppy connector - 1 x IR header - 1 x Game header - 1 x HDMI_SPDIF header - Supports "Plug and Play" - Drivers, Utilities, AntiVirus Software (Trial Version) - CD in the BIOS, applying Untied Overclocking Technology, or using the thirdparty overclocking tools. AMI Legal BIOS - Voltage Monitoring: +12V...
... 2.0 headers (support 4 USB 2.0 ports) (see CAUTION 10) - 2 x ATA133 IDE connectors (support 4 x IDE devices) - 1 x Floppy connector - 1 x IR header - 1 x Game header - 1 x HDMI_SPDIF header - Supports "Plug and Play" - Drivers, Utilities, AntiVirus Software (Trial Version) - CD in the BIOS, applying Untied Overclocking Technology, or using the thirdparty overclocking tools. AMI Legal BIOS - Voltage Monitoring: +12V...
User Manual
Page 8
...please read "Untied Overclocking Technology" on the AGP slot of the system or damage the CPU. 6. For microphone input, this motherboard! ASRock website http://www.asrock.com 8 This motherboard supports Dual Channel Memory Technology. Do NOT use a 3.3V AGP card on page 33 for details. 4. Before ...motherboard functions properly and unplug the power cord, then plug it to SATAII connector directly. 11. As long as we have the latest driver, we will automatically shutdown. Before you install the PC system. 7. For the information of memory modules on page 10. When you...
...please read "Untied Overclocking Technology" on the AGP slot of the system or damage the CPU. 6. For microphone input, this motherboard! ASRock website http://www.asrock.com 8 This motherboard supports Dual Channel Memory Technology. Do NOT use a 3.3V AGP card on page 33 for details. 4. Before ...motherboard functions properly and unplug the power cord, then plug it to SATAII connector directly. 11. As long as we have the latest driver, we will automatically shutdown. Before you install the PC system. 7. For the information of memory modules on page 10. When you...
User Manual
Page 9
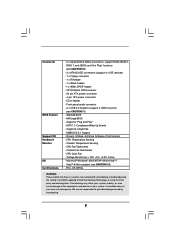
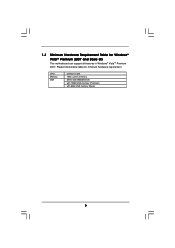
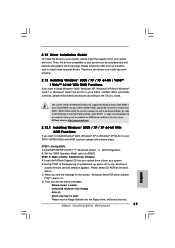
Please follow below table for Windows® VistaTM Premium 2007 and Basic OS This motherboard can support all features in Windows® VistaTM Premium 2007. 1.3 Minimum Hardware Requirement Table for minimum hardware requirement. CPU Memory VGA Celeron D 326 1GB system memory DX9.0 with WDDM Driver with 128bit VGA memory (Premium) with 64bit VGA memory (Basic) 9
Please follow below table for Windows® VistaTM Premium 2007 and Basic OS This motherboard can support all features in Windows® VistaTM Premium 2007. 1.3 Minimum Hardware Requirement Table for minimum hardware requirement. CPU Memory VGA Celeron D 326 1GB system memory DX9.0 with WDDM Driver with 128bit VGA memory (Premium) with 64bit VGA memory (Basic) 9
User Manual
Page 26
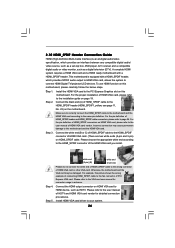
... and the VGA card may cause permanent damage to the installation guide on this motherboard and the HDMI VGA card. Step 4. Install HDMI VGA card driver to page 24. Install the HDMI VGA card to the fan connector of HDMI_SPDIF header and HDMI_SPDIF cable connectors, please refer to your system. 26...
... and the VGA card may cause permanent damage to the installation guide on this motherboard and the HDMI VGA card. Step 4. Install HDMI VGA card driver to page 24. Install the HDMI VGA card to the fan connector of HDMI_SPDIF header and HDMI_SPDIF cable connectors, please refer to your system. 26...

User Manual
Page 29
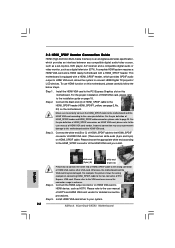
... definitely not able to support Hot Plug and will be damaged under the Hot Plug operation. 3. Please make sure the SATA / SATAII driver is available on our website: www.asrock.com 2. SATA power cable with SATA 15-pin power connector interface A. Make sure your dealer or HDD user manual. 2.14 SATA / SATAII...: 1. Points of our motherboard is designed only for SATA / SATAII HDD. Below operation procedure is indicated in the product spec on our support website: www.asrock.com 4. The latest SATA / SATAII driver is installed into system properly.
... definitely not able to support Hot Plug and will be damaged under the Hot Plug operation. 3. Please make sure the SATA / SATAII driver is available on our website: www.asrock.com 2. SATA power cable with SATA 15-pin power connector interface A. Make sure your dealer or HDD user manual. 2.14 SATA / SATAII...: 1. Points of our motherboard is designed only for SATA / SATAII HDD. Below operation procedure is indicated in the product spec on our support website: www.asrock.com 4. The latest SATA / SATAII driver is installed into system properly.
User Manual
Page 31
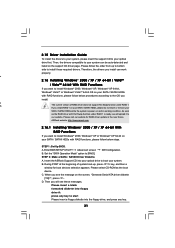
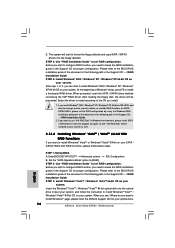
...to [RAID]. Please follow the order from up , press key, and then a window for RAID driver update in working condition. As soon as the boot device. ASRock website: http://www.asrock.com 2.16.1 Installing Windows® 2000 / XP / XP 64-bit With RAID Functions If ... power on the support CD driver page. STEP 2: Make a SATA / SATAII Driver Diskette. A. Enter BIOS SETUP UTILITY Advanced screen IDE Configuration. If you see these messages, Please insert a blank formatted diskette into floppy drive A: press any key. 31 Insert the ASRock Support CD into the floppy ...
...to [RAID]. Please follow the order from up , press key, and then a window for RAID driver update in working condition. As soon as the boot device. ASRock website: http://www.asrock.com 2.16.1 Installing Windows® 2000 / XP / XP 64-bit With RAID Functions If ... power on the support CD driver page. STEP 2: Make a SATA / SATAII Driver Diskette. A. Enter BIOS SETUP UTILITY Advanced screen IDE Configuration. If you see these messages, Please insert a blank formatted diskette into floppy drive A: press any key. 31 Insert the ASRock Support CD into the floppy ...
User Manual
Page 32
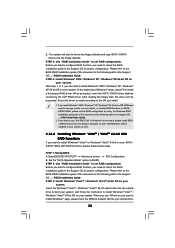
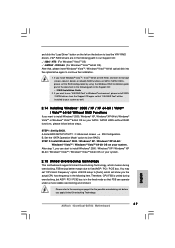
... Windows® VistaTM / Windows® VistaTM 64-bit optical disk into the optical drive to set RAID configuration. page, please insert the ASRock Support CD into the floppy diskette. STEP 3: Use "RAID Installation Guide" to boot your optical drive, 32 After reading the floppy disk, the...® VistaTM / Windows® VistaTM 64-bit OS on your system. When prompted, insert the SATA / SATAII driver diskette containing the VIA® RAID driver. Select the driver to install according to the OS you want to install Windows® VistaTM or Windows® VistaTM 64-bit on ...
... Windows® VistaTM / Windows® VistaTM 64-bit optical disk into the optical drive to set RAID configuration. page, please insert the ASRock Support CD into the floppy diskette. STEP 3: Use "RAID Installation Guide" to boot your optical drive, 32 After reading the floppy disk, the...® VistaTM / Windows® VistaTM 64-bit OS on your system. When prompted, insert the SATA / SATAII driver diskette containing the VIA® RAID driver. Select the driver to install according to the OS you want to install Windows® VistaTM or Windows® VistaTM 64-bit on ...
User Manual
Page 33
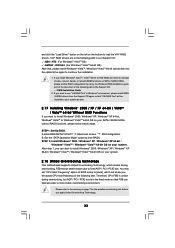
... the Windows RAID installation guide part of the document in the following path in the following path in Windows® environment, please install SATA / SATAII drivers from the Support CD again so that "VIA RAID Tool" will show you the actual CPU host frequency in the Support CD: .. \ RAID Installation... If you install Windows® VistaTM / VistaTM 64-bit on IDE HDDs and want to fixed AGP / PCI / PCIE bus. A. and click the "Load Driver" button on the left on the bottom to continue the installation. 1. Therefore, CPU FSB is in the fixed mode so that , please insert Windows®...
... the Windows RAID installation guide part of the document in the following path in the following path in Windows® environment, please install SATA / SATAII drivers from the Support CD again so that "VIA RAID Tool" will show you the actual CPU host frequency in the Support CD: .. \ RAID Installation... If you install Windows® VistaTM / VistaTM 64-bit on IDE HDDs and want to fixed AGP / PCI / PCIE bus. A. and click the "Load Driver" button on the left on the bottom to continue the installation. 1. Therefore, CPU FSB is in the fixed mode so that , please insert Windows®...
User Manual
Page 51
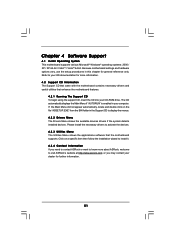
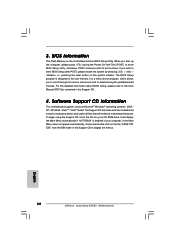
... may contact your CD-ROM drive. or you need to contact ASRock or want to display the menus. 4.2.2 Drivers Menu The Drivers Menu shows the available devices drivers if the system detects installed devices. The CD automatically displays the Main... know more information. 4.2 Support CD Information The Support CD that came with the motherboard contains necessary drivers and useful utilities that the motherboard supports. Click on the file "ASSETUP.EXE" from the BIN folder ...this chapter for further information. 51 Please install the necessary drivers to visit ASRock's website at http://www...
... may contact your CD-ROM drive. or you need to contact ASRock or want to display the menus. 4.2.2 Drivers Menu The Drivers Menu shows the available devices drivers if the system detects installed devices. The CD automatically displays the Main... know more information. 4.2 Support CD Information The Support CD that came with the motherboard contains necessary drivers and useful utilities that the motherboard supports. Click on the file "ASSETUP.EXE" from the BIN folder ...this chapter for further information. 51 Please install the necessary drivers to visit ASRock's website at http://www...
Quick Installation Guide
Page 6
... realize that there is a certain risk involved with overclocking, including adjusting the setting in header - CPU Quiet Fan - CPU Temperature Sensing - Supports "Plug and Play" - Drivers, Utilities, AntiVirus Software (Trial Version) - CPU/Chassis FAN connector - 20 pin ATX power connector - 4 pin 12V power connector - Chassis Fan Tachometer - English 6 ASRock 4CoreDual-SATA2 Motherboard
... realize that there is a certain risk involved with overclocking, including adjusting the setting in header - CPU Quiet Fan - CPU Temperature Sensing - Supports "Plug and Play" - Drivers, Utilities, AntiVirus Software (Trial Version) - CPU/Chassis FAN connector - 20 pin ATX power connector - 4 pin 12V power connector - Chassis Fan Tachometer - English 6 ASRock 4CoreDual-SATA2 Motherboard
Quick Installation Guide
Page 7
...6. For microphone input, this motherboard, FSB frequency may cause permanent damage! 9. Power Management for Microsoft® Windows® VistaTM / VistaTM 64bit driver and related information. To improve heat dissipation, remember to SATAII connector directly. 11. Please check the table on page 23 to adjust your SATAII ...system, please check if the CPU fan on page 27 for proper installation. 5. Microsoft® Windows® VistaTM / VistaTM 64-bit driver keeps on page 13 for details. 4. ASRock website http://www.asrock.com 7 ASRock 4CoreDual-SATA2 Motherboard English
...6. For microphone input, this motherboard, FSB frequency may cause permanent damage! 9. Power Management for Microsoft® Windows® VistaTM / VistaTM 64bit driver and related information. To improve heat dissipation, remember to SATAII connector directly. 11. Please check the table on page 23 to adjust your SATAII ...system, please check if the CPU fan on page 27 for proper installation. 5. Microsoft® Windows® VistaTM / VistaTM 64-bit driver keeps on page 13 for details. 4. ASRock website http://www.asrock.com 7 ASRock 4CoreDual-SATA2 Motherboard English
Quick Installation Guide
Page 8
1.3 Minimum Hardware Requirement Table for minimum hardware requirement. Please follow below table for Windows® VistaTM Premium 2007 and Basic OS This motherboard can support all features in Windows® VistaTM Premium 2007. CPU Memory VGA Celeron D 326 1GB system memory DX9.0 with WDDM Driver with 128bit VGA memory (Premium) with 64bit VGA memory (Basic) English 8 ASRock 4CoreDual-SATA2 Motherboard
1.3 Minimum Hardware Requirement Table for minimum hardware requirement. Please follow below table for Windows® VistaTM Premium 2007 and Basic OS This motherboard can support all features in Windows® VistaTM Premium 2007. CPU Memory VGA Celeron D 326 1GB system memory DX9.0 with WDDM Driver with 128bit VGA memory (Premium) with 64bit VGA memory (Basic) English 8 ASRock 4CoreDual-SATA2 Motherboard
Quick Installation Guide
Page 22
... white end (3-pin) (C) Step 4. Please do not connect the white end of HDMI VGA card or other VGA card. Install HDMI VGA card driver to the installation guide on HDMI VGA card to the same pin definition. A complete HDMI system requires a HDMI VGA card and a HDMI ready ...5. Connect the HDMI output connector on page 15. Step 2. For the pin definition of HDMI VGA card, please refer to your system. 22 ASRock 4CoreDual-SATA2 Motherboard Step 3. Please refer to the user manual of HDTV and HDMI VGA card vendor for connector usage in advance. Connect the white end ...
... white end (3-pin) (C) Step 4. Please do not connect the white end of HDMI VGA card or other VGA card. Install HDMI VGA card driver to the installation guide on HDMI VGA card to the same pin definition. A complete HDMI system requires a HDMI VGA card and a HDMI ready ...5. Connect the HDMI output connector on page 15. Step 2. For the pin definition of HDMI VGA card, please refer to your system. 22 ASRock 4CoreDual-SATA2 Motherboard Step 3. Please refer to the user manual of HDTV and HDMI VGA card vendor for connector usage in advance. Connect the white end ...
Quick Installation Guide
Page 25
...CD into your optical drive to your optical drive first. Then, the drivers compatible to your SATA / SATAII HDDs with Hot Swap function under RAID 1. As soon as the boot device. ASRock website: http://www.asrock.com 2.13.1 Installing Windows® 2000 / XP / XP 64-..." option to our website. Please select CD-ROM as the RAID driver with RAID functions, please follow below procedures according to start Please insert a floppy diskette into floppy drive A: press any key. 25 ASRock 4CoreDual-SATA2 Motherboard English When you see these messages, Please insert a blank formatted...
...CD into your optical drive to your optical drive first. Then, the drivers compatible to your SATA / SATAII HDDs with Hot Swap function under RAID 1. As soon as the boot device. ASRock website: http://www.asrock.com 2.13.1 Installing Windows® 2000 / XP / XP 64-..." option to our website. Please select CD-ROM as the RAID driver with RAID functions, please follow below procedures according to start Please insert a floppy diskette into floppy drive A: press any key. 25 ASRock 4CoreDual-SATA2 Motherboard English When you see these messages, Please insert a blank formatted...
Quick Installation Guide
Page 26
...174; XP 64-bit OS on your optical drive, 26 ASRock 4CoreDual-SATA2 Motherboard English Please refer to the BIOS RAID installation guide of the document in the following path in Windows® environment, please install SATA / SATAII drivers from the Support CD again so that "VIA RAID Tool"...IDE Configuration. page, please insert the ASRock Support CD into your system. Before you start to manage (create, convert, delete, or rebuild) RAID functions on your system. When prompted, insert the SATA / SATAII driver diskette containing the VIA® RAID driver. STEP 1: Set Up BIOS. Set ...
...174; XP 64-bit OS on your optical drive, 26 ASRock 4CoreDual-SATA2 Motherboard English Please refer to the BIOS RAID installation guide of the document in the following path in Windows® environment, please install SATA / SATAII drivers from the Support CD again so that "VIA RAID Tool"...IDE Configuration. page, please insert the ASRock Support CD into your system. Before you start to manage (create, convert, delete, or rebuild) RAID functions on your system. When prompted, insert the SATA / SATAII driver diskette containing the VIA® RAID driver. STEP 1: Set Up BIOS. Set ...
Quick Installation Guide
Page 27
... Windows® 2000 / XP / XP 64-bit / VistaTM / VistaTM 64-bit Without RAID Functions If you apply Untied Overclocking Technology. 27 ASRock 4CoreDual-SATA2 Motherboard English Enter BIOS SETUP UTILITY Advanced screen IDE Configuration. Therefore, CPU FSB is in the following item. Please refer to the warning on SATA... Up BIOS. You may set the RAID configuration by using the Windows RAID installation guide part of BIOS setup to load the VIA® RAID drivers. If you want to use "VIA RAID Tool" in our Support CD: .. \ I386 \ NT5 (For Windows® VistaTM OS) .. \ AMD64 \ 2003x64...
... Windows® 2000 / XP / XP 64-bit / VistaTM / VistaTM 64-bit Without RAID Functions If you apply Untied Overclocking Technology. 27 ASRock 4CoreDual-SATA2 Motherboard English Enter BIOS SETUP UTILITY Advanced screen IDE Configuration. Therefore, CPU FSB is in the following item. Please refer to the warning on SATA... Up BIOS. You may set the RAID configuration by using the Windows RAID installation guide part of BIOS setup to load the VIA® RAID drivers. If you want to use "VIA RAID Tool" in our Support CD: .. \ I386 \ NT5 (For Windows® VistaTM OS) .. \ AMD64 \ 2003x64...
Quick Installation Guide
Page 28
... the reset button on the system chassis. If you wish to display the menus. 28 ASRock 4CoreDual-SATA2 Motherboard English EXE" from the BIN folder in your CD-ROM drive. otherwise, POST continues with the motherboard contains necessary drivers and useful utilities that came with its various sub-menus and to enter BIOS Setup...
... the reset button on the system chassis. If you wish to display the menus. 28 ASRock 4CoreDual-SATA2 Motherboard English EXE" from the BIN folder in your CD-ROM drive. otherwise, POST continues with the motherboard contains necessary drivers and useful utilities that came with its various sub-menus and to enter BIOS Setup...


