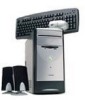
eMachines T2542 Support Question
eMachines T2542 Support Question
Find answers below for this question about eMachines T2542 - 256 MB RAM.Need a eMachines T2542 manual? We have 2 online manuals for this item!
Question posted by Dolphas1 on May 26th, 2016
I Need A Manual/diagram For The T2542 Motherboard
need to find out if it has spdif connection on the board
Current Answers


Related eMachines T2542 Manual Pages
User Guide - Page 1

... or short out parts that could result in this manual.
3 Do not use this computer near or over a radiator or heat register. Only connect this computer to rest on your obsolete outlet. Also...will walk on a bed, sofa, rug or other similar surface. This product should never be connected to protect it does not exceed the amperage rating of any kind into a grounding-type power ...
User Guide - Page 2
... been exposed to remove the main system unit cover, observe the following conditions: 1 If the power cord or plug is
plugged back in performance indicating a need for service.
Stop
If you ever have to rain or water. 4 If the product has been dropped or the cabinet has been damaged. 5 If the...
User Guide - Page 7
... Media 3-3 Using an Optical Drive 3-4 Using Special Keys on the Keyboard 3-5 Using a Mouse ...3-6 Changing the Display Resolution and Color Depth 3-7 Controlling the Audio Volume 3-7
vii Connecting Your Peripheral Devices 2-3 4. Selecting a Location 2-1 2. CONTENTS
Chapter 1 Chapter 2
Chapter 3
Introduction
System Overview...1-1
Setting Up Your System
1.
User Guide - Page 11

....
Chapter 1 No electromagnetic interference. Moderate environment conditions. Setting Up Your System 2-1 You need one outlet for the computer, one for the monitor, and an additional outlet for a... floors attract static electricity, which generates an electromagnetic field. To prevent static charges, connect all of space around the computer so air can erase data on /off your computer...
User Guide - Page 13
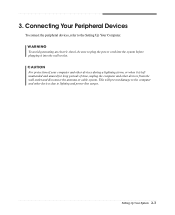
... disconnect the antenna or cable system. WARNING To avoid generating an electric shock, be sure to lighting and power line surges. Setting Up Your System 2-3 Connecting Your Peripheral Devices
To connect the peripheral devices, refer to the Setting Up Your Computer.
3.
User Guide - Page 14

...; .
4. To start Windows, remove the Restore CD and restart the computer. Turning Off the Computer
To turn on the monitor, and any other peripheral devices connected to your information and close all application programs you use. 2. Turning the Computer On and Off
Follow the instructions below to turn off your computer...
User Guide - Page 15

... pops, remove it clicks into the drive, as OS/2 Warp or UNIX, see the manual that you are using Windows® with the label facing up and the metal shutter leading into place. The... procedures in this manual assume that came with already installed on installation and use. NOTE Never remove a disk or turn ...
User Guide - Page 18
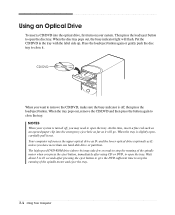
... tray pops out, remove the CD/DVD and then press the button again to close it. The high speed DVD-ROM drive (above 6x) may need to open the tray. When the disc tray pops out, the busy indicator light will go. CD/DVD
When you want to remove the CD...
User Guide - Page 21
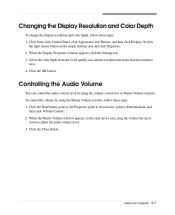
... device area, drag the volume bar up or
down to Entertainment, and
then click Volume Control. 2. Or click
the right mouse button on the empty desktop area and click Properties. 2. Controlling the Audio Volume
You can control the audio volume level by using the volume control box or Master Volume window...
User Guide - Page 23

...access its power source and from any telecommunications links, networks, or modems before performing any cables connected to remove the cover of all, disconnect the power cable from the electrical outlet and from ... any of the procedures described in this chapter. Removing the Cover
You need to the computer. Turn off the computer.
NOTE Turn off the computer and peripheral devices including the...
User Guide - Page 26
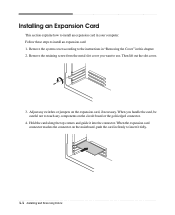
... the metal slot cover you handle the card, be careful not to use. When you want to touch any switches or jumpers on the circuit board or the gold-edged connector.
4. Hold the card along the top corners and guide it fully.
4-4 Installing and Removing Drives Remove the system cover according...
User Guide - Page 27
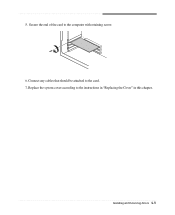
Installing and Removing Drives 4-5 Secure the end of the card to the instructions in "Replacing the Cover" in this chapter. 5. Replace the system cover according to the computer with retaining screw. 6.
Connect any cables that should be attached to the card. 7.
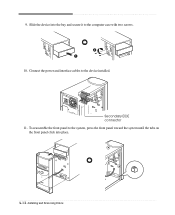
User Guide - Page 30

Slide the HDD bracket into the chassis and secure it .)
9. Connect the power and hard disk drive cable to the instructions in "Replacing the Cover" in this chapter. 4-8 Installing and Removing Drives 7. Replace the system cover according to your hard disk drive. (If you removed the hard disk drive cable from the motherboard, replace it with the retaining screw, as shown below.
8.
User Guide - Page 33

.... Push out the faceplate, pressing outward two tabs on both ends of your computer. NOTES Like a hard disk drive, most optional devices have jumpers that connected to use the spare connector of the cable connector that must set for the drive to work properly with your optional device to location of...
User Guide - Page 34
Slide the device into place.
4-12 Installing and Removing Drives Connect the power and interface cables to the computer case with two screws.
10. To reassemble the front panel to the system, press the front panel toward the system until the tabs on the front panel click into the bay and secure it to the device installed. 9. Secondary EIDE connector 11.
User Guide - Page 35
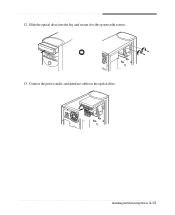
Connect the power, audio, and interface cables to the system with screws. 13. Installing and Removing Drives 4-13
Slide the optical drive into the bay and secure it to the optical drive. 12.
User Guide - Page 43

... doesn't work
Chapter 1
Solution
Computer is firmly plugged into the wall outlet and into the wall outlet. Make sure the power cord is not properly connected to a grounded wall outlet. Check for lost allocation units by sudden power failure, it will not operate if you might experience when using your hard...
User Guide - Page 44
... the CD/DVD should be facing up.)
CD/DVD is turned down . When the Master Volume window appears, verify that the speakers are not properly connected.
Volume is dirty. The speakers are properly connected to open the tray when I control the audio volume level?
User Guide - Page 45

... controls on the empty desktop area and click Properties. 2. Make sure the power cord is damaged. You have a screen blanking utility installed or your mouse. To change the display resolution or color depth?
When the Display Properties window appears, click the Settings tab. 3. Monitor is not properly connected to the Windows Help...
User Guide - Page 46
... mouse ball by unscrewing the bottom of your computer, not the keyboard connector. Mouse needs cleaning. Then clean the mouse ball with a damp cloth and replace the mouse ball. A-4 Solving Common Problems Check that the keyboard is connected to the mouse connector on the back of the mouse. Mouse
Cause Mouse doesn...
Similar Questions

When I Turn The Computer On The Tower Only Comes On And The Monitor Comes On But
Self test check your PC and signal cable
Self test check your PC and signal cable
(Posted by jbyrd3115 2 years ago)

Looking For Jumper And Front Panel Connections For Emachine T3418 Manual?
I upgraded my Emachine T3418 and accidentally pulled the power switch, Harddrive LED and Power LED c...
I upgraded my Emachine T3418 and accidentally pulled the power switch, Harddrive LED and Power LED c...
(Posted by BvPc 9 years ago)

Mother Board For Emachines Et1641-02w
if the main mother board goes out can you use i different one that's not the same thing if not what ...
if the main mother board goes out can you use i different one that's not the same thing if not what ...
(Posted by amandahwoodring 11 years ago)


How And What Is Need To Connect 5.1 Speakers
(Posted by freddy202014477 12 years ago)