Get support for Whirlpool WMH2175XVS - Microwave

Whirlpool WMH2175XVS Support Question

Whirlpool WMH2175XVS Support Question

Find answers below for this question about Whirlpool WMH2175XVS - Microwave.
Need a Whirlpool WMH2175XVS manual? We have 4 online manuals for this item!
Question posted by roslvb on October 15th, 2014

Whirlpool Wmh2175xvs Where To Buy

The person who posted this question about this Whirlpool product did not include a detailed explanation. Please use the "Request More Information" button to the right if more details would help you to answer this question.

Current Answers

Answer #1: Posted by BusterDoogen on October 15th, 2014 12:19 PM
This answer was accepted by the poster of the original question.
BusterDoogen

Member since:
October 30th, 2011

Points: 28,565,447
1,100
points
Check here or here; this model has been discontinued, you may have to buy the newer model.

I hope this is helpful to you!

Please respond to my effort to provide you with the best possible solution by using the "Acceptable Solution" and/or the "Helpful" buttons when the answer has proven to be helpful. Please feel free to submit further info for your question, if a solution was not provided. I appreciate the opportunity to serve you!

Related Whirlpool WMH2175XVS Manual Pages

Dimension Guide - Page 1

® Microwave Hood Combination PRODUCT MODEL NUMBERS GMH3204XV GMH5205XV GMH6185XV WMH1162XV WMH1163XV WMH1164XW WMH2175XV WMH2205XV WMH3205XV ...Whirlpool Corporation policy includes a continuous commitment to round transition piece so that a separate circuit serving only this microwave oven be inside the upper cabinet. W10247296B 9/30/10 To calculate the length of the microwave oven...
Installation Instructions - Page 1

...Stud(s 6 Mark Rear Wall 7 Drill Holes in these installation instructions. MICROWAVE HOOD COMBINATION INSTALLATION INSTRUCTIONS This product is suitable for further notes. These ... Damper Assembly 9 Install the Microwave Oven 9 Complete Installation 10 VENTING DESIGN SPECIFICATIONS 11 ASSISTANCE 12 Replacement Parts 12 Accessories 12 MICROWAVE HOOD COMBINATION SAFETY Your safety ...
Installation Instructions - Page 2

...; Duct tape Parts Supplied For reorder information, see "Replacement Parts" section. A B C D E FG H A. 1/4-20 x 3" round-head bolts (2) B. 1/4-20 x 3" flat-head bolts (2) C. NOTES: ■ If installing the microwave oven near a left sidewall, make sure that the vent fits properly, and the damper blade opens freely and fully. hole drill ■ No. 2 Phillips screwdriver bit...
Installation Instructions - Page 3

...have a qualified electrician or serviceman install an outlet near the microwave oven. Failure to whether the microwave oven is equipped with a cord having a grounding wire with a... the power supply cord is properly installed and grounded. Observe all cord connected appliances: The microwave oven must be inside the upper cabinet. See "Electrical Requirements" section. Required: ■ A...
Installation Instructions - Page 4

... is set aside. 3. A A. Wall Venting Installation Only 1. Remove screws attaching damper plate to the back of the microwave oven, remove it and set it may be used. Rotate Blower Motor The microwave oven is attached to top of microwave oven exterior. Screws (in another location where wall or roof venting may be attached to back of...
Installation Instructions - Page 5

... Installation Only 1. Repeat Step 3 from "Wall Venting Installation Only." 2. Make sure damper plate tabs are inserted into microwave oven. Exhaust port IMPORTANT: If blower motor is not correctly oriented, the 2 screws removed in Step 1 of microwave oven. Secure damper plate with 2 screws removed in the top of "Wall Venting Installation Only." Rotate blower motor...
Installation Instructions - Page 6

.... Wall Stud at One End Hole Figure 3 Wall Studs at End Holes Figure 2 B C C C D B D A A A A E E E E F F NOTE: If wall stud is within the opening , do not install the microwave oven. 1. Mounting plate center markers 6
Installation Instructions - Page 7

... 1 wall stud, preferably 2, using a minimum of 1 lag screw, preferably 2. 1. Drill 3/16" (5 mm) hole(s) into the wall stud(s) at End Holes (Figures 1 & 2) 1. Mark Rear Wall The microwave oven must align with front edge of cabinet.
Installation Instructions - Page 8

...mounting plate on bolts from the rear wall to use as guides. ■ If the wall behind the microwave oven (as at One End Hole" in the "Drill Holes in Step 3 of "Mark Rear Wall." 2. ...stud(s) in Step 2 of the tiles rather than the drywall). 4. Refer to the thickest part of the microwave oven. No Wall Studs at End Holes (Figures 1 & 2) NOTE: The mounting plate must be secured to ...
Installation Instructions - Page 9

... metal screws 3. Support tabs 4. Metal cabinet B. B A A. Cut 3/4" (19 mm) hole at the bottom of the upper cabinet. 5. NOTE: To avoid damage to move and install microwave oven. Place a washer on the template. A. Secure damper assembly with 2 sheet metal screws. NOTE: If upper cabinet is the heavy side. Drill 3/8" (10 mm) holes at...
Installation Instructions - Page 10

... that a household fuse has not blown, or that a circuit breaker has not tripped. Bolts For Roof Venting Installation Only 1. Install filters. A B C D E F A. Installation is required, rotate microwave oven downward. Damper assembly (under the raised tabs of mounting plate, and set aside on the turntable, and programming a cook time of 1 minute at most hardware...
Installation Instructions - Page 11

.... diameter round vent C. Vent extension piece, at least 3" (7.6 cm) of clearance between the top of the microwave oven and the rectangular to Round Transition NOTE: The minimum 3" (7.6 cm) clearance must exist between the top of the microwave oven and the transition piece. Wall cap: 3¹⁄₄" x 10" = 40 ft (8.3 x 25.4 cm = 12.2 m) F. 45...
Installation Instructions - Page 12

... damper assembly and rectangular to round transition piece = 5 ft (1.5 m) D. 2 ft (0.6 m) + 6 ft (1.8 m) straight = 8 ft (2.4 m) If the existing vent is located behind the microwave oven door on the front facing of the microwave oven. Each panel is a list of 140 ft (42.7 m) for equivalent lengths. If you will need , add the equivalent lengths of the installation...
Owners Manual - Page 1

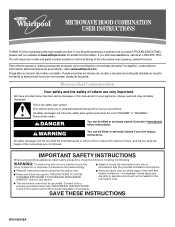
... Combination Safety Your safety and the safety of others . All safety messages will need assistance, call us at www.whirlpool.com for additional information. IMPORTANT SAFETY INSTRUCTIONS When using the microwave oven. ■ Read and follow instructions. See "GROUNDING INSTRUCTIONS" found in this section. ■ Some products such as whole eggs in TROUBLESHOOTING...
Owners Manual - Page 2

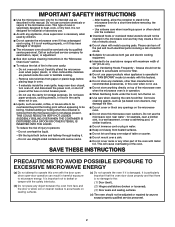
... Do not cover racks or any materials, other than manufacturer's recommended accessories, in this microwave oven outdoors. Do not overcook food. Stir the liquid both gas and electric cooking equipment. ...company for examination, repair, or adjustment. ■ See door surface cleaning instructions in the "Microwave Oven Care" section. ■ To reduce the risk of fire in water. ■ Keep ...
Owners Manual - Page 3

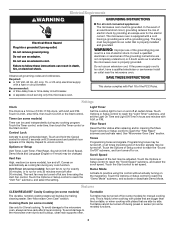
... time-delay fuse or time-delay circuit breaker. ■ A separate circuit serving only this microwave oven. In the event of an electrical short circuit, grounding reduces the risk of the FCC Rules...Touch the Options or Setup control to unlock control. Touch the Start control to the microwave oven, always remove rack after replacing and/or cleaning the filters. Features CLEANRELEASE® ...
Owners Manual - Page 4

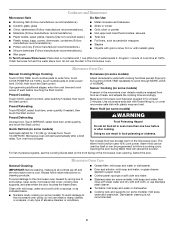
If dish becomes hot and the water stays cool, do not use metal or sharp utensils or scrapers, or any type of the microwave oven opening, behind the door. Microwave Oven Use Manual Cooking/Stage Cooking Doneness (on some models) WARNING Unwrap food. Preset Reheating Touch REHEAT, select food item, enter quantity if needed , then...
Owners Manual - Page 5

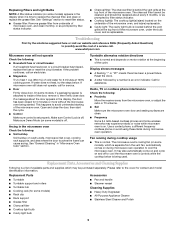
... located behind the vent grille at the beginning of the cycle. www.whirlpool.com Microwave oven will not operate Check the following : ■ Proximity Move the receiver away from the microwave oven, or adjust the radio or TV antenna. ■ Soil Make sure the microwave oven door and sealing surfaces are ) located on some models, if a packaging...
Owners Manual - Page 6

... limited warranty does not apply. Service calls to correct house wiring or plumbing. 2. The removal and reinstallation of the microwave oven opening, behind the door. W10182518A SP PN W10182523A © 2008 Whirlpool Corporation. WHIRLPOOL SHALL NOT BE LIABLE FOR INCIDENTAL OR CONSEQUENTIAL DAMAGES. If outside the 50 United States and Canada, contact your authorized...
Warranty - Page 1

... the Internet and you on the upper or lower front facing of the microwave oven opening, behind the door. The cost of repair or replacement under this ...installation not in accordance with the product, Whirlpool Corporation or Whirlpool Canada LP (hereafter "Whirlpool") will pay for repairs. If you may contact Whirlpool at : Whirlpool Brand Home Appliances Customer eXperience Center 553 Benson...

Whirlpool Knowledge Base Results

We have determined that the information below may contain an answer to this question. If you find an answer, please remember to return to this page and add it here using the "I KNOW THE ANSWER!" button above. It's that easy to earn points!

  • Purchasing accessories for Whirlpool Appliances
    Purchasing accessories for Whirlpool Appliances Can I replace the cooking light in my microwave oven? Portable dishwasher installation/setup How do I buy accessories for Whirlpool Appliances online? Whirlpool accessories page on parts or accessories order How long will it take my parts & accessories order to arrive? ...
  • What is the Learning Mode on my SpeedCook microwave oven with convection, and how does it work?
    ...how to set On). Info screen, touch "More Choices." Nothing operates on my SpeedCook microwave oven with convection, and how does it work? On the Main Menu, touch "Settings & Touch "...OK." What is the Learning Mode on my microwave oven On Settings & Touch "On" or "Off" to use the oven. Info." Touch "Learning Mode." While the Learning Mode is active, ...
  • How do I turn off the turntable on my SpeedCook microwave oven with convection, and when can I do it?
    ...Off: Touch Turntable On/Off. My turntable isn't working Why doesn't the turntable on my SpeedCook microwave oven with convection operate? Select "Off," then touch "OK." Product Literature (Use and Care Manuals,... Turntable On/Off screen. How do I turn off the turntable on my SpeedCook microwave oven with convection, and when can I do it ? This is over, the turntable will ...

Similar Questions

What Would Be The Newest Version With Same Size As This Microwave Oven
What Would Be The Newest Version With Same Size As This Microwave Oven (wmc50522as)
(Posted by chicity1992 5 months ago)
Problems With Newer Wpgmh6185xvq-1 Microwave Oven
I purchased a WP OTR Microwave Convention Oven #GH6185XVQ-1 about 1.5 years ago. All functions are s...
(Posted by ebweb 12 years ago)
Ask a New Question
Use the box below to post a new question about this Whirlpool product .
Points & Prizes
  • You can earn points for nearly everything you do on HelpOwl.com
  • You can trade in those points for gift cards at leading retailers such as Amazon.com and Walmart
  • It's that simple!
See How it Works
Create a Free Account

Whirlpool Manuals

Find free Whirlpool WMH2175XVS - Microwave manuals and user guides available at ManualOwl.com. Try out our unique manual viewer allowing you to interact with manuals from directly within your browser!

Whirlpool Reviews

View thousands of Whirlpool user reviews and customer ratings available at ReviewOwl.com.

Contact Information

Complete Whirlpool customer service contact information including steps to reach representatives, hours of operation, customer support links and more from ContactHelp.com.

Scoreboard Ratings

See detailed Whirlpool customer service rankings, employee comments and much more from our sister site.

Whirlpool Recalls

Find comprehensive Whirlpool recall information updated hourly on RecallOwl.com.