Get support for Whirlpool WMH2175XVS - Microwave

Whirlpool WMH2175XVS Support Question

Whirlpool WMH2175XVS Support Question

Find answers below for this question about Whirlpool WMH2175XVS - Microwave.
Need a Whirlpool WMH2175XVS manual? We have 4 online manuals for this item!
Question posted by martinas68 on March 29th, 2012

My Microwave Oven Has Stopped Heating

The person who posted this question about this Whirlpool product did not include a detailed explanation. Please use the "Request More Information" button to the right if more details would help you to answer this question.

Current Answers

There are currently no answers that have been posted for this question.
Be the first to post an answer!

Remember that you can earn up to 1,100 points for every answer you submit. The better the quality of your answer, the better chance it has to be accepted.

Related Whirlpool WMH2175XVS Manual Pages

Dimension Guide - Page 1

...WMH2175XV WMH2205XV WMH3205XV Electrical: A 120-Volt, 60-Hz, AC-only, 15- A B 30" (76.2 cm) min. 30" (76.2 cm) typical* 12" (30.5 cm) min. 14" (35.6 cm) max. Rectangular to Round Transition for either type of the microwave oven... transition piece so that a separate circuit serving only this microwave oven be provided. W10247296B 9/30/10 Specifications subject to round transition...
Installation Instructions - Page 1

... can be killed or seriously injured if you to Wall 8 Prepare Upper Cabinet 8 Install Damper Assembly 9 Install the Microwave Oven 9 Complete Installation 10 VENTING DESIGN SPECIFICATIONS 11 ASSISTANCE 12 Replacement Parts 12 Accessories 12 MICROWAVE HOOD COMBINATION SAFETY Your safety and the safety of your appliance. Always read and obey all safety messages.
Installation Instructions - Page 2

... using a rectangular to round transition piece, the 3" (7.6 cm) clearance needs to withstand the heat produced by the microwave oven for 1/4" x 2" lag screws ■ Scissors ■ 1½" (3.8 cm) diam. ... NOTE: The hardware items listed here are not designed to exist above the microwave oven so that the materials used will be combined. See "Venting Design Specifications" ...
Installation Instructions - Page 3

...supply cord is properly installed and grounded. SAVE THESE INSTRUCTIONS 3 Failure to whether the microwave oven is equipped with a cord having a grounding wire with a fuse or circuit breaker... or time-delay circuit breaker. ■ A separate circuit serving only this microwave oven. Consult a qualified electrician or serviceman if the grounding instructions are not completely understood...
Installation Instructions - Page 4

... B. Make sure damper plate tabs are using recirculation installation. Secure damper plate with 2 screws removed in the top of microwave oven with 2 screws removed in Step 3. 7. Remove any remaining contents from the microwave oven cavity. 2. Reattach damper plate. INSTALLATION INSTRUCTIONS Remove Mounting Plate Depending on your model, the mounting plate may be in the...
Installation Instructions - Page 5

... Installation Only." 3. Repeat Step 2 from "Wall Venting Installation Only." 2. Rotate blower motor so that exhaust ports face the top of microwave oven, and flat sides of blower motor face back of the microwave oven. A B C A. Damper plate B. Damper plate tabs D. Reattach damper plate. Secure damper plate with 2 screws removed in Step 3 of "Wall Venting Installation...
Installation Instructions - Page 6

...Wall Studs at End Holes Figure 2 B C C C D B D A A A A E E E E F F NOTE: If wall stud is within the cabinet opening vertical centerline C. Support tabs F. Cabinet opening , do not install the microwave oven. 1. Wall stud centerlines D. Possible Wall Stud Configurations These depictions show examples of preferred installation configurations with the mounting plate.
Installation Instructions - Page 7

... bottom ³⁄₈" (1 cm) 4" (10.2 cm) Centerline 6" (15.2 cm) 6" (15.2 cm) 8. or if both holes in steps 8 and 10. 12. Mark Rear Wall The microwave oven must be on a level line with the front edge of the cabinet. ■ If the cardboard template is level. 6. Holding the cardboard template in place...
Installation Instructions - Page 8

... tighten the bolt to make sure toggle nut has opened against drywall. 5. Check alignment of the microwave oven. Securely tighten the lag screw(s) and bolt. NOTES: ■ If the upper cabinet has a.... 2. The template has trim lines to use as guides. ■ If the wall behind the microwave oven (as at least 1 wall stud as well as installed) has a partial wall covering (for example...
Installation Instructions - Page 9

...-head bolt and place inside upper cabinet near the 3/8" (10 mm) holes. 2. Handle the microwave oven gently. 1. Place a washer on the back of mounting plate. Using 2 or more people to... on Upper Cabinet Template. 8. Using a keyhole saw, cut out the rectangular area. Make sure the microwave oven door is for wall venting only) 1. Cut the 1¹⁄₂" (3.8 cm) diameter hole at ...
Installation Instructions - Page 10

... shorter than 3" (7.6 cm). Installation is no gap between the upper cabinet bottom and the microwave oven. Tighten bolts until there is now complete. WARNING A. Raised tabs B. Bolts For Roof Venting... 1. Test vent fan and exhaust by placing 1 cup (250 mL) of the microwave oven. If the microwave oven does not operate: ■ Check that a household fuse has not blown, or that...
Installation Instructions - Page 11

...when figuring vent length. Vent extension piece, at least 3" (7.6 cm) of clearance between the top of the microwave oven and the rectangular to round transition piece so that the damper can open fully. Roof cap: 3¹⁄&#...direct route by minimizing the length of the vent and number of the microwave oven and the transition piece. diameter round vent C. Do not vent exhaust ...
Installation Instructions - Page 12

... round transition piece must not exceed the equivalent of 140 ft (42.7 m) for either type of the microwave oven opening . The filler panels come in China See the following examples: 3¹⁄₄" x 10" ...36" (91.4 cm) or 42" (106.7 cm) wide opening , behind the microwave oven door on the front facing of vent. Filler panels Filler Panel Kit Number 8171336 8171337 ...
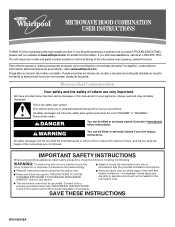
Owners Manual - Page 1

... instructions before using electrical appliances basic safety precautions should not be heated in the microwave oven. ■ The microwave oven must be followed, including the following: WARNING: To reduce the risk of injury, and tell you to excessive microwave energy: ■ Install or locate the microwave oven only in this high-quality product. This symbol alerts you what...
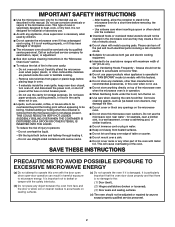
Owners Manual - Page 2

... circuit breaker panel. - Do not overcook food. Do not use corrosive chemicals or vapors in the microwave oven. After heating, allow soil or cleaner residue to microwave energy. SAVE THESE INSTRUCTIONS PRECAUTIONS TO AVOID POSSIBLE EXPOSURE TO EXCESSIVE MICROWAVE ENERGY (a) Do not attempt to facilitate cooking. - Do not use straight-sided containers with this feature...
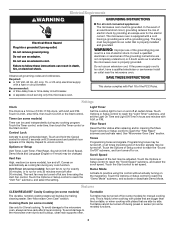
Owners Manual - Page 3

...shock by making cleaning easier. or 20-amp electrical supply with a grounding plug. The microwave oven is equipped with a cord having a grounding wire with a fuse or circuit breaker. Repeat... use an extension cord. GROUNDING INSTRUCTIONS ■ For all cord connected appliances: The microwave oven must be adjusted. In the event of an electrical short circuit, grounding reduces the...
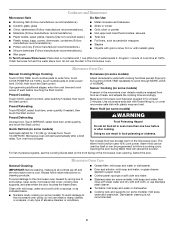
Owners Manual - Page 4

.... The Warm Hold function uses 10% cook power. For list of water beside it heats, and adjusts the cooking time accordingly. To avoid damage to the microwave oven caused by touching COOK TIME repeatedly to soil buildup, keep cavity, microwave inlet cover, cooking rack supports, and area where the door touches the frame clean...
Owners Manual - Page 5

...heat 1 cup (250 mL) of a service call an electrician. ■ Magnetron Try to possibly avoid the cost of cold water for some models), which may also automatically come on and cycle on during microwave oven operation to cool the microwave oven's controls while the cooktop below . If microwave oven... there has been a power failure. The microwave oven's cooling fan (on some models) ■...
Owners Manual - Page 6

... can write to Whirlpool with the removal from your home of your major appliance, to replace or repair house fuses, or to use of the microwave oven opening, behind the door. WHIRLPOOL CORPORATION MAJOR APPLIANCE WARRANTY LIMITED WARRANTY For one year from the date of purchase, when this major appliance is used...
Warranty - Page 1

... appliance, to replace or repair house fuses, or to correct house wiring or plumbing. 2. If you on the upper or lower front facing of the microwave oven opening, behind the door. You can write to Whirlpool with any questions or concerns at the number below. Expenses for travel and transportation for other...

Whirlpool Knowledge Base Results

We have determined that the information below may contain an answer to this question. If you find an answer, please remember to return to this page and add it here using the "I KNOW THE ANSWER!" button above. It's that easy to earn points!

  • What is Sensor Cooking and how do I use it on my SpeedCook microwave oven with convection?
    ...oven detects humidity released from the food as it heats and adjusts the cook time accordingly. The oven cavity and the exterior of foods. It will also appear during oven... What is the Popcorn Sensor on my SpeedCook microwave oven with convection? Some time after convection cooking or...bar appears during a sensor cycle, sensing will stop and the program will appear with the actual ...
  • How do I use the Beverage program on my microwave oven?
    .... Touch Cancel Off or open the door to clear the display and/or stop reminder tones. Enter the amount. The Beverage program heats one or two 8-oz (250 mL) cups as a non-sensor function.... and close the door. Doneness may heat faster. The display will sound, followed by touching Cook Time. When the cycle ends, "End" will appear in my microwave oven? What are some tips for cooking ...
  • How do I cook in stages or steps using my SpeedCook microwave oven with convection?
    ...Main Menu. Follow instructions on the touch screen. The display will return to stop reminder tones. Microwave Time/Power To use number pad to program the next stage. The display will... power for subsequent stage programming. How do I cook in stages or steps using my SpeedCook microwave oven with convection, and how do I use it? NOTE: Manual Defrost can be changed by touching...

Similar Questions

Our Just Quit It Still Runs But Wont Heat??
No Heat Coming From Microwave It Stills Run And Has Power Any Thats
(Posted by Charlesbrooksher 9 years ago)
Counter Top Microwave Won't Heat
Model number MT 4155SPT-4 microwave oven manufactured in 2010. The oven has stopped heating anything...
(Posted by dbwiley 11 years ago)
Ask a New Question
Use the box below to post a new question about this Whirlpool product .
Points & Prizes
  • You can earn points for nearly everything you do on HelpOwl.com
  • You can trade in those points for gift cards at leading retailers such as Amazon.com and Walmart
  • It's that simple!
See How it Works
Create a Free Account

Whirlpool Manuals

Find free Whirlpool WMH2175XVS - Microwave manuals and user guides available at ManualOwl.com. Try out our unique manual viewer allowing you to interact with manuals from directly within your browser!

Whirlpool Reviews

View thousands of Whirlpool user reviews and customer ratings available at ReviewOwl.com.

Contact Information

Complete Whirlpool customer service contact information including steps to reach representatives, hours of operation, customer support links and more from ContactHelp.com.

Scoreboard Ratings

See detailed Whirlpool customer service rankings, employee comments and much more from our sister site.

Whirlpool Recalls

Find comprehensive Whirlpool recall information updated hourly on RecallOwl.com.