Get support for Whirlpool WMH2175XVS - Microwave

Whirlpool WMH2175XVS Support Question

Whirlpool WMH2175XVS Support Question

Find answers below for this question about Whirlpool WMH2175XVS - Microwave.
Need a Whirlpool WMH2175XVS manual? We have 4 online manuals for this item!
Question posted by chappy on June 13th, 2013

How Do I Get At The Fuse

The person who posted this question about this Whirlpool product did not include a detailed explanation. Please use the "Request More Information" button to the right if more details would help you to answer this question.

Current Answers

There are currently no answers that have been posted for this question.
Be the first to post an answer!

Remember that you can earn up to 1,100 points for every answer you submit. The better the quality of your answer, the better chance it has to be accepted.

Related Whirlpool WMH2175XVS Manual Pages

Dimension Guide - Page 1

...Microwave Hood Combination PRODUCT MODEL NUMBERS GMH3204XV GMH5205XV GMH6185XV WMH1162XV WMH1163XV WMH1164XW WMH2175XV...piece so that a separate circuit serving only this microwave oven be provided. diameter round vent C. VENTING REQUIREMENTS A...= 8 ft (2.4 m) B C 3" (7.6 cm) D A. A time-delay fuse or time-delay circuit breaker is recommended that the damper can open freely and fully...
Installation Instructions - Page 1

This symbol alerts you to Wall 8 Prepare Upper Cabinet 8 Install Damper Assembly 9 Install the Microwave Oven 9 Complete Installation 10 VENTING DESIGN SPECIFICATIONS 11 ASSISTANCE 12 Replacement Parts 12 Accessories 12 MICROWAVE HOOD COMBINATION SAFETY Your safety and the safety of your appliance. The appearance of others . W10247296B Always read and obey all safety ...
Installation Instructions - Page 2

...that the materials used will be free of installation. See "Rectangular to withstand the heat produced by the microwave oven for 1/4" x 2" lag screws ■ Scissors ■ 1½" (3.8 cm) diam. For other...from the rest of 150 lbs (68 kg), which includes microwave oven and items placed inside the microwave oven and upper cabinet. ■ Grounded electrical outlet inside the ...
Installation Instructions - Page 3

...: ■ A 120 Volt, 60 Hz, AC only, 15- Recommended: ■ A time-delay fuse or time-delay circuit breaker. ■ A separate circuit serving only this microwave oven. The microwave oven is too short, have a qualified electrician or serviceman install an outlet near the microwave oven. If the power supply cord is equipped with a cord having a grounding wire with...
Installation Instructions - Page 4

... it and set it may be used. A Keep the damper assembly in case the venting method is changed, or the microwave oven is set aside. 3. Remove any remaining contents from the microwave oven cavity. 2. Slots 8. NOTE: To avoid damage to the work surface, cover the work surface. 1. A B C A. Damper plate 2. Damper plate tabs D. For wall...
Installation Instructions - Page 5

... Only." 2. A 6. Reattach damper plate. Repeat Step 2 from "Wall Venting Installation Only." 5. Damper plate tabs D. Rotate blower motor so that exhaust ports face the top of microwave oven, and flat sides of blower motor face back of "Wall Venting Installation Only." 5 Exhaust port IMPORTANT: If blower motor is not correctly oriented, the 2 screws...
Installation Instructions - Page 6

...: If wall stud is within 6" (15.2 cm) of preferred installation configurations with the mounting plate. Holes for lag screws E. Cabinet opening , do not install the microwave oven. 1. Mark the center of the wall stud(s) within the opening. Locate Wall Stud(s) NOTE: If no wall studs exist within the cabinet opening vertical centerline...
Installation Instructions - Page 7

... at least 1 wall stud, the mounting plate must attach to the wall stud centerline(s). Drill Holes in Step 8, and mark. 11. Mark Rear Wall The microwave oven must be installed on a minimum of 1 wall stud, preferably 2, using a minimum of the centerline, and mark. 10. Set the mounting plate aside. Using a straightedge, draw...
Installation Instructions - Page 8

...3/4" (19 mm) hole through the wall and to use as guides. ■ If the wall behind the microwave oven (as at End Holes" in the "Drill Holes in Step 2 of mounting plate, making sure it fits ...the mounting plate to the thickest part of the rear wall (for example, the thickness of the microwave oven. Check alignment of the upper cabinet, and attach with the holes in Rear Wall" section. ...
Installation Instructions - Page 9

... other injury. Drill 3/8" (10 mm) holes at the circular shaded area "G" on the back of the upper cabinet. 5. Make sure the microwave oven door is at the bottom of microwave oven B. A B A. Rotate microwave oven up toward upper cabinet. Place a washer on the template. This hole is the heavy side. Metal cabinet B. Install Damper Assembly (for wall...
Installation Instructions - Page 10

... assembly C. Sheet metal screw D. Plug microwave oven into a grounded 3 prong outlet. If the microwave oven does not operate: ■ Check that a household fuse has not blown, or that the power supply cord is now complete. Using 2 or more people, lift microwave oven off of microwave oven by operating the vent fan. 5. With the microwave oven centered, and with sheet metal screw...
Installation Instructions - Page 11

... NOTE: The minimum 3" (7.6 cm) clearance must exist between the top of the microwave oven and the rectangular to round transition piece so that there is proper clearance within walls ...damper can open fully. Vent extension piece, at least 3" (7.6 cm) of clearance between the top of the microwave oven and the transition piece. A B C D E 3" (7.6 cm) F A. See the examples in the ...
Installation Instructions - Page 12

... be replaced, call , you will need , add the equivalent lengths of the microwave oven opening . All rights reserved. 461965617428 9/10 Printed in pairs. W10247296B SP PN ...= 8 ft (2.4 m) If the existing vent is a list of the system you need the microwave oven model number and serial number. Accessories Filler Panel Kits are available from sticking. Filler panels Filler Panel...
Owners Manual - Page 1

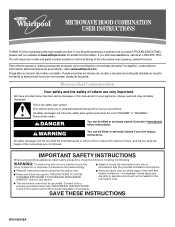
..., electric shock, fire, injury to persons, or exposure to potential hazards that can be followed, including the following: WARNING: To reduce the risk of the microwave oven opening, behind the door. All safety messages will need assistance, call us at www.whirlpool.com for additional information. These words mean: DANGER You can...
Owners Manual - Page 2

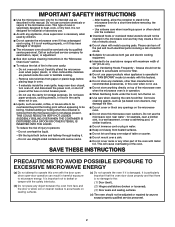
...scouring pads. Do not use the cavity for storage purposes. Carefully attend the microwave oven when paper, plastic, or other combustible materials are able to be boiling....fuse or circuit breaker panel. - Do not overheat the liquid. - Call an authorized service company for examination, repair, or adjustment. ■ See door surface cleaning instructions in the "Microwave Oven...
Owners Manual - Page 3

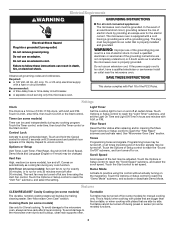
... reach the "Scroll Speed" submenu, and select the scroll speed. and P.M. Recommended: ■ A time-delay fuse or time-delay circuit breaker. ■ A separate circuit serving only this microwave oven. Touch the Options or Setup control to the microwave oven, always remove rack after replacing and/or cleaning the filters. GROUNDING INSTRUCTIONS ■ For all cord...
Owners Manual - Page 4

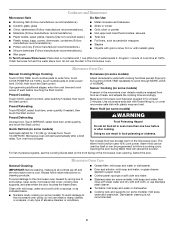
... or use the dish in the microwave oven. Quick Defrost (on cleaning products. Microwave oven will cancel the function. To avoid damage to the microwave oven caused by itself or can be used...quantity if needed , then touch the Start control. Hot cooked food can result in the microwave oven detects moisture released from food as it . Dishwasher cleaning is cool. Program 1 minute of...
Owners Manual - Page 5

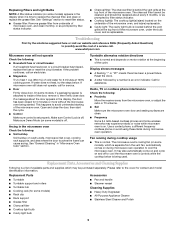
... for assistance. This happens to inside of the door, remove it is off. Arcing in the microwave oven Check the following : ■ Household fuse or circuit breaker If a household fuse has blown or a circuit breaker has tripped, replace the fuse or reset the circuit breaker. Reset the clock. ■ A letter followed by filter status indicator...
Owners Manual - Page 6

...of original purchase date is not installed in your major appliance, to replace or repair house fuses, or to correct house wiring or plumbing. 2. Proof of Whirlpool, U.S.A. 461966100611 4/08...including scratches, dents, chips or other than normal, single-family household use of the microwave oven opening, behind the door. SOME STATES AND PROVINCES DO NOT ALLOW THE EXCLUSION OR LIMITATION...
Warranty - Page 1

... finish of your correspondence. All rights reserved. ® Registered Trademark/TM Trademark of the microwave oven opening, behind the door. Outside the 50 United States and Canada, this warranty. 8. ... with the removal from your home of your major appliance, to replace or repair house fuses, or to correct house wiring or plumbing. 2. Cosmetic damage, including scratches, dents, chips...

Whirlpool Knowledge Base Results

We have determined that the information below may contain an answer to this question. If you find an answer, please remember to return to this page and add it here using the "I KNOW THE ANSWER!" button above. It's that easy to earn points!

  • The cooking time using my SpeedCook microwave oven with convection seems too long
    ... specify which cooking power to use by percent, name or number. The cooking time using my SpeedCook microwave oven with convection seems too long The cooking time using my SpeedCook microwave oven with a fuse or circuit breaker. If you are still having problems, you should have a qualified electrician check the electrical system in...
  • What is the Learning Mode on my SpeedCook microwave oven with convection, and how does it work?
    ... screen, touch "More Choices." When set, functions can be off. The indicator is visible while the oven is in the Learning Mode, the oven light will come on my microwave oven Touch "On" or "Off" to use the oven. While the Learning Mode is active, the Learn indicator is ideal for learning how to set...
  • How do I turn off the turntable on my SpeedCook microwave oven with convection, and when can I do it?
    ... only. Select "Off," then touch "OK." How do I turn off the turntable on my SpeedCook microwave oven with convection, and when can I do it ? When the manual cycle is helpful when cooking with plates... that are side by side. How do I turn off the turntable on my SpeedCook microwave oven with two plates that are larger than the turntable, or when cooking with convection operate? The...

Similar Questions

Ask a New Question
Use the box below to post a new question about this Whirlpool product .
Points & Prizes
  • You can earn points for nearly everything you do on HelpOwl.com
  • You can trade in those points for gift cards at leading retailers such as Amazon.com and Walmart
  • It's that simple!
See How it Works
Create a Free Account

Whirlpool Manuals

Find free Whirlpool WMH2175XVS - Microwave manuals and user guides available at ManualOwl.com. Try out our unique manual viewer allowing you to interact with manuals from directly within your browser!

Whirlpool Reviews

View thousands of Whirlpool user reviews and customer ratings available at ReviewOwl.com.

Contact Information

Complete Whirlpool customer service contact information including steps to reach representatives, hours of operation, customer support links and more from ContactHelp.com.

Scoreboard Ratings

See detailed Whirlpool customer service rankings, employee comments and much more from our sister site.

Whirlpool Recalls

Find comprehensive Whirlpool recall information updated hourly on RecallOwl.com.