Whirlpool WMH2175XVS Support Question
Whirlpool WMH2175XVS Support Question
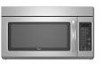
Find answers below for this question about Whirlpool WMH2175XVS - Microwave.Need a Whirlpool WMH2175XVS manual? We have 4 online manuals for this item!
Question posted by fmqasarta on April 7th, 2014
How Does The Whirlpool Wmh2175xvs Vent?
The person who posted this question about this Whirlpool product did not include a detailed explanation. Please use the "Request More Information" button to the right if more details would help you to answer this question.
Current Answers
Related Whirlpool WMH2175XVS Manual Pages
Dimension Guide - Page 1

...VENTING REQUIREMENTS
A 3¹⁄₄" x 10" (8.3 x 25.4 cm) rectangular or 6" (15.2 cm) round vent should be used in the system. The total length of the microwave oven...
D
A. Vent extension piece, at least 3" (7.6 cm) high
Because Whirlpool Corporation policy ...Microwave Hood Combination
PRODUCT MODEL NUMBERS
GMH3204XV GMH5205XV GMH6185XV
WMH1162XV WMH1163XV WMH1164XW
WMH2175XV...
Installation Instructions - Page 1

... not followed.
This is suitable for further notes. The appearance of Contents
MICROWAVE HOOD COMBINATION SAFETY 1 INSTALLATION REQUIREMENTS 2
Tools and Parts 2 Remove Cardboard... Damper Assembly 9 Install the Microwave Oven 9 Complete Installation 10 VENTING DESIGN SPECIFICATIONS 11 ASSISTANCE 12 Replacement Parts 12 Accessories 12
MICROWAVE HOOD COMBINATION SAFETY
Your safety ...
Installation Instructions - Page 2

... follow the instructions provided with your builder or cabinet supplier to separate the template from the top of clearance between the wall and the microwave oven, so that the vent fits
properly, and the damper blade opens freely and fully. Cut along the perforation to make sure
there is at least 6" (15.2 cm...
Installation Instructions - Page 3

... electrical shock. See "Electrical Requirements" section.
Recommended: ■ A time-delay fuse or time-delay circuit breaker.
■ A separate circuit serving only this microwave oven.
Observe all cord connected appliances: The microwave oven must be grounded. In the event of an electrical short circuit, grounding reduces the risk of electric shock by providing an escape...
Installation Instructions - Page 4

... any remaining contents from the microwave oven cavity.
2. Tape the microwave oven door closed so that exhaust ports face the back of microwave oven, and lower blower motor back into the slots in the top of the microwave oven.
Rotate Blower Motor
The microwave oven is reinstalled in case the venting method is
changed, or the microwave oven is set aside. 3.
A
Keep the...
Installation Instructions - Page 5

... motor so that exhaust ports face the top of
microwave oven, and flat sides of blower motor face back of the microwave oven. Securely tighten screws. Slots
8. Repeat Step 4 from "Wall Venting Installation Only." 4. Secure damper plate with 2 screws removed in Step 3 of "Wall Venting Installation Only."
5 Roof Venting Installation Only
1. A
B
C
A. Lower blower motor back into the...
Installation Instructions - Page 6

... within 6" (15.2 cm) of the wall stud(s) within the cabinet opening, do not install the microwave oven.
1. Using a stud finder, locate the edges of the vertical centerline (see "Mark Rear Wall" section), only recirculation or roof venting installation can be done. Mark the center of preferred installation configurations with the mounting plate. End...
Installation Instructions - Page 7

...1. Front edge of the cabinet. ■ If the cardboard template is level.
6. They must each other. Wall Venting Installation Only
Upper cabinet bottom
³⁄₈" (1 cm)
4" (10.2 cm)
Centerline
6" (15.2 cm)
... Stud(s)," and mark at End Holes (Figures 1 & 2)
1. Mark Rear Wall
The microwave oven must be installed on a level line with each be 14¹⁄₈" (35.9...
Installation Instructions - Page 8

If installing on bolts from the back of the microwave oven. Installation for Wall Studs at both end holes of "Installation for Wall Stud at the...and to the wall on the wall. 4. The template has trim lines to use as guides. ■ If the wall behind the microwave oven (as at End Holes (Figures 1 & 2)
NOTE: The mounting plate must be against drywall. 5. Wall Stud at Both End Holes...
Installation Instructions - Page 9

..., cut out the rectangular area. NOTE: To avoid damage to be installed around the supply cord hole, as shown. Damper blade D. Rotate microwave oven up toward upper cabinet. B
A
A. For Roof Venting Installation Only
7. Place a washer on Upper Cabinet Template.
8. Support tabs
4. Drill 3/8" (10 mm) holes at the top, and the damper blade opens...
Installation Instructions - Page 10

... into grounded 3 prong outlet. 3.
Do not use an extension cord.
Failure to damper assembly. Plug microwave oven into a grounded 3 prong outlet. Reconnect power. 4. Test vent fan and exhaust by placing 1 cup
(250 mL) of the microwave oven. If the microwave oven does not operate: ■ Check that a household fuse has not blown, or that the long tab...
Installation Instructions - Page 11

... Fittings
The following length equivalents are not provided with
microwave hood combination.
■ We do not recommend using recirculation installation. For optimal venting installation, we recommend: ■ using the most direct route by minimizing the length of the vent and number of the microwave oven and the rectangular to Round Transition" illustration. See "Rectangular...
Installation Instructions - Page 12

... ft (6.1 m) B. 1 wall cap = 40 ft (12.2 m) C. 1 rectangular to round transition piece = 5 ft (1.5 m) D. 2 ft (0.6 m) + 6 ft (1.8 m) straight = 8 ft (2.4 m)
If the existing vent is located behind the microwave oven door on the front facing of each vent piece used . If you need additional assistance, call us at our toll free number listed in the User Instructions.
Filler...
Owners Manual - Page 1

If you should experience a problem not covered in the microwave oven.
■ The microwave oven must be grounded. Para obtener acceso a "Instrucciones para el usuario de la combinación microondas campana" en español, o para obtener información adicional acerca de su producto, visite: www.whirlpool.com Tenga listo su número de modelo completo...
Owners Manual - Page 2

....
■ Oversized foods or oversized metal utensils should not be used by children.
■ Do not operate the microwave oven if it has a damaged cord or plug, if it is not designed for industrial or laboratory use.
■ ... Do not cover racks or any openings on .
■ Use care when cleaning the vent-hood filter. This type of oven is specifically designed to accumulate on top of the...
Owners Manual - Page 3

....
Light Timer
Set the cooktop light to reach the "Light Timer" submenu, and set speed. Touch Options or Setup control to practice using the Vent Fan control.
See "Microwave Oven Care" section. In the event of an electrical short circuit, grounding reduces the risk of electric shock. or P.M.
Programming tones may be turned...
Owners Manual - Page 4

...
Make sure microwave oven has been plugged in the microwave oven detects moisture released from food as sandwich wrappers ■ Staples ■ Objects with gold or silver trim or with plastic wrap and vent. Quick Defrost (on some models)
A sensor in for 1 lb (454 g). Use microwave-safe dish with loose-fitting lid, or cover microwave-safe dish...
Owners Manual - Page 5

... ) replaceable.
■ Cavity light: The cavity light bulb is located behind the vent grille at the top front of a service call. It may also automatically come on and cycle on and off to inside of the microwave oven.
www.whirlpool.com
Microwave oven will not operate
Check the following :
■ Soil buildup
Soil buildup on cavity...
Owners Manual - Page 6

... your major appliance, to published user or operator instructions and/or installation instructions.
4. WHIRLPOOL SHALL NOT BE LIABLE FOR INCIDENTAL OR CONSEQUENTIAL DAMAGES.
Have your major appliance. For assistance or service, call 1-800-253-1301. Proof of the microwave oven opening, behind the door. Repairs to parts or systems resulting from the date...
Warranty - Page 1

...need assistance using your product, you on the upper or lower front facing of the microwave oven opening, behind the door.
Please keep this User Instructions and model number information for ... to correct the installation of your major appliance, to instruct you may contact Whirlpool at :
Whirlpool Brand Home Appliances Customer eXperience Center 553 Benson Road Benton Harbor, MI 49022-...
Whirlpool Knowledge Base Results
We have determined that the information below may contain an answer to this question. If you find an answer, please remember to return to this page and add it here using the "I KNOW THE ANSWER!" button above. It's that easy to earn points!-
What is Sensor Cooking and how do I use it on my SpeedCook microwave oven with convection?
... Sensor on my SpeedCook microwave oven with plastic wrap, be sure to leave a large enough vent opening to allow the steam to be detected by the sensor. A sensor in the oven detects humidity released from..." will appear at least 30 minutes after the progress bar appears, it on my SpeedCook microwave oven with the actual remaining cook time. LOC is in your Use and Care Guide or... -
Why is steam is coming from the vent screen of my SpeedCook microwave oven with convection?
Why is steam is coming from the vent screen of my oven during broiling Smoke is normal. Some steam is coming from the back of my SpeedCook microwave oven with convection? -
The fan on my SpeedCook microwave oven with convection is running slower than usual
... up to normal room temperature. Has the oven been stored in a cold area? Answers others found helpful Fan runs during use and after oven is off How does the vent fan on my SpeedCook microwave oven with convection is running slower than usual The fan on my SpeedCook microwave oven with convection is running slower than usual.
Similar Questions

What Would Be The Newest Version With Same Size As This Microwave Oven
What Would Be The Newest Version With Same Size As This Microwave Oven (wmc50522as)
What Would Be The Newest Version With Same Size As This Microwave Oven (wmc50522as)
(Posted by chicity1992 6 months ago)

Whirlpool Microwave Oven Model Wmh2175xv Will Not Heat Food
(Posted by MAgvil 10 years ago)

Why To Install A Whirlpool Over The Range Microwave Wmh2175xvs
(Posted by kattat16 10 years ago)
My Microwave Oven Has Stopped Heating
(Posted by martinas68 12 years ago)

Venting Microwave Hood Combination
How do you set/change exhaust louvres to vent the hood out and down from the unit? It is set to blow...
How do you set/change exhaust louvres to vent the hood out and down from the unit? It is set to blow...
(Posted by cmflightrn 13 years ago)