Get support for Whirlpool WFE361LVT

Whirlpool WFE361LVT Support Question

Whirlpool WFE361LVT Support Question

Find answers below for this question about Whirlpool WFE361LVT.
Need a Whirlpool WFE361LVT manual? We have 4 online manuals for this item!
Question posted by Ike53door on December 29th, 2021

Oven Controll Has Blinking Red Light Says Turn Oven Off, But Neither Element O

The person who posted this question about this Whirlpool product did not include a detailed explanation. Please use the "Request More Information" button to the right if more details would help you to answer this question.

Current Answers

Answer #1: Posted by connorxd on December 31st, 2021 11:00 AM
This answer was accepted by the poster of the original question.
connorxd

Member since:
November 21st, 2020

Points: 4,400
1,100
points
Normally, the only time that the OVEN ON light will blink is in the CLEAN mode when this cycle is finished. The CLEAN light is normally blinking along with the OVEN ON light in this situation. You could have a problem with the electronic control board or the oven door lock mechanism that is causing this problem. There is also a possibility that a failed thermistor (temperature sensor) or a wiring problem could cause this failure.


There are times when an glitch or power surge through the electrical power lines will confuse the electronic control board in the range. You can sometimes reset the control board by unplugging the range for 5 minutes. After plugging the range back in, you may be able to reset the clock and the control may resume normal operation. This is a long shot but you can try it.

If you are not able to reset the control by using the method mentioned above, I recommend that you call a service technician to diagnose and repair this type of failure.


Related Whirlpool WFE361LVT Manual Pages

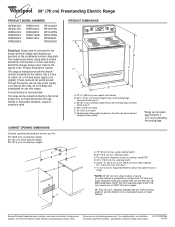
Dimension Guide - Page 1

... the "Product Dimensions" section. A circuit breaker is located behind the control panel or on the left side frame behind the storage drawer panel. when... D. 30¹⁄₈" (76.5 cm) min. Model/serial rating plate (located on the oven frame behind storage drawer panel) *Range can be raised approximately 1" (2.5 cm) by not less than 1/4" (6.4 mm) flame retardant millboard ...
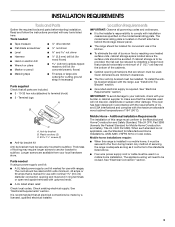
Installation Instructions - Page 3

...floor during transit. Check local codes. Mobile home installations require: ■ When this range must be installed. See "Electrical Connection" section. 3 INSTALLATION REQUIREMENTS Tools and Parts ... antitip bracket shipped with any tools listed here. This oven has been designed in accordance with the requirements of this range is marked for use the Standard for cutting ground strap...
Installation Instructions - Page 5

...Electrical Connection." Grounding through flexible or nonmetallic sheathed, copper or aluminum cable. mobile homes; Connectors on the oven frame behind the storage drawer panel. See the "Electrical Connection" section. ■ Allow 2 to 3...-50R is located behind the control panel or on the appliance end must be revised so the green ground wire of the range or inside the storage drawer ...
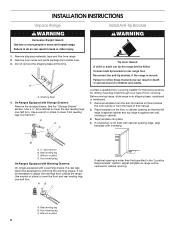
Installation Instructions - Page 6

... leg B. Tape template into place. 4. Wrench or pliers 6 Connect anti-tip bracket to lower the front and rear leveling legs one -half turn . Remove oven racks and parts package from range. 2. A A. Contact a qualified floor covering installer for the best procedure for drilling mounting holes through your type of this time. Remove template from...
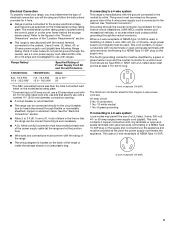
Installation Instructions - Page 9

... on the cord/conduit plate on bottom of the 10-32 hex nuts. Power supply cord wires 4. Line 2 (red) C. Line 1 (black) 6. Allow enough slack to easily attach the wiring to the range with one of range. Tighten strain relief screws. 6. Tighten strain relief screws. 9. Ground-link screw D. A B 3-wire connection: Power Supply Cord Use...
Installation Instructions - Page 10

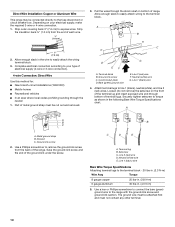
... the wires through bottom of the ground-link under the screw. C G D EF A. Line 2 (red) wire D. Neutral (white) wire E. Line 1 (black) wire Bare Wire Torque Specifications Attaching terminal lugs... ground strap B. C D E A. Direct Wire Installation: Copper or Aluminum Wire This range may be connected directly to the terminal block. Depending on the front of the terminal ...
Installation Instructions - Page 12

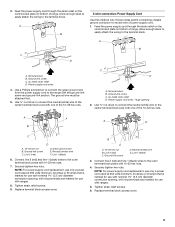
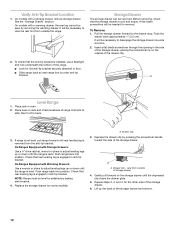
... a flat-blade screwdriver through the opening in oven. 2. A Level Range 1. Place level on some models). If range is not level, pull range forward until the range is removed from the anti-tip bracket. Drawer... leg is engaged in anti-tip bracket. then front to the drawer stop. Push range back into position. On models with Warming Drawers: Use a wrench or pliers to ...
Installation Instructions - Page 13

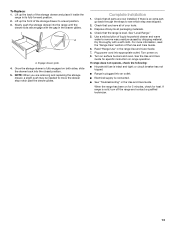
... to a level position. 3. Use a mild solution of your tools. 3. Turn power on surface burners and oven. Slowly push the storage drawer into appropriate outlet. NOTE: When you have all packaging materials. 4. Check that you are now installed. Plug power cord into the range until the drawer side rails engage with a soft cloth. To...
Owners Manual - Page 1

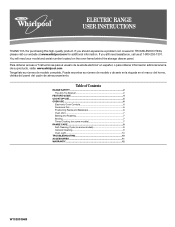
... our website at 1-800-253-1301. Table of Contents RANGE SAFETY 2 The Anti-Tip Bracket 2 FEATURE GUIDE 4 COOKTOP USE 5 OVEN USE 6 Electronic Oven Controls 6 Aluminum Foil 6 Positioning Racks and Bakeware 6 Oven Vent 7 Baking and Roasting 7 Broiling 7 Timed Cooking (on some models 8 General Cleaning 9 Oven Light 10 TROUBLESHOOTING 10 ACCESSORIES 11 WARRANTY 12 W10200356B
Owners Manual - Page 3

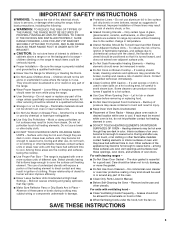
... should not be stored in an oven or near these liners may subject wiring or components underneath to damage. ■ Protective Liners - Moist or damp potholders on the Range - The range is turned inward, and does not extend over adjacent surface units. ■ Do Not Soak Removable Heating Elements - Select utensils having flat bottoms large...
Owners Manual - Page 4

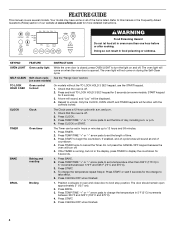
...oven and close door to turn off . SELF-CLEAN Self-clean cycle See the "Range Care" section. (on and off . 5. or p.m. 4. If the TIMER is opened. Press CANCEL/OFF when finished. The oven light will not come on when the oven...the countdown. Press BROIL. 3. Your model may have some models) TO LOCK Oven control HOLD 3 SEC lockout On models without the TO LOCK HOLD 3 SEC keypad, ...
Owners Manual - Page 5

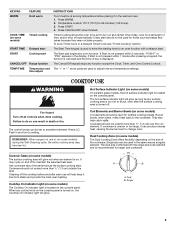
... pad begins any function except the Clock, Timer, and Oven Control Lockout. The control knobs can result in use will glow. REMEMBER: When range is used in the warmed oven. 1. The dual size combines both the single and outer element and is located on , the Cooktop On indicator light will help catch spills. Ceramic Glass (on some...
Owners Manual - Page 6

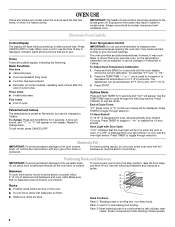
... exit mode, press CANCEL/OFF. Rack Positions Rack 5: Toasting bread or broiling thin, non-fatty foods. Broiling chicken pieces. 6 Exposure to the fumes may cause element cycling to beep) will turn on only with the oven light switch. Electronic Oven Controls Control Display The display will appear on them. ■ Make sure racks are level. Indicator...
Owners Manual - Page 7

...: 1. Press COOK TIME. The bake element will begin preheating. Please refer to purchase a broiler pan, one displayed. 3. Do not set to clear the display. The cook time oven indicator light will not. This feature is automatically activated when the oven is pressed, the oven will glow red when cycling on the display. Oven vent (ceramic glass model...
Owners Manual - Page 8

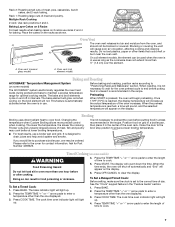
..., the DOOR LOCKED and CLEAN indicator lights will be displayed. 4. Electronic Oven Control with a damp cloth. Press SELF CLEAN to another closed or the door will not lock and the self-cleaning cycle will be displayed. When the oven is extremely sensitive to move the oven door gasket. The start . 7. RANGE CARE Self-Cleaning Cycle (on...
Owners Manual - Page 9

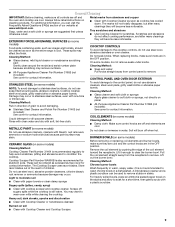
... or all controls are off sugary spills while the cooktop is cool. Light to remove. Pull the coil element straight away from control panel to ...range is still warm. For heavily soiled bowls, place an ammonia soaked paper towel on some models) Cleaning Method: Cooktop Cleaner Part Number 31464 is recommended regularly to help avoid scratches, pitting and abrasions and to wear oven...
Owners Manual - Page 10

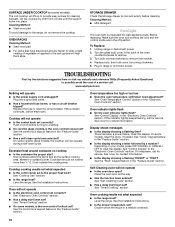
...Cleaning Method: ■ Mild detergent Oven Light The oven light is the oven control lockout set? Unplug range or disconnect power. 2. Turn bulb counterclockwise to the range, do not remove the cooktop. ..., element or surface burner. See "Electronic Oven Controls" section. ■ Has a delay start been set? Oven temperature too high or too low ■ Does the oven temperature...
Owners Manual - Page 11

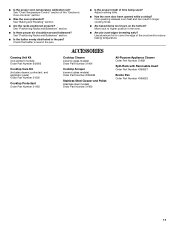
... air circulation around bakeware? Move rack to cover the edge of the "Electronic Oven Controls" section. ■ Was the oven preheated? Oven peeking releases oven heat and can result in the oven. ■ Are pie crust edges browning early? Canning Unit Kit (coil element models) Order Part Number 242905 Cooktop Care Kit (includes cleaner, protectant, and applicator...
Owners Manual - Page 12

...of repair or replacement under this limited warranty does not apply. If you on the oven frame behind the storage drawer panel. Expenses for travel and transportation for other damage to ... This limited warranty does not cover: 1. Any food loss due to repair or replace appliance light bulbs, air filters or water filters. WHIRLPOOL SHALL NOT BE LIABLE FOR INCIDENTAL OR CONSEQUENTIAL DAMAGES...
Warranty - Page 1

... major appliance is not available. 10. Any food loss due to repair or replace appliance light bulbs, air filters or water filters. This major appliance is designed to the finish of ...Expenses for travel and transportation for future reference. DISCLAIMER OF IMPLIED WARRANTIES; If you on the oven frame behind the storage drawer panel. This limited warranty is valid only in which it is...

Whirlpool Knowledge Base Results

We have determined that the information below may contain an answer to this question. If you find an answer, please remember to return to this page and add it here using the "I KNOW THE ANSWER!" button above. It's that easy to earn points!

  • Normal sounds - Side by side refrigerator
    ... make . If the refrigerator is a model with the ice bin in the freezer door, turn off the ice maker by sliding the switch located on the right-hand wall of the compressor... Check that your previous one did not make the sound seem louder. Top freezer Blinking red light in the freezer compartment, turn off the ice maker by side refrigerator Why is forced through the tube. Hard ...
  • Using the LCD refrigeration controls - Side by Side with Ice Bin in Door, Flush Mounted Dispenser with LCD Display
    ... Mounted Dispenser with Ice Bin in freezer compartment - Side by side refrigerator Blinking red light in the Door Adjusting temperature controls - IMPORTANT: The display screen on the dispenser panel.  Adjusting the Controls For your convenience, your refrigerator, make sure that the controls are preset at the factory. If you put food into the refrigerator. The...
  • Dispenser and Refrigerator/Freezer compartment lights - Side by Side with Ice Bin in Door, Flush Mounted Dispenser with LCD Display
    ... Side with Ice Bin in Door, Flush Mounted Dispenser with LCD Display How do I replace the light bulbs in Door, Flush Mounted Dispenser with warm water and liquid detergent. Side by side refrigerator Blinking red light in refrigerator or reconnect power. Bottom freezer/French door refrigerator Operating the dispenser controls (4 or 5 button control without a display screen) -

Similar Questions

Oven Is Not Working On Whirlpool Range
Hello,I have a Whirlpool electric range model number WFE361LVT 0 I am troubleshooting for a friend. ...
(Posted by douglasrenk 6 years ago)
How Do I Get Oven To Turn On?
How do I get the oven to turn on? I figured out how to unlock it but when I try to go through the di...
(Posted by Susank065 9 years ago)
Knobs Wont Turn Off When Using Range Top And Oven Because It Gets Too Hot
We run into the above mentioned issue on a regular basis... When we cook spaghetti for example. On o...
(Posted by jjcarlson03 11 years ago)
Oven Not Heating
My oven has stopped heating. The control board is also not working. it was working perfect until our...
(Posted by Dhernandez85 11 years ago)
Ask a New Question
Use the box below to post a new question about this Whirlpool product .
Points & Prizes
  • You can earn points for nearly everything you do on HelpOwl.com
  • You can trade in those points for gift cards at leading retailers such as Amazon.com and Walmart
  • It's that simple!
See How it Works
Create a Free Account

Whirlpool Manuals

Find free Whirlpool WFE361LVT manuals and user guides available at ManualOwl.com. Try out our unique manual viewer allowing you to interact with manuals from directly within your browser!

Whirlpool Reviews

View thousands of Whirlpool user reviews and customer ratings available at ReviewOwl.com.

Contact Information

Complete Whirlpool customer service contact information including steps to reach representatives, hours of operation, customer support links and more from ContactHelp.com.

Scoreboard Ratings

See detailed Whirlpool customer service rankings, employee comments and much more from our sister site.

Whirlpool Recalls

Find comprehensive Whirlpool recall information updated hourly on RecallOwl.com.