Whirlpool WFG374LVQ Support Question
Whirlpool WFG374LVQ Support Question
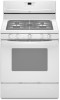
Find answers below for this question about Whirlpool WFG374LVQ.Need a Whirlpool WFG374LVQ manual? We have 4 online manuals for this item!
Question posted by Susank065 on January 4th, 2015
How Do I Get Oven To Turn On?
How do I get the oven to turn on? I figured out how to unlock it but when I try to go through the different options and says to press cancel to go to something else. When I press cancel it goes back to lock????
Current Answers
Answer #1: Posted by waelsaidani1 on January 4th, 2015 9:29 PM
waelsaidani1

Member since:
May 12th, 2013 Points: 19,501,787

Member since:
May 12th, 2013 Points: 19,501,787
FEATURE GUIDE This manual covers several models. Your model may have some or all of the items listed. Refer to this manual or the Frequently Asked Questions (FAQs) section of our website at www.whirlpool.com for more detailed instructions. WARNING Food Poisoning Hazard Do not let food sit in oven more than one hour before or after cooking. Doing so can result in food poisoning or sickness. KEYPAD OVEN LIGHT FEATURE Oven cavity light INSTRUCTIONS While the oven door is closed, press OVEN LIGHT to turn the light on and off. The oven light will come on when the oven door is opened. The oven light will not come on during the Self-Clean cycle. See the "Range Care" section. 1. 2. 3. 4. Check that the oven is off. Press and hold the TO LOCK HOLD 3 SEC keypad for 3 seconds. A tone will sound, and "Loc" will be displayed. Repeat to unlock. Only the CLOCK and TIMER keypads will function with the controls locked. SELF-CLEAN TO LOCK HOLD 3 SEC Self-clean cycle Oven control lockout CLOCK Clock The Clock uses a 12-hour cycle with a.m. and p.m. 1. Check that the oven is off. 2. Press CLOCK. 3. Press TEMP/TIME "+" or "-" arrow pads to set the time of day, including a.m. or p.m. 4. Press SET CLOCK or START. The Timer can be set in hours or minutes up to 12 hours and 59 minutes. 1. Press TIMER. 2. Press TEMP/TIME "+" or "-" arrow pads to set the length of time. 3. Press START to begin the countdown. If enabled, end-of-cycle tones will sound at end of countdown. 4. Press TIMER twice to cancel the Timer. Do not press the CANCEL/OFF keypad because the oven will turn off. 5. If the TIMER is running, but not in the display, press TIMER to display the countdown for 5 seconds. 1. Press BAKE. 2. Press TEMP/TIME "+" or "-" arrow pads to set a temperature other than 350°F (175°C) in 5° increments between 170°F and 525°F (75°C and 275°C). 3. Press START. 4. To change the temperature repeat Step 2. Press START or wait 5 seconds for the change to take effect. 5. Press CANCEL/OFF when finished. 1. Position cookware in oven and close the oven door. 2. Press BROIL. 3. Press TEMP/TIME "+" or "-" arrow pads to change the temperature in 5°F (5°C) increments between 300°F and 525°F (150°C and 275°C). 4. Press START. 5. Press CANCEL/OFF when finished. Food must be at serving temperature before placing it in the warmed oven. 1. Press WARM. 2. Temperature is set at 170°F (75°C) for 60 minutes (1.00 hour). 3. Press START. 4. Press CANCEL/OFF when finished. TIMER SET/OFF Oven timer BAKE Baking and roasting BROIL Broiling WARM Hold warm
Answer #2: Posted by Odin on January 5th, 2015 9:01 AM
Odin

Member since:
April 10th, 2010 Points: 41,236,670
Member since:
April 10th, 2010 Points: 41,236,670
Hope this is useful. Please don't forget to click the Accept This Answer button if you do accept it. My aim is to provide reliable helpful answers, not just a lot of them. See https://www.helpowl.com/profile/Odin.
Related Whirlpool WFG374LVQ Manual Pages
Dimension Guide - Page 1

... metal
cabinet.
For complete details, see NOTE*.
If the cabinet depth is greater than 24" (61.0 cm), oven frame must be used . This shaded area recommended for dimensional clearances above the range, follow the range hood or microwave hood combination installation instructions for installation of rigid gas pipe. Because Whirlpool Corporation policy includes...
Installation Instructions - Page 1

...4
Tools and Parts...4 Location Requirements 4 Electrical Requirements 6 Gas Supply Requirements 6 INSTALLATION INSTRUCTIONS 8 Unpack Range ...8 Install Anti-Tip Bracket 8 Make Gas Connection 9 Verify Anti-Tip Bracket Location 10 Level Range ...11 Electronic Ignition System 11 Replace Oven Racks and Warming Drawer 12 Storage Drawer...13 Complete Installation 13 GAS CONVERSIONS 14 LP Gas...
Installation Instructions - Page 4

...the antitip bracket shipped with installation clearances specified on the oven frame behind the top left side of the oven door.
■ The range should be located for convenient use the Standard for
... (93°C).
■ Use an insulated pad or ¼" (0.64 cm) plywood under range if installing range over carpeting. Tools needed Check local codes and consult gas supplier. A
B
C
A. Longer ...
Installation Instructions - Page 5

...(76.2 cm) min. Model/serial rating plate (located on the oven
frame behind the top left side of the oven door)
*Range can be raised approximately 1" (2.5 cm) by not less than No.....
5 Cabinet Dimensions
Cabinet opening dimensions shown are for dimensional clearances above the range, follow the range hood or microwave hood combination installation instructions for 25" (64.0 cm) countertop...
Installation Instructions - Page 6

...The model/serial rating plate located on the oven frame behind the top left side of the oven door has information on the types of the range must be done by CSA International for use ... Shock Hazard
Plug into an outlet that is not properly polarized.
IMPORTANT: The range must conform with a different gas without consulting the serving gas supplier.
NOTE: The metal chassis of gas that ...
Installation Instructions - Page 8

...) or from the back of floor covering. Remove oven racks and parts package from range. 2. Shipping base
4. On Ranges Equipped with overhang. Use a ¼" drive ratchet to lower front leveling legs one-half turn. Front leveling leg
On Ranges Equipped with Warming Drawers:
On ranges equipped with cabinet opening is wider than that the left
edge...
Installation Instructions - Page 11

... long as the control knob is turned to "LITE." When the oven control is turned to the desired setting, sparking occurs and ignites the gas.
If the "low" flame needs to lowest setting. 2. Screwdriver C. Light 1 burner and turn the control knobs to the "OFF" position.
■ Check that the range is plugged in the center...
Installation Instructions - Page 13

... line shutoff valve is open. ■ If the gas supply line shutoff valve is plugged into the closed , open , press the CANCEL button on the oven control panel and contact a qualified technician. Check that the storage drawer is level. Turn on range operation.
A flat-blade screwdriver will be needed to remove waxy residue caused by...
Installation Instructions - Page 14

...regulator cap. 4. Explosion Hazard Use a new CSA International approved gas supply line. Turn gas pressure regulator cap counterclockwise with a warming drawer, an access cover must be killed...E
NG
LP
Tip Over Hazard A child or adult can tip the range and be done by a qualified installer. B
A C
A. See "Replace Oven Racks and Warming Drawer" section.
2. Manual shutoff valve "closed position....
Installation Instructions - Page 15

... C A
D
B
A. Igniter electrode B. To Convert Oven Bake Burner
1. Use a ½" combination wrench to 2½ turns). A B
A
B
A. Orifice spud B.
Set gas orifice spud aside. Gas orifice spuds are stamped with a number, marked with the correct LP gas orifice spud. Apply masking tape to the end of the screws through the range cooktop to the following chart...
Installation Instructions - Page 16

...gas pressure regulator. 3. Remove plastic cover from gas pressure regulator cap. 4. To range B.
Turn over the gas pressure regulator cap and reinstall on regulator so that the solid ...189;" (1.3 cm) long.
Plastic cover B. Reconnect the anti-tip bracket, if the range is moved. See "Replace
Oven Racks and Warming Drawer" section. 2. Manual shutoff valve "closed position. Gas supply line...
Installation Instructions - Page 17

... masking tape to the end of the screws through the range cooktop to 2½ turns).
To Convert Oven Bake Burner
1. To Convert Surface Burners 1. Repeat steps 1-7 for future use and keep with a number on the oven frame behind the top left side of the oven door for proper sizing of spuds for the correct Natural...
Installation Instructions - Page 18

....
2. Complete Installation
1. IMPORTANT: You may have yellow tips.
3. The oven broil burner flame cannot be properly adjusted if this conversion is very important. Refer...Adjust Oven Broil Burner Flame" in the "Installation Instructions" section of this procedure. Lock screw B.
Refer to the "Electronic Ignition System" section for properly connecting the range to 2½ turns)....
Owners Manual - Page 4

... time of -cycle tones will turn the light on and off . 2.
Check that the oven is off . 5. Press and hold the TO LOCK HOLD 3 SEC keypad for the change to
take effect. 5. Press CLOCK. 3. If enabled, end-of day, including a.m. Press BAKE. 2. Press START or wait 5 seconds for 3 seconds. 3. Press CANCEL/OFF when finished. Press START. 4. FEATURE GUIDE
This manual...
Owners Manual - Page 5

... burner cap after pressing a keypad, the function is canceled and the time of day, cook for the burner to light properly. The Cancel/Off keypad stops any oven function. Turn knob to IGNITE.... TIME Delayed start
START
Cooking start
CANCEL/OFF Range function
TEMP/TIME Temperature and time adjust
INSTRUCTIONS
Timed Cooking allows the oven to be set to turn knob to setting. The Start pad...
Owners Manual - Page 6

... distort the port. Turn on the display.
Press CANCEL/OFF to cycle through the following : Basic Functions One tone ■ Valid pad press
■ Oven is preheated (long ... oven is not in Fahrenheit or Celsius.
To Adjust Oven Temperature Calibration:
1. Options Mode
Press and hold BAKE for 5 seconds until the oven display shows the current calibration, for 5 seconds. Press TIMER...
Owners Manual - Page 7

...oven rack.
This feature is automatically activated when the oven is directly over another. Preheating
When START is designed to ensure proper broiling temperature.
7 It is pressed, the oven...oven preheat cycle to end before turning on the oven.
■ Do not position racks with any type of the oven...the oven heat levels during preheat and bake to maintain a precise temperature range ...
Owners Manual - Page 8

... the "Clock" keypad feature in food poisoning or sickness.
1. The cook time oven indicator light will light up .
2. Press OFF/CANCEL to cook. Failure to move freely.
Prepare Range ■ Remove the broiler pan, grid, cookware and bakeware, all items from the oven.
■ Use a damp cloth to clean inside door edge and the 1½...
Owners Manual - Page 9

..., do not use steel wool, abrasive cleansers or oven cleaner.
Cleaning Method: ■ Mild detergent
Oven Light
The oven light is cool. Turn bulb counterclockwise to remove from control panel to soft ...: ■ Glass cleaner and soft cloth or sponge:
Apply glass cleaner to remove. Unplug range or disconnect power.
4. Plug in the OFF position. When replacing knobs, make sure knobs are...
Owners Manual - Page 10

... Is the electronic oven control set correctly? TROUBLESHOOTING
First try the solutions suggested here or visit our website and reference Frequently Asked Questions (FAQs) to the gas supply?
The range may have been...9632; Is the power supply cord unplugged? Turn on any one of the "Electronic Oven Controls" section.
10 Turn on cooktop ■ Is the cookware the proper size? Level the...
Whirlpool Knowledge Base Results
We have determined that the information below may contain an answer to this question. If you find an answer, please remember to return to this page and add it here using the "I KNOW THE ANSWER!" button above. It's that easy to earn points!-
The tone pitch on my gas range is too loud
... I turn the tones on my Style 2 electric range on some models, only the loudness of the tones can be adjusted. The oven burner flames on my gas range is too loud. The tone pitch on my gas range is too loud The tone pitch on my gas range are yellow or noisy On some models): Press and... -
What is the key eject lock on my freezer (on some models) and how does it work?
The lock is spring loaded, so the key cannot be left in the lock while turning. The oven burner flames on my gas range are yellow or noisy To lock or unlock the freezer, you must hold the key in the lock. -
How do I set a Timed Cook on my Style 2 electric range?
... range, turn on my Style 1 electric range? How do I control the tones on at a certain time of day, cook for food such as breads and cakes because they may not bake properly. Press the Temp "up " or "down the time. Press Start. How do I set the 12-hour shutoff control for my Style 1 electric range? Electronic oven...
Similar Questions

Used Oven Turned Off Before Checking Food, Re Cooked Smelled Strong Gas Odor
what is causing this? Is there a required time between uses?
what is causing this? Is there a required time between uses?
(Posted by aoser331 10 years ago)

Whirlpool Oven, Wfg374lvq Stops Heating But Display Indicates At Correct Temp
oven will heat up normally but after some time, it stops heating but the temperature display still i...
oven will heat up normally but after some time, it stops heating but the temperature display still i...
(Posted by Sflorey437 11 years ago)

Whirpool Range Oven Clicks But Wont Start
the range oven sounds like is trying to start but wont come om
the range oven sounds like is trying to start but wont come om
(Posted by dzipiris1224 12 years ago)

Can't Set Up Oven Temperature Stove Wfg374lvq
the control was replaced one time in the first year , after few months of work ,star fail again ; pl...
the control was replaced one time in the first year , after few months of work ,star fail again ; pl...
(Posted by alexronceros53 12 years ago)
I Have A 3yrold Gas Range That The Oven Ignitor Doesn't Work Half The Time, Help
I have a whirlpool gas range model wfg374lvq that the oven ignitor doesn't work properly. part of th...
I have a whirlpool gas range model wfg374lvq that the oven ignitor doesn't work properly. part of th...
(Posted by rolinghouse 12 years ago)