Whirlpool GFG461LVS Support Question
Whirlpool GFG461LVS Support Question
Find answers below for this question about Whirlpool GFG461LVS - 30 Inch Gas Range.Need a Whirlpool GFG461LVS manual? We have 4 online manuals for this item!
Question posted by jjcarlson03 on February 8th, 2013
Knobs Wont Turn Off When Using Range Top And Oven Because It Gets Too Hot
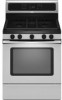
We run into the above mentioned issue on a regular basis... When we cook spaghetti for example. On one burner we boil the noodles and on the other the sauce and we bake the garlic bread at the same time. The PLASTIC range knobs get so hot that when you go to turn them off they wont turn off without stripping the knob. Is there a fix to this?
Current Answers
Related Whirlpool GFG461LVS Manual Pages
Owners Manual - Page 1
...174;
GAS RANGE
USER INSTRUCTIONS
THANK YOU for additional information.
Table of Contents
RANGE SAFETY 2 The Anti-Tip Bracket 3
FEATURE GUIDE 4 COOKTOP USE 6
Sealed Surface Burners 6 OVEN USE 7
Electronic Oven Controls 7 Sabbath Mode 8 Aluminum Foil 8 Positioning Racks and Bakeware 8 Oven Vent 9 Baking and Roasting 9 Broiling 9 Convection Cooking 9 Rapid Preheat 9 Timed Cooking...
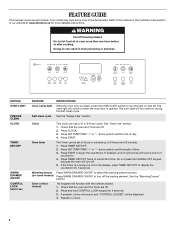
Owners Manual - Page 4
.... 1.
If the Timer is closed, press the OVEN LIGHT switch to set the time of time.
3. Check that the oven and Timer are off. 2. Doing so can use a 12 or 24-hour cycle. The oven light will come on and off .
5. Press SET TEMP/TIME "+" or "-" arrow pads to turn the light on during the Self-Clean cycle...
Owners Manual - Page 5
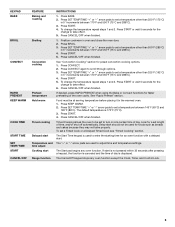
...when using the Bake or Convect functions for preset convection cooking options. 1. Timed Cooking allows the oven to be used to set a temperature other than 325°F (162°C)
in 5° increments between 145°F (63°C) and
190°F (88°C). If start Range function
INSTRUCTIONS
1. KEYPAD BAKE
BROIL
CONVECT
RAPID PREHEAT KEEP WARM
COOK TIME START TIME SET TEMP/TIME START...
Owners Manual - Page 6

... and low temperature cooking.
Hold a lit match near a burner and turn knob counterclockwise to the "General Cleaning" section. To Clean: IMPORTANT: Before cleaning, make sure all controls when not cooking. If the burner needs to be used to rapidly bring liquid to a boil and to desired setting. All 4 surface burners will click. Gas tube opening . A
Power™ Burner Feature The right...
Owners Manual - Page 7
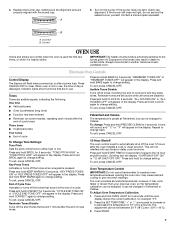
... Disable Turns off the short tones that sound 1 minute after a power loss. Press and hold BAKE for 5 seconds. Scrolling text will appear on the display. To exit, press CANCEL/OFF. 4. Press and hold KEEP WARM again to change back. To exit, press CANCEL/OFF. Correct
OVEN USE
Odors and smoke are disabled.
Replace the burner...
Owners Manual - Page 8
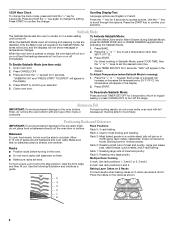
... tones will sound, and the displays will not turn on or off . When the oven door is running):
1. To Enable Sabbath Mode (one time only):
To Activate Sabbath Mode: To use racks 2 and 5. Press BAKE.
2. For timed cooking in chicken pieces. Press and hold the "+" keypad for 5 seconds to return to regular baking or press CANCEL/OFF to set a temperature...
Owners Manual - Page 9
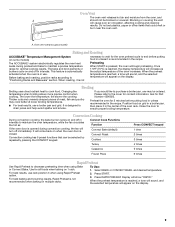
... or
burn near the oven vent. Use for Part Number 4396923. To Use: 1.
It is recommended in intervals to maintain a precise temperature range for contact information. Close the door to "Positioning Racks and Bakeware" section. Display will cause poor air circulation, affecting cooking and cleaning
results.
The bake and broil elements or burners cycle on 1 rack. Before...
Owners Manual - Page 10
... food poisoning or sickness. The cook time oven indicator light will count down the time. Press SET TEMP/TIME "+" or "-" arrow pads to enter the length of time to start.
7. Press START TIME. Press SET TEMP/TIME "+" or "-" arrow pads to enter the time of food may be used for keeping hot cooked foods at the same time. Press OFF/CANCEL to select...
Owners Manual - Page 12

... some models)
NOTE: To avoid damage to remove.
3. Cooked-on some models, do not use abrasive cleaners, steel-wool pads, gritty washcloths or abrasive paper towels. SURFACE BURNERS ■ See "Sealed Surface Burners" section. On some models) Do not use . Cleaning Method: ■ Soap and water:
Pull knobs straight away from socket. METALLIC PAINT (on soils...
Owners Manual - Page 13

... noises ■ Is the burner wet? Gas range noises during Bake and Broil operations Noises that may be heard during the Bake and Broil operations: Whooshing, Poof, Clicking, Snaps, Pop These sounds are normal operational noises that can result in knob before turning to a setting. ■ Is this the first time the oven has been used? Excessive heat around cookware...
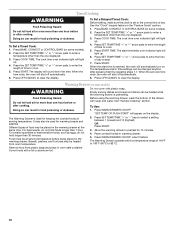
Owners Manual - Page 14

... edge of the "Electronic Oven Controls" section.
■ Was the oven preheated? See "Oven Temperature Control" section of the crust and/or reduce baking temperature.
See the "Start" keypad feature in the pan.
■ Is the proper length of time being used? Adjust cooking time.
■ Has the oven door been opened while cooking? Level the range. Depending on the bottom...
Installation Instructions - Page 6
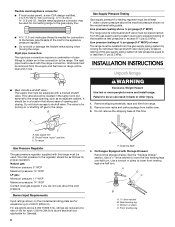
... lower front leveling legs one -half turn . See the "Storage Drawer" section. The rigid pipe must be used for connecting range to the gas supply line.
■ A ½" (1.3 cm) male pipe thread is for turning on the model/serial rating plate are for Canada).
6
A
A. Remove oven racks and parts package from range. 2. Use a ¼" drive ratchet to lower...
Installation Instructions - Page 7
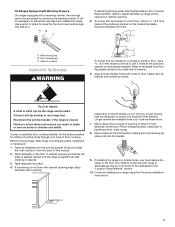
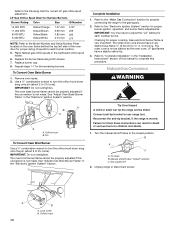
...turn. Failure to follow these instructions can tip the range and be necessary to the subfloor. Before moving range, slide range onto shipping base, cardboard or hardboard. 1.
If installing the range in a mobile home, you must secure the range... to allow for drilling mounting holes through your range using the following installation instructions.
7 Continue installing your type...
Installation Instructions - Page 9

... gas flame adjustments Cooktop and oven burners use an extension cord. When the cooktop control knob is removed from outside the range.
2.
Failure to "LITE." On models with a storage drawer, remove the storage drawer.
This sparking continues, as long as the control knob is installed, use an adapter. Check Operation of Cooktop Burners
Standard Surface Burners Push in and turn...
Installation Instructions - Page 10

... flame. Remove the oven rack. 2. A
B C
D
A. Press the BAKE pad. 5. Reinstall flame spreader and oven bake burner cover.
10 Replace the control knob. 4. Check Operation of flame should occur.
3.
A
B C
A. Air shutter B. Press CANCEL/OFF when finished. 5. Light 1 burner and turn the screw located in the center of the range. Test the flame by using the adjustment screw in...
Installation Instructions - Page 12
... the CANCEL button on surface burners and oven. Use a mild solution of the Use and Care Guide.
6. Read the Use and Care Guide.
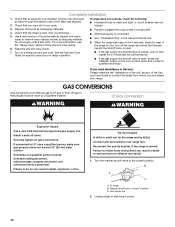
7. GAS CONVERSIONS
Gas conversions from Natural gas to LP gas or from whom you have a qualified person make sure gas pressure does not exceed 14" (36 cm) water column.
Gas supply line
2. See "Level Range."
5. For more information, see...
Installation Instructions - Page 13
... Regulator
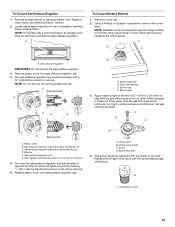
1. Remove storage drawer or warming drawer. See "Replace Oven Racks and Warming Drawer" section.
2. A
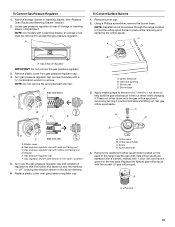
To Convert Surface Burners
1.
Press nut driver down onto the gas orifice spud and remove by turning it . C A D
B
LP
C
Side view after
A. Turn over the gas pressure regulator cap and reinstall on regulator so that the hollow end faces out and...
Installation Instructions - Page 14
...is not as distinct as the inner cone. Unplug range or disconnect power. Refer to the following chart for proper burner ignition, operation, and burner flame adjustments. Replace the burner base using both screws.
7. Remove oven racks. 2. The outer cone is moved.
To Convert Oven Bake Burner
1. The oven bake burner flame cannot be killed.
Checking for proper sizing of this...
Installation Instructions - Page 15
... Using a Phillips or Quadrex® screwdriver, remove the burner
base. Remove plastic cover from gas pressure regulator cap. 4. Apply masking tape to remove. F
Side view before
A
LP
LP
BFD
E
B
A. To Convert Gas Pressure Regulator
1. See "Replace Oven Racks and Warming Drawer" section.
2.
Gas pressure regulator
IMPORTANT: Do not remove the gas pressure regulator. 3. Turn...
Installation Instructions - Page 16

... to "Complete Installation" in plastic parts bag for proper cooktop, bake and broil burner flame is not made . Replace the burner base using both screws.
7. Remove oven racks.
2.
IMPORTANT: You may have yellow tips. 3. A
A. Repeat steps 1-7 for properly
connecting the range to the gas supply. 2. The oven bake burner flame cannot be properly adjusted if this conversion is not made...
Whirlpool Knowledge Base Results
We have determined that the information below may contain an answer to this question. If you find an answer, please remember to return to this page and add it here using the "I KNOW THE ANSWER!" button above. It's that easy to earn points!-
What are the control panel features on my 30-inch gas modular downdraft cooktop?
... to become familiar with the location and appearance of your Use & To help you find information on my 30-inch gas modular downdraft cooktop? Care Guide are the control panel features on specific parts and features quickly, page references from your 30-inch modular downdraft cooktop control panel. What are included. Below is a captioned... -
What are the parts and features on the control panel of my freestanding ceramic glass electric range?
... parts and features on the control panel of the parts and features listed. The range you have some or all What are the control panel features on my electric range? My range is the Control Lockout or Lockout on my 30-inch gas modular downdraft cooktop? Ordering replacement parts or accessories What is not working at... -
What is the vent fan on my microwave for and how do I operate it?
... noises It may stay on at medium speed when any sensor cooking function begins. The vent (exhaust) fan has three speeds: high, medium and low. To protect the microwave oven, if the temperature from the range or cooktop below the microwave oven gets too hot, the vent fan will start at low speed when any...
Similar Questions

Suddenly 4 Of 5 Burners Won't Light When Knob Is Turned - Only Center Burner Ign
(Posted by emccaffrey 2 years ago)

I Have This Whirlpool Gas Range Oven. I Know It Can Be Converted From Mat To Lp.
I just need instructions on what to buy and how to convert the stove from nat to lp??
I just need instructions on what to buy and how to convert the stove from nat to lp??
(Posted by Sheweychristine2 4 years ago)


Whirlpool Gas Stove Model Gfg461lvs Oven Won't Light
(Posted by mrhowsk 9 years ago)

I Turn On My Burner, It Will Not Get Hot But The Indicating Light Is On
(Posted by Anonymous-123367 10 years ago)