Get support for Whirlpool RF111PXSQ

Whirlpool RF111PXSQ Support Question

Whirlpool RF111PXSQ Support Question

Find answers below for this question about Whirlpool RF111PXSQ.
Need a Whirlpool RF111PXSQ manual? We have 4 online manuals for this item!
Question posted by wjdev on November 28th, 2011

Why Does Circuit Breaker Trip When Stove Is Plugged In?

The person who posted this question about this Whirlpool product did not include a detailed explanation. Please use the "Request More Information" button to the right if more details would help you to answer this question.

Current Answers

There are currently no answers that have been posted for this question.
Be the first to post an answer!

Remember that you can earn up to 1,100 points for every answer you submit. The better the quality of your answer, the better chance it has to be accepted.

Related Whirlpool RF111PXSQ Manual Pages

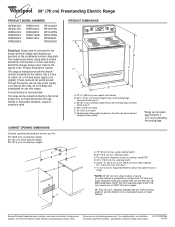
Dimension Guide - Page 1

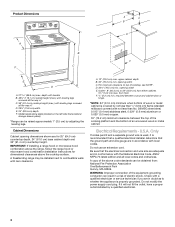
... side frame behind the storage drawer panel. The model/serial number rating plate is recommended. A circuit breaker is located behind the control panel or on the oven frame behind storage drawer panel) *Range can be connected directly to the circuit breaker box (or fused disconnect) through the neutral, use a 4-wire power supply cord rated at...
Installation Instructions - Page 1

... U.S.A. Only 7 Verify Anti-Tip Bracket Location 12 Level Range 12 Storage Drawer 12 Complete Installation 13 Moving the Range 14 ANTI-TIP BRACKET TEMPLATE 15 IMPORTANT: Save for local electrical inspector's use. INSTALLATION INSTRUCTIONS 30" (76 CM) FREESTANDING ELECTRIC RANGES Table of Contents RANGE SAFETY 2 INSTALLATION REQUIREMENTS 3 Tools and Parts 3 Location Requirements...
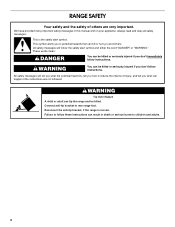
Installation Instructions - Page 2

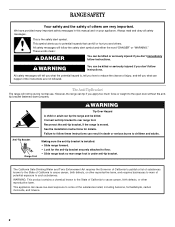
...have provided many important safety messages in death or serious burns to children and adults. 2 RANGE SAFETY Your safety and the safety of injury, and tell you what the potential hazard is...can kill or hurt you don't immediately follow instructions. Reconnect the anti-tip bracket, if the range is the safety alert symbol. Connect anti-tip bracket to reduce the chance of others . ...
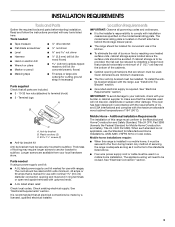
Installation Instructions - Page 3

...dimensions that are available from your builder or cabinet supplier to your cabinets, check with ranges. See "Electrical Requirements" section. IMPORTANT: To avoid damage to make sure that ...and CSA International and complies with any tools listed here. Any method of securing the range is not applicable, use in accordance with the requirements of the cabinets. ■ Cabinet...
Installation Instructions - Page 4

....1 cm) overall height (max.) with leveling legs screwed all the way in accordance with leveling legs screwed all local codes and ordinances. A freestanding range may be obtained from floor F 2.2 cm) min. D. 30¹⁄₈" (76.5 cm) min. Product Dimensions A C B A ... width E. Electrical Requirements - Do not modify the power supply cord plug. opening width C.
Installation Instructions - Page 5

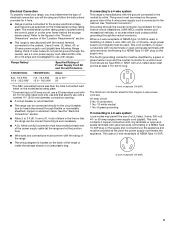
... Type 10-50P plug on the supply end. Cord should be Type SRD or SRDT with a UL listed strain relief and be at the junction box). ■ Wire sizes and connections must conform with a nominal 1³⁄₈" (34.9 mm) diameter connection opening. ■ A circuit breaker is recommended. ■ The range can be moved...
Installation Instructions - Page 6

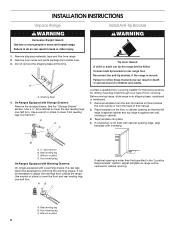
...wrench or pliers to lower the front and rear leveling legs one -half turn . Remove template from range. 2. Use wrench or pliers to lower front leveling legs one -half turn. Wrench or pliers ...floor in cabinet opening so that specified in the "Location Requirements" section, adjust template so range will be centered in back or other injury. 1. Remove shipping materials, tape and film from...
Installation Instructions - Page 7

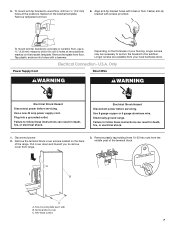
...instructions can result in death, fire, or electrical shock. 1. U.S.A. Failure to the subfloor. Electrically ground range. Failure to drill 2 holes at the positions marked on the thickness of your local hardware store. ...tip bracket to remove cover from the middle post of the range. Plug into holes with screws provided. Electrical Shock Hazard Disconnect power before servicing.
Installation Instructions - Page 8

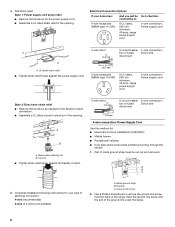
... against the flexible conduit. 3-wire direct ³⁄₈" (1.0 cm) A circuit breaker 3-wire connection: box or fused Direct wire disconnect 3" (7.6 cm) 4-wire connection...;" (1.0 cm) A circuit breaker 4-wire connection: box or fused Direct wire disconnect 5" (12.7 cm) 3-wire receptacle (NEMA type 10-50R) A UL listed, 250-volt minimum, 40-amp, range power supply cord 3-wire...
Installation Instructions - Page 9

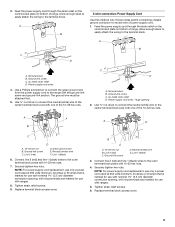
...) C. Ground-link screw D. Tighten strain relief screws. 6. large opening , with ring terminals and marked for use with ranges. 8. Line 2 (red) D D. NOTE: For power supply cord replacement, use only a power cord rated at 250... ³⁄₈" nut driver to connect the neutral (white) wire to the range with one of the 10-32 hex nuts. Replace terminal block access cover. Allow ...
Installation Instructions - Page 10

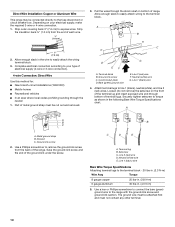
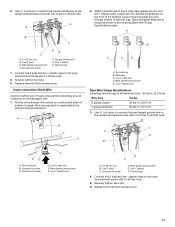
... terminal. 10 Terminal block B. Bare (green) ground wire E. Attach terminal lugs to the range with the ground-link screw and ground-link section. Line 1 (black) wire Bare Wire Torque Specifications Attaching terminal lugs to the fuse disconnect or circuit breaker box. The ground wire must be attached first and must be connected directly...
Installation Instructions - Page 11

... 1 (black) wires to the outer terminal block posts with 10-32 hex nuts. 8. Securely tighten setscrew to the center terminal block post with one of range. Use ³⁄₈" nut driver to connect the bare (green) ground wire to torque as shown in . (4.0 N-m) 3. Bare (green) ground wire D. Allow enough slack...
Installation Instructions - Page 12

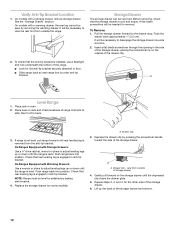
...engaged in the side of the storage drawer. 6. If range is not level, pull range forward until the range is level. On Ranges Equipped with a storage drawer, remove storage drawer. Gently pull...drawer forward to back. 3. Replace the storage drawer (on rack and check levelness of range, first side to adjust leveling legs up the back of storage drawer 4. Place level on some models)....
Installation Instructions - Page 13

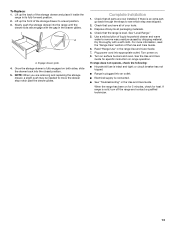
...Use and Care Guide for heat. or circuit breaker has not tripped. ■ Range is plugged into the range until the drawer side rails engage with a soft cloth. When the range has been on for 5 minutes, ...Lift up the back of your tools. 3. A A. Turn power on surface burners and oven. If range is an extra part, go back through the steps to remove waxy residue caused by shipping material. To...
Installation Instructions - Page 14

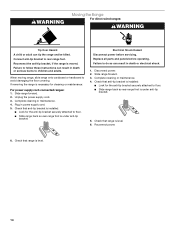
When moving range, slide range onto cardboard or hardboard to rear range foot. Plug in death or electrical shock. 1. Check that anti-tip bracket is installed: ■ Look for the anti-tip bracket securely attached to floor. ■ Slide range back so rear range foot is necessary for the anti-tip bracket securely attached to do so...
Owners Manual - Page 2

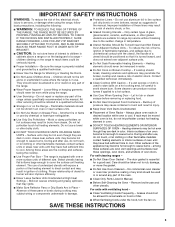
... "WARNING." All safety messages will not tip during normal use. The Anti-Tip Bracket The range will follow instructions. We have provided many important safety messages in death or serious burns to ...such substances. Always read and obey all safety messages. WARNING You can tip the range and be killed or seriously injured if you what the potential hazard is the safety alert ...
Owners Manual - Page 3

...Place - Contact a qualified technician immediately. ■ Clean Cooktop With Caution - For self-cleaning ranges - ■ Do Not Clean Door Gasket - Flammable materials should never be used to wipe ...reduce the risk of fire, electrical shock, injury to persons, or damage when using the range. ■ User Servicing - Among those areas are dark in Manual. ■ Before ...
Owners Manual - Page 4

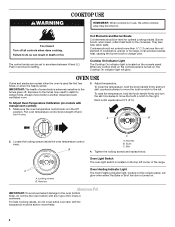
... cover entire oven rack with any control knob on the console panel is turned on the console panel. Adjust temperature. IMPORTANT: The health of the range. Tooth C. For best cooking results, do not line the oven bottom with foil because air must be set to the cookware. Coil Elements and Burner...
Owners Manual - Page 6

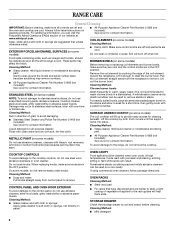
...help them slide. Nonabrasive plastic scrubbing pad and mildly abrasive cleanser can be used to the range, do not use . Cleaning Method: ■ Glass cleaner, mild liquid cleaner or nonabrasive...knobs. When replacing knobs, make sure they are cool and the control knobs are cool. RANGE CARE General Cleaning IMPORTANT: Before cleaning, make sure all -purpose cleaner: Rinse with clean ...
Owners Manual - Page 7

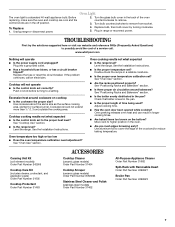
... Part Number 31682 Split-Rack with Removable Insert Order Part Number 4396927 Broiler Pan Order Part Number 4396923 7 Unplug range or disconnect power. 4. Plug into a grounded outlet. ■ Has a household fuse blown, or has a circuit breaker tripped? If the problem continues, call . Before replacing, make sure the oven and cooktop are cool and the control...

Whirlpool Knowledge Base Results

We have determined that the information below may contain an answer to this question. If you find an answer, please remember to return to this page and add it here using the "I KNOW THE ANSWER!" button above. It's that easy to earn points!

  • Nothing will operate on my gas range
    Replace the fuse or reset the circuit breaker. Has a household fuse blown, or has a circuit breaker tripped? My gas oven won't operate Blank display My range is not working at all Compactor won't operate If the problem continues, call an electrician. Nothing will operate on my gas range Nothing will operate on my gas range. Plug into a grounded 3 prong outlet...
  • Compactor won't operate
    ... service provider. Plug into a grounded 3 prong outlet. For additional information, review your specific Use and Care Guide . Replace the fuse or reset the circuit breaker. Is the ...disposer Compactor operation My electric range is not working. Turn the key-knob (key-switch) fully to Start? Has a household fuse blown, or has a circuit breaker tripped? Is the drawer completely ...
  • Blank display
    ... oven display blank? Is the range warm at all?   Plug power supply cord into a grounded 3 prong outlet. Display showing letters and numbers and hidden features/functions Does the range work now? Is the circuit breaker tripped or fuse blown? Is the power supply cord unplugged? Try resetting the circuit breaker or replacing the fuse as...

Similar Questions

Power To Clock But Oven Or Stove Not Heating
after a short in plug wore and circuit breaker tripping all repairs are completed circuit breaker tu...
(Posted by Holly081995 6 years ago)
Burns Not Working
the time is flashing on my display. When I turn on a burner (any of the four, same happens with all)...
(Posted by 1984villalta 6 years ago)
Breaker Needed For This Stove Top Please Model Number Rf111pxsq 3
running 8 3 wire for this stove need a breaker amp size for this stove thank
(Posted by rayszone 7 years ago)
Putting Panel On Stove Door Back Together After Cleaning Please Help Me!
I need help. Took apart the oven door to clean. Loosen the screws that held the handle and the side ...
(Posted by cathie93427 8 years ago)
Power Supply Cord
circuit breaker trips when stove is plugged in to good receptacle?
(Posted by wjdev 12 years ago)
Ask a New Question
Use the box below to post a new question about this Whirlpool product .
Points & Prizes
  • You can earn points for nearly everything you do on HelpOwl.com
  • You can trade in those points for gift cards at leading retailers such as Amazon.com and Walmart
  • It's that simple!
See How it Works
Create a Free Account

Whirlpool Manuals

Find free Whirlpool RF111PXSQ manuals and user guides available at ManualOwl.com. Try out our unique manual viewer allowing you to interact with manuals from directly within your browser!

Whirlpool Reviews

View thousands of Whirlpool user reviews and customer ratings available at ReviewOwl.com.

Contact Information

Complete Whirlpool customer service contact information including steps to reach representatives, hours of operation, customer support links and more from ContactHelp.com.

Scoreboard Ratings

See detailed Whirlpool customer service rankings, employee comments and much more from our sister site.

Whirlpool Recalls

Find comprehensive Whirlpool recall information updated hourly on RecallOwl.com.