Vivitar DVR 518 Support Question
Vivitar DVR 518 Support Question
Find answers below for this question about Vivitar DVR 518.Need a Vivitar DVR 518 manual? We have 2 online manuals for this item!
Question posted by mmitch0141 on October 19th, 2013
Date Stamp Removal
how to remove the date stamp; it's reading in 2008???
Current Answers
Related Vivitar DVR 518 Manual Pages
Camera Manual - Page 1

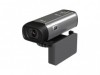
Windows and the Windows logo are the property of Microsoft Corporation. All rights reserved. All other trademarks are registered trademarks of their respective companies. DVR 518
Digital Video Camcorder
User's Manual
© 2009 Sakar International, Inc.
Camera Manual - Page 2
... System Requirement for Windows Vista 5 Computer System Requirements for Macintosh 5 A Quick Look at your Digital Video Camcorder 7 Preparing Your Camcorder for Use 8 Inserting an SD Memory Card 9 Maintenance and Care 11 DVR Function Control 12 Capturing Videos 15 Taking Photos 21 Audio Mode 34 Playback mode 35 Setup Mode 50 Connecting the Camcorder...
Camera Manual - Page 3
...Key Features
5 modes - In addition, a SD compatible memory card of your DVR camcorder. Video, Audio, Camera, Playback and Set Up. Digital Video resolutions - 640x480 (VGA), 320x240 (QVGA).
2 Your camcorder also has a PC Camera function for purchasing the DVR 518 Digital Video Camcorder.
Transfer media from my camcorder to my computer manually (Using Windows) ...66 Transfer...
Camera Manual - Page 4
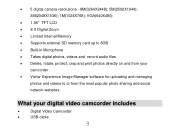
... Vivitar Experience Image Manager software for uploading and managing
photos and videos to or from your digital video camcorder includes
Digital Video Camcorder
USB cable
3
VGA(640X480)
... memory card up to 8GB Built-in Microphone Takes digital photos, videos and record audio files Delete, rotate, protect, crop and print photos directly...
Camera Manual - Page 9

Return and close the battery cover. Note:
8 Lift and open the battery compartment on the side of the camcorder.
2. Preparing Your Camcorder for Use
Battery Installation Your DVR camcorder requires 3 "AAA" batteries (not included). It is recommended that alkaline batteries be used.
1. Insert the batteries in accordance with the polarity indicated in the battery compartment.
3.
Camera Manual - Page 10

... strongly recommend downloading your photos and videos regularly to your DVR camcorder.
Media sitting on replacing the batteries.
9 Inserting an SD Memory Card
An SD compatible memory card of movies, photos and audio that can be inserted into your computer. Remove the batteries from the DVR camcorder when not in the number of...
Camera Manual - Page 12

...61623; Before using the video camcorder, please ensure that you read and understand the safety precautions described below:
• Do not try to open the case of the video camcorder or attempt to ...data on the SD Memory Card including protected data. Do not remove the SD memory Card during formatting as this video camcorder in any way. Maintenance and Care
Before using the camcorder, be...
Camera Manual - Page 13

.... The camcorder will switch off automatically. DVR Function Control
To power on the inside of the camcorder. The LCD monitor will light up indicating that your DVR is insufficient battery power, a "Low ...an operation mode for 60 seconds it will appear on your DVR camcorder off Press the Power button to turn your DVR.
Power on Press the Power button to turn on the
LCD screen.
...
Camera Manual - Page 14
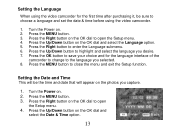
...and select the Language option. 5. Press the Right button on the photos you desire. 7. Setting the Date and Time This will appear on the OK dial to open
the Setup menu. 4. Turn the Power... time and date that will be sure to choose a language and set the date & time before using the video camcorder.
1. Press the MENU button. 3. Setting the Language
When using the video camcorder for ...
Camera Manual - Page 15

... files.
Press the OK button to turn on the camcorder. 2. The video default capture mode appears on each of the LCD screen to change the...
Change the camcorder`s mode There are four modes in this DVR camcorder.
1. Press the Up/Down button to change
the mode. 4....the bottom left of the settings you
wish to open the date and time settings. 6. Each time the DV/DSC mode button is pressed...
Camera Manual - Page 16

... will appear on the top right on the top left at the subject or object you need to select the Video mode. Press the Shutter button on your DVR, press the DV/DSC button on the top right of the LCD.
1. The amount of the camcorder to start shooting. 4. On turning on...
Camera Manual - Page 22

menu. 6. The camera
icon appears in the top left of the LCD.
The camcorder`s internal memory is limited per each ...memory and capture many more memorable photos.
Note: After selecting your shot. 1. Press the MENU button to revert back to the Video capture mode to compose your White Balance choice, the corresponding icon will beep and the picture taken as jpeg and saved to ...
Camera Manual - Page 28
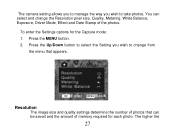
Press the MENU button. 2. The camera setting allows you to manage the way you wish to take photos. Press the Up/Down button to select the Setting you wish to change the Resolution pixel size, Quality, Metering, White Balance, Exposure, Driver Mode, Effect and Date Stamp of the photos. To enter the Settings options...
Camera Manual - Page 35

... highlight and select the Date Stamp option:
[Off]: Neither date nor time is added to the image. [Date]: Add date only to the image. [Date& Time]: Add date and time to record your audio clips depends on your camcorder. Date Stamp With this function, you may record the date and time on how much memory is left after capturing videos
34
Camera Manual - Page 51

Sounds, Auto Review, Power Frequency, Power Save, Date & Time, Language, TV Out, USB, Start-up Image, Format and Reset All.
1. Press the Right button to select the
icon to open the Setup menu. ... Setup mode you can adjust the sounds the camcorder emits
50 Press the MENU button. 2.
Setup Mode
The Setup mode can be accessed from the Video, Camera Capture and Playback modes.
Camera Manual - Page 64

... computer recognizes the device. 4. Turn the camcorder on the LCD,
indicating that came with your camcorder to connect your camcorder to PC Camera mode. As your computer.
1. Get photos and videos from the Main menu.
63 Doing so will appear on . 3. Select the "Get Images" button from your camcorder to your computer...
Camera Manual - Page 66

..., MySpace, Picasa, Photobucket and YouTube. You can upload and manage photos and videos to your
camcorder is complete. 9.
If your computer. Select a location on the bottom left showing the number of media files downloading to and from the selected device (removable disk) after the import. 8. Select to the selected folder and albums...
Camera Manual - Page 67

...to Mass Storage mode
4. Then select a folder and choose Paste from this folder into the Videos/My Videos folder. 8. "MSDC" will cancel the transfer
66 Open the DCIM folder and the folder ...My Pictures folder and the videos into your computer.
2. Select the media and copy the files from the Edit menu. 7. We recommend that your camcorder appears in PC Camera mode, press the DV...
Camera Manual - Page 68

...choose Copy from the Edit menu. 7. Note: After you copy the images into the Pictures folder and the videos into the USB and it back to
view the media files. 6. Select the files and drag them into your... folder inside to Mass Storage mode
4. "MSDC" will remain on all the while it is in PC Camera mode, press the DV/DSC button on the bottom left of the LCD screen to change it won't ...
Camera Manual - Page 73
The Memory card is loaded.
★This video camcorder cannot display non-PICT images. A memory card with non-PICT images (recorded with other camera) is not formatted correctly.
★Format the ...
1. Trouble Shooting
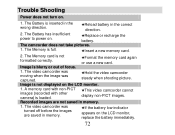
Power does not turn on .
★Replace or recharge the battery. The video camcorder was moving when the image was turned off before the images are not saved in the...
Similar Questions

How Do I Delete Everything On 503 Hd To Start Over...........
(Posted by ijd6213 8 years ago)

Vivitar Dvr787-pnk-kit-wm Action Digital Video Recorder, Pink Video Camera With
Vivitar's DVR 787 HD comes on when plugged in and says it has full power but cuts off when you unplu...
Vivitar's DVR 787 HD comes on when plugged in and says it has full power but cuts off when you unplu...
(Posted by jjknott82 8 years ago)

Not Powering Up
I have the vivitar 810 HD and we changed batteries and when trying to power up it shows red light bu...
I have the vivitar 810 HD and we changed batteries and when trying to power up it shows red light bu...
(Posted by shericoons 9 years ago)

Dvr 794 Hd Vivitar Camera Sport
Does this camera take pictures or only video ?
Does this camera take pictures or only video ?
(Posted by sandrinedebongnie 9 years ago)
