Toshiba PA3973U-1C0K Camileo X200 Support Question
Toshiba PA3973U-1C0K Camileo X200 Support Question
Find answers below for this question about Toshiba PA3973U-1C0K Camileo X200.Need a Toshiba PA3973U-1C0K Camileo X200 manual? We have 1 online manual for this item!
Question posted by bromjohn on March 28th, 2015
Cannot Turn Off Views Creen Indicators
The touchscreen or view screen power indicator and recording indicator do not turn off. They are always displayed. How can I turn them off. I have checked every option on the setup.
Current Answers
Answer #1: Posted by TommyKervz on March 31st, 2015 6:55 AM
TommyKervz

Member since:
January 10th, 2013 Points: 17,776,813

Member since:
January 10th, 2013 Points: 17,776,813
Mostly the course of this problem is when it falls down or if ever water went inside. if so' a local professional technician must be visited or contact Toshiba for additional technical assistance. firmware/hardware failure it seems.
Related Toshiba PA3973U-1C0K Camileo X200 Manual Pages
User Guide - Page 7

... view 13 Underside view 13
Chapter 2: Getting Started 14
Loading the battery 14 Charge your battery 16
Inserting and removing an SD™ Card (optional).....20 Protecting data on an SD™ Card 21
Turning the camcorder on and getting started .......22 Turning off the camcorder 22
Chapter 3: Record Mode 23
Button functions 23 LCD touch screen...
User Guide - Page 9

... TV 58
Connecting to a high-definition 16:9 (wide) TV 58
Chapter 7: Viewing Photos and Videos on a Computer 60
Installing bundled software 60 Transferring photos or videos to a computer..........61
Chapter 8: Uploading Video and Photo Files to the Internet 62
CAMILEO® Uploader 63 Setting up your account information for a Web site 65
Chapter 9: Webcam Mode...
User Guide - Page 10
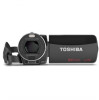
Other features of your CAMILEO® X200 camcorder are: ❖ 12x Optical Zoom ❖ 20x Advanced Zoom (1080p) ❖ 60x Digital Zoom ❖ High quality images up to 16 megapixels ❖ 3" color LCD touch screen for easy viewing of video, pictures
and onscreen menus ❖ On screen video trimming ❖ Video recording at full HD resolution of 1920 x 1080p ❖...
User Guide - Page 12

... of the manufacturing process, and do not affect the recording.
Front view
Photo button Tele/Wide button
Speaker
Light Lens IR receiver
Microphone (Sample Illustration) Front view
Rear view
Indicator light
LCD touch screen
Mini USB/Mini HDMI™ port cover
(Sample Illustration) Rear view
Pause button Video button 12
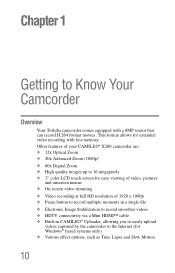
Getting to Know Your Camcorder
Overview
NOTE
The...
User Guide - Page 16
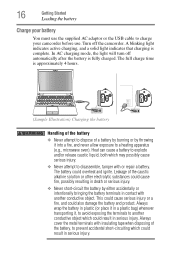
... ignite. Always wrap the battery in plastic (or place it in serious injury. Turn off automatically after the battery is fully charged. Heat can cause a battery to ... or intentionally bringing the battery terminals in serious injury. A blinking light indicates active charging, and a solid light indicates that charging is approximately 4 hours.
(Sample Illustration) Charging the battery
...
User Guide - Page 18
... clothes, promptly remove them to the loss of your eyes, body or clothing. Battery warning indicators
❖ Always immediately turn on the product's power again until an authorized Toshiba service provider has checked it off and disconnect the power cable/cord plug from the plug socket and stop using the battery if you might have...
User Guide - Page 19
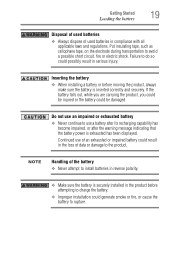
..., or cause the battery to rupture. Continued use a battery after its recharging capability has become impaired, or after the warning message indicating that the battery power is exhausted has been displayed.
Put insulating tape, such as cellophane tape, on the electrode during transportation to use of an exhausted or impaired battery could be...
User Guide - Page 21
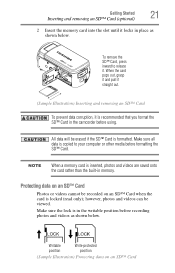
...to your computer or other media before recording photos and videos as shown below .
Make sure all data is locked (read only); All data will be viewed. Getting Started
21
Inserting and removing an SD™ Card (optional)
2 Insert the memory card into...
To prevent data corruption, it . Protecting data on an SD™ Card
Photos or videos cannot be recorded on an SD™ Card
User Guide - Page 22

... turns green. To record videos: Press the Video ( ) button to take a still photo while recording a video: Press the Photo ( ) button. Then press it fully to begin recording.
To take the photo. Turning off the camcorder
To turn off the camcorder, either :
❖ Flip the LCD touch screen outward to turn on .
Press it on the camcorder automatically.
❖ Or press the Power...
User Guide - Page 24

... images below may appear on the LCD touch screen when photos and videos are recorded:
Onscreen notification icons
Onscreen touch function icons
3
21
12 11 10 9
8
4
7
56
13 14 15 16 17
(Sample Image) LCD touch screen indicators
Notification icons
Battery: Full power
Battery: Medium power
1
Battery: Low power
Battery: No power
DC power mode
2
Macro mode for close ups
User Guide - Page 27
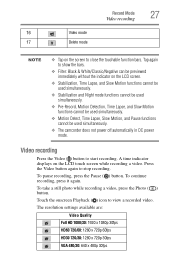
...30fps Press the Video button again to start recording.
Video recording
Press the Video ( ) button to stop recording. A time indicator displays on the LCD screen.
❖ ...power off automatically in DC power mode. To continue recording, press it again. Record Mode
27
Video recording
16
Video mode
17
Delete mode
NOTE
❖ Tap on the screen to view a recorded video.
User Guide - Page 28
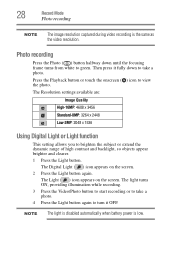
... while recording. 3 Press the Video/Photo button to start recording or to take a photo. Photo recording
Press the Photo ( ) button halfway down until the focusing frame turns from white to turn it fully down to view the photo. Then press it OFF. The Digital Light ( ) icon appears on the screen. NOTE The light is disabled automatically when battery power...
User Guide - Page 30

... All
*Please see "Camcorder Settings" on page 53 for more information about Setup.
The available options are Video Setting, Photo Setting, Effects, Setup, and Delete. Screen
2 Touch the desired onscreen icon twice.
The Menu screen appears. The options menu appears.
3 Touch to select the specific option you want to change, and touch it again to enter its settings...
User Guide - Page 31
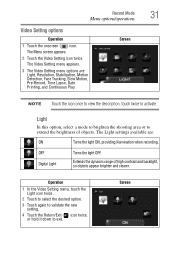
.../Exit ( ) icon twice, or hold it down to activate. Screen
31
NOTE Touch the icon once to view the description, touch twice to exit. The Video Setting menu appears.
3 The Video Setting menu options are :
ON
Turns the light ON, providing illumination when recording.
Light
In this option, select a mode to brighten the shooting area or to extend...
User Guide - Page 34

... played, the playback time will be longer than the actual recording time. NOTE Touch the icon once to view the description, touch twice to exit.
Screen
Operation
1 In the Video Setting menu, touch the Pre-Record icon twice.
2 Touch to select the desired option.
3 Touch again to validate the new setting.
4 Touch the Return/Exit ( ) icon...
User Guide - Page 45

Record Mode
Menu options/operations
Deleting Video(s)
Operation
1 In the Delete menu, touch the Delete Video icon twice.
2 Touch to select the desired thumbnail photo(s) and video(s).
Screen
Select & Delete
Operation
1 In the Delete menu, touch the Select & Delete icon twice.
2 Touch to select the desired thumbnail video(s). Check mark(s) will indicate the selected file(s).
3 Touch the ...
User Guide - Page 52

....
6 Touch the Return/Exit ( ) icon twice, or hold it as the new video clip. Video Flow:
Specify the Dividing ( / ) where the video clip is write-protected.
Portions A and C will be saved as a new video clip. Screen
2 Touch the Dividing ( / ) icon (the icon turns yellow) to indicate the beginning/end.
3 Touch the Rewind/Forward ( / ) icon to fine-tune...
User Guide - Page 61
...2.0 cable. The multi-indicator light blinks.
2 To access photos and videos on your SD™ Card: Videos and photos can be ...found on your computer at "My Computer\Removable Disk\DCIM\100MEDIA."
3 To access photos and videos in the online help of all the bundled software. To do this folder, you can view, delete, move, or copy any video...
User Guide - Page 63
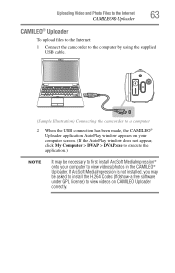
... computer by using the supplied USB cable.
(Sample Illustration) Connecting the camcorder to view videos/photos in the CAMILEO® Uploader. If ArcSoft MediaImpression is not installed, you may be necessary to first install ArcSoft MediaImpression® onto your computer screen. (If the AutoPlay window does not appear, click My Computer > DVAP > DVAP.exe...
User Guide - Page 70
...; Card using the camcorder instead of a computer (Refer to a high speed card.
3 Why do not display properly when the LCD touch screen shows the "!" The camcorder must use the supplied AC adaptor or the USB cable. A steady light indicates that the SD™ Card is fully charged (In AC charging Mode).
70 symbol...
Similar Questions

I Would Like To Use This Camera Connected To My Computer But After 3 Minutes It
My camera is a Toshiva Camileo H30, I'm using this camera in my computer and when I turn it on it st...
My camera is a Toshiva Camileo H30, I'm using this camera in my computer and when I turn it on it st...
(Posted by wfmendez 2 years ago)


How To Turn On Ac Power Mode - Toshiba Pa3974u 1c0k Camileo X400
The camera will not power on while connected to AC. How do I swap from DC to AC so I can use the cam...
The camera will not power on while connected to AC. How do I swap from DC to AC so I can use the cam...
(Posted by rpbuice 9 years ago)


What External Ac Supply Cords Doe This Camera Need? Can It Be Charged By
What external ac supply cords doe this camera need? Can it be charged by computer or by an ac adapto...
What external ac supply cords doe this camera need? Can it be charged by computer or by an ac adapto...
(Posted by barbbailey45 11 years ago)