Get support for Optoma EP719

Optoma EP719 Support Question

Optoma EP719 Support Question

Find answers below for this question about Optoma EP719.
Need a Optoma EP719 manual? We have 1 online manual for this item!
Question posted by stome01 on March 4th, 2012

Video Mode

The person who posted this question about this Optoma product did not include a detailed explanation. Please use the "Request More Information" button to the right if more details would help you to answer this question.

Current Answers

There are currently no answers that have been posted for this question.
Be the first to post an answer!

Remember that you can earn up to 1,100 points for every answer you submit. The better the quality of your answer, the better chance it has to be accepted.

Related Optoma EP719 Manual Pages

User Manual - Page 1

... Image 14 Adjusting the Projector Image Height 14 Adjusting the Projector Zoom / Focus 15 Adjusting Projected Image Size 15 User Controls 16 Control Panel & Remote Control 16 On-Screen Display Menus 19 How to operate ...19 Menu Tree...20 Language ...21 Image-I ...22 Image-II (Computer Mode 24 Image-II (Video Mode 26 Audio ...28...
User Manual - Page 2

... the risk of the lamp itself. Warning- Do not use lens cap when projector is on the projector first and then the signal sources. Warning- Please do not expose this... sound. Usage Notice Precautions Follow all changing instructions. Warning- Warning- Warning- If this happens, the projector will detect the life of fire or electric shock, do not open or disassemble the product...
User Manual - Page 4

...  SXGA+, SXGA compression and VGA, SVGA re-sizing  Mac compatible English ... 4 Introduction Product Features This product is an XGA single chip 0.55" DLPTM projector.
User Manual - Page 5

... SCART RGB/S-Video Adaptor (available in applications for each country, some regions may have different accessories. Contact your unit is missing. English Check to the difference in European version only) 2 x AAA Batteries Documents :  User's Guide  Quick Start Card  Warranty Card Carrying Case 5 ... Introduction Package Overview This projector comes with...
User Manual - Page 10

... different accessories. 54 S-Video Output Video Output 1...Power Cord 2...VGA Cable 3 SCART RGB/S-Video Adaptor (For European Only) 4 Composite Video Cable 5 S-Video Cable (Optional Accessory) 6 D-15 to RCA Adapter for YPbPr (Optional Accessory) English ... 10  To ensure the projector works well with the projector. Installation Connecting the Projector EUR RGB RS232 1 DVD...
User Manual - Page 11

... regions may have different accessories. 54 S-Video Output Video Output 1...Power Cord 2...VGA Cable 3 DVI to DVI Cable 4 Composite Video Cable 5 S-Video Cable (Optional Accessory) 6 D-15 to RCA Adapter for YPbPr (Optional Accessory)  To ensure the projector works well with the projector. Make sure the timing of the display mode is compatible with your computer, please...
User Manual - Page 12

...the control panel or remote control to switch. Turn on the projector first and then the signal sources. 2 Power/Standby English ... 12 Lens Cap 1 The projector will turn green. Turn on the lamp by pressing "Power/Standby" ...detect your source automatically.  If you can select your source (computer, notebook, video player,etc.). Remove the lens cap.  2.
User Manual - Page 13

... seconds, it has cooled down. Press the "Power/Standby" button again to turn the projector back on the projector immediately following a power off the projector lamp, you must wait until the projector has completed the cooling cycle and has entered standby mode. Press the "Power/Standby" button to confirm, otherwise the message will...
User Manual - Page 16

... Control English ... 16 Using the Control Panel Power/Standby  Refer to the "Power On/Off the Projector" section on screen display (OSD) menu. Menu  Press "Menu" to choose RGB, Component-p, Component-i, S-Video, Composite Video and HDTV sources. User Controls Control Panel & Remote Control There are two ways for you to the...
User Manual - Page 17

... Mode  Select the display mode from PC, Movie, Game, sRGB and User. Enter  Confirm your selection. English Re-Sync  Automatically synchronizes the projector to...Video source. 17 ... To exit OSD, press "Menu" again. S-Video  Press "S-Video" to pause the screen image. Keystone /  Adjusts image distortion caused by tilting the projector...
User Manual - Page 19

... item and adjust the settings by key. 4. Main Menu Sub Menu Setting 19 ... English The projector will automatically save the new settings. To open the OSD menu, press "Menu " on a ...enter sub menu. 3. To exit, press "Menu "again. User Controls On Screen Display Menus The Projector has multilingual On Screen Display menus that allow you to select any item in the sub menu and...
User Manual - Page 22

Keystone (Keystone Correction) Adjust image distortion caused by tilting projector. (±15 degrees) Color Press "Enter" to lighten the image. If you prefer a stronger image, adjust towards User Controls English ... 22 Image-I Display Mode There are many factory presets optimized for maximum peaking. Brightness Adjust the brightness of the image.  Press the...
User Manual - Page 24

User Controls English ... 24 Image-II (Computer Mode) Frequency "Frequency"changes the display data frequency to match the frequency of the ... the width of the screen.  Window: When a 4:3 image is bigger than a 16:9 screen, select the "Window" mode to make an adjustment. Position (Vertical Position)  Press the to move the image up. If you experience an unstable or &#...
User Manual - Page 25

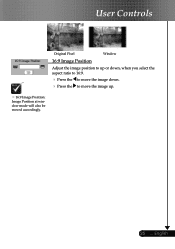
User Controls Original Pixel Window 16:9 Image Position Adjust the image position to up or down, when you select the aspect ratio to 16:9.  Press the to move the image down.  Press the to move the image up.  16:9 Image Position: Image Position at window mode will also be moved accordingly. 25 ... English
User Manual - Page 26

... in the image. User Controls Image-II (Video Mode) "Saturation", "Tint" and "Sharpness" function is bigger than a 16:9 screen, select the "Window" mode to fit the image onto the screen ...of color in the image. Adjusts the sharpness of color in the image. Saturation Adjusts a video image from black and white to fully saturated color.  Press the  Press ...
User Manual - Page 27

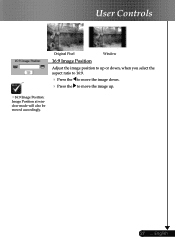
English User Controls Original Pixel Window 16:9 Image Position Adjust the image position to up or down, when you select the aspect ratio to 16:9.  Press the to move the image down.  Press the to move the image up. 16:9 Image Position: Image Position at window mode will also be moved accordingly. 27 ...
User Manual - Page 29

...When you select this function, the projector turns the image upside down at full speed continuously to turn on High Altitude mode. You can project behind a ...projector reverses the image so you select this function is lost. High Altitude Choose "On" to allow for other signals if the current input signal is turned on the display screen. Signal Type Select signal type RGB or Video...
User Manual - Page 30

...is "0000". 2. Press "Enter" to set password. (First time) 1. English ... 30  Security Mode  On: Choose "On" to delete the bit. (You can be switched over between the position and...to go to to use security verification while user switch on projector.  Off: When user switch on projector without password.  Timer: Displays the usable hours when switch on...
User Manual - Page 32

User Controls Lamp Setting Lamp Hours Display the cumulative lamp operating time. Choose "Off" to return to 130%. ECO Mode Choose "On" to dim the projector lamp which will show or to hide the warning message when the changing lamp message is no signal input. (In ...Reset Reset the lamp life hour after replacing a new lamp. Lamp Reminding Choose this function to show up to normal mode.
User Manual - Page 34

... If you are using a Notebook: 1. Select the "Change" button under the SP box; Click on the projector lens. Press the toggle output settings. Problem: Image is not displaying a presentation  If you are using a..." to make an adjustment.  Check and reconfigure the display mode of the Notebook or PowerBook computer is out of the computer. 2.

Similar Questions

We Have A Dark Shadow Or Spot On The Left Side Of The Screen. Ep719 Projector.
We have dark spots or shadow on our EP719 Projector. Already replaced the light bulb and it still th...
(Posted by karlita71 11 years ago)
Gray Bar: Optoma Ep719 Xga Dlp Projector 2000l 2500:1 Cont Dvi-d With Hdcp
I have a vertical Gray Bar that was taking up about 10% of the screen and it was 80% off to the righ...
(Posted by rob92719 11 years ago)
Eco-mode?
How do I select Economy Lamp Life Mode?
(Posted by Anonymous-43615 12 years ago)
Optoma Pk201 Repeat Video Function?
Does this projector (Optoma PK201)have an internal repeat function when you play .mov or avi files f...
(Posted by mrvear 12 years ago)
Ask a New Question
Use the box below to post a new question about this Optoma product .
Points & Prizes
  • You can earn points for nearly everything you do on HelpOwl.com
  • You can trade in those points for gift cards at leading retailers such as Amazon.com and Walmart
  • It's that simple!
See How it Works
Create a Free Account

Optoma Manuals

Find free Optoma EP719 manuals and user guides available at ManualOwl.com. Try out our unique manual viewer allowing you to interact with manuals from directly within your browser!

Optoma Reviews

View thousands of Optoma user reviews and customer ratings available at ReviewOwl.com.

Contact Information

Complete Optoma customer service contact information including steps to reach representatives, hours of operation, customer support links and more from ContactHelp.com.

Scoreboard Ratings

See detailed Optoma customer service rankings, employee comments and much more from our sister site.