Get support for Onkyo TX-NR656

Onkyo TX-NR656 Support Question

Onkyo TX-NR656 Support Question

Find answers below for this question about Onkyo TX-NR656.
Need a Onkyo TX-NR656 manual? We have 1 online manual for this item!
Question posted by polgerard on March 6th, 2023

Hoe Stel Ik De Equilizer In, Als Ik Een Knop Selecteer Gebeurd Er Niets

hoe moet dit er het geluid veranderd niet als ik de schuiven verstel

Current Answers

Answer #1: Posted by SonuKumar on March 6th, 2023 7:48 PM
This answer was accepted by the poster of the original question.
SonuKumar

Member since:
May 9th, 2021

Points: 16,622,280
1,100
points
To set the equalizer on the Onkyo TX-NR656 receiver, you can follow these steps:

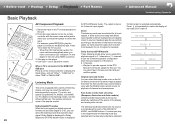
Press the "Home" button on the remote control to access the receiver's menu.

Use the arrow keys on the remote control to navigate to the "Manual Setup" option and press "Enter".

Select the "Audio Setup" option and then choose "Equalizer".

Use the arrow keys to highlight the frequency band you want to adjust (for example, "Bass" or "Treble").

Use the arrow keys to adjust the level of that frequency band. The level can be adjusted up or down in increments of 1 decibel (dB).

Once you have adjusted the equalizer settings to your liking, press the "Home" button on the remote control to exit the menu.

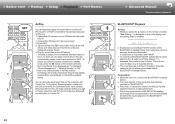
If you are selecting a button on the remote control and nothing is happening, it is possible that the equalizer is not currently active or that the receiver is not recognizing the remote control signal. In this case, you may need to check the receiver's settings or refer to the owner's manual for additional troubleshooting tips.


Please respond to my effort to provide you with the best possible solution by using the "Acceptable Solution" and/or the "Helpful" buttons when the answer has proven to be helpful.

Regards,
Sonu
Your search handyman for all e-support needs!!

Related Onkyo TX-NR656 Manual Pages

User Manual - Page 1

> Before start > Hookup > Setup > Playback > Part Names > Advanced Manual Troubleshooting | Appendix AV RECEIVER TX-NR656 Basic Manual Hookup Step1: Choose your Speaker Layout 3 Step2: Connect the Speakers 9 Step3: Connect the TV 11 Step4: Connect the AV Components 13 Step5: Connect ...
User Manual - Page 2

... as linking input switching with the input selector and players conforming to the CEC standard, switching audio output and volume using onscreen guidance and On-Screen Display (OSD) showing operations on the TV... of speakers to this unit is in Dolby Atmos format which allows you to play , select the source with one HDMI cable $ Easy Initial Setup using the remote controller of a CECcompliant...
User Manual - Page 4

...envelopment and connectivity of sound created by outputting sound from the surround back speakers when you select the Dolby Surround listening mode. With formats other than you would in the setup, ...surround speakers are including surround back speakers in a 5.1-channel system. 0 If you can select the Dolby Atmos listening mode, which realizes the most up-to-date 3D surround sound,...
User Manual - Page 5

...ˎ 2: 120e Go To "Hookup" (ÄP9) 5 With formats other than the front speakers. Select which realizes the most up facing the listening position. ˎ1 ˎ2 ˎ 1: 22e to ...Dolby Atmos. Both should be situated at least 0.9 m higher than Dolby Atmos, you can select the Dolby Atmos listening mode (5.1.2 channel playback), which speakers to setup according to the environment of...
User Manual - Page 6

... seating position, and top rear speakers on the ceiling forward of height speakers, either as top front speakers, top middle speakers, or top rear speakers. Select which realizes the most up-to 150e Go To "Hookup" (ÄP9) The distance between each pair should match the distance between the two front...
User Manual - Page 7

... by outputting sound from overhead. Place them either as Dolby enabled speakers (front) or Dolby enabled speakers (surround). With formats other than Dolby Atmos, you select the Dolby Surround listening mode. If they are special speakers designed to face the ceiling so that sound appears to the environment of the room...
User Manual - Page 11

...a TV that supports ARC when connecting. Shown here are required to a connected device (ÄP20) 11 Select "Yes" in the Initial Setup. 0 Please refer to the HDMI OUT SUB jack. Another TV or ...more AV components, you can select the video displayed on the TV that supports the ARC (Audio Return Channel) feature. Choose an HDMI IN jack on the TV and the audio output from the TV through ...
User Manual - Page 13

...after all connections are complete. 0 To enjoy digital surround sound including Dolby Digital, audio output should be set -top Streaming media box player GAME > Advanced Manual Troubleshooting ...an AV component that conforms with the CEC (Consumer Electronics Control) standard, you to play video and audio from AV components on the TV even when this unit is required to use the HDMI CEC and HDMI...
User Manual - Page 14

... AV component to match the jacks it has. Note that does not have : Non-HDMI AV Components This is no option for audio signals with 480i or 576i resolution. Select interlace if there is an example of the player to 480i or 576i. > Before start > Hookup > Setup > Playback > Part Names 1 2 OR 3 BD...
User Manual - Page 15

... jack. Further, if the turntable uses an MC type cartridge, install an audio equalizer compatible with an audio component. You can also connect a turntable that has an MM-type cartridge to the PHONO jack. 0 If the turntable has a built-in audio equalizer, connect it to the GND terminal of a connection with the MC...
User Manual - Page 16

... unit and the LINE IN jacks of 5.1 channels in the main room. MAIN ROOM ZONE2 ZONE 2 LINE OUT It is possible to ZONE 2 when selected with an analog audio cable. 3 2 1 LINE IN ZONE SPEAKER It is being played in the main room during ZONE 2 playback. > Before start > Hookup > Setup > Playback > Part Names...
User Manual - Page 17

...as shown in "3. Power Cord Hookup Connect the power cord to the power outlet after selecting "Wireless" in the illustration. AM FM AM loop antenna Indoor FM antenna (North American.... 0 Taiwanese models include removable power cords. Network Connection" (ÄP19) in Initial Setup, select the desired setting method and follow the onscreen instructions to the network using wired LAN or Wi...
User Manual - Page 18

... to the input for each speaker, the crossover frequencies, and the distance from the listening position. When you terminate the procedure on the remote controller, select "7. Read beforehand so the setup goes smoothly. To redo the Initial Setup If you turn off the household appliances. 18 AccuEQ Room Calibration Place the...
User Manual - Page 19

...ˎ " or display it in the Initial Setup. If you want to the TV's audio through this unit. There are a further two choices of the access point to enable the ...mode. "HDMI CEC" to mask the password with speaker cable, select "Using AV Receiver". Find out the SSID of the input selector selected immediately before switching the unit to standby, you to agree to indicate...
User Manual - Page 20

...SUB" or "MAIN+SUB". Dolby Digital is displayed for Dolby Digital and DTS-HD Master Audio is stereo for each of listening modes, and you to expand the playback signal to ...connected to the number of channels in order of the display and analog video circuits. The listening mode last selected for the source is best for movies, TV, music, and games using HDMI connection. 3. > Before...
User Manual - Page 21

... storage device to the unit. 2. USB Play music files on the rear of the unit, select the desired folder or music file with the cursors, and press ENTER to confirm and start playback... storage device. Music Server You can listen to confirm your selection (a). Select the item with USB storage devices using the cursors to select radio stations and programs, then press ENTER to play music files...
User Manual - Page 22

... Management" - Next, click the AirPlay icon in the control center of the iOS device and select this unit from amongst the devices displayed. Enable (turn on the computer with all BLUETOOTH enabled ... Before start play back music files on ) the BLUETOOTH function of the BLUETOOTH enabled device, then select this unit from the list of devices displayed, and tap "Done". 4. To reduce the amount...
User Manual - Page 23

... the preset number is displayed on the main unit twice. 0 You cannot select different inputs for the separate room, the main room also switches. 4. "AM/FM Frequency Step" or ..."9 kHz / 0.05 MHz". Frequency step setting Press the button on the display lights. Please change it to select "7. For Taiwanese models, the setting is changed, all radio presets are required if you press the S / T...
User Manual - Page 24

... remote controller during multi-zone playback, the Z2 indicator is dimmed and the playback mode is switched to adjust the audio delay when the video is in ZONE 2 only If you to select the HDMI OUT terminal to confirm your preferences will automatically switch to the Direct listening mode. (European, Australian and...
User Manual - Page 28

... from Microsoft. and other countries. Onkyo Corporation garandeert niet de BLUETOOTH compatibiliteit tussen de AV-receiver en alle BLUETOOTH apparaten. Selvittääksesi AV... consulte al distribuidor y la documentación del dispositivo. In sommige landen geldt mogelijk een beperking op het gebruik van BLUETOOTH apparatuur. This logo is under license from Japan Audio Society. ...

Similar Questions

Onkyo Afstandsbediening Voor De Tx-sr501
Ik heb de (oude) Onkyo-versterker TX-SR501 van mijn zoon gekregen. Alles werkt prima.Alleen de afsta...
(Posted by tedenburg 2 years ago)
Onkyo Ht-r570 Hdmi Signal Loss
It doesn't matter if it's first turned on or been on 7 minutes screen goes black no sound from signa...
(Posted by miketaylor570 2 years ago)
No Enciende
1.aparece check sp wire
(Posted by migueltapiaz 5 years ago)
Roku 3 To The Receiver
Hoe do I hook up the roku to the receiver
(Posted by dgroov 8 years ago)
Ask a New Question
Use the box below to post a new question about this Onkyo product .
Points & Prizes
  • You can earn points for nearly everything you do on HelpOwl.com
  • You can trade in those points for gift cards at leading retailers such as Amazon.com and Walmart
  • It's that simple!
See How it Works
Create a Free Account

Onkyo Manuals

Find free Onkyo TX-NR656 manuals and user guides available at ManualOwl.com. Try out our unique manual viewer allowing you to interact with manuals from directly within your browser!

Onkyo Reviews

View thousands of Onkyo user reviews and customer ratings available at ReviewOwl.com.

Contact Information

Complete Onkyo customer service contact information including steps to reach representatives, hours of operation, customer support links and more from ContactHelp.com.

Scoreboard Ratings

See detailed Onkyo customer service rankings, employee comments and much more from our sister site.