Get support for LiftMaster H

LiftMaster H Support Question

LiftMaster H Support Question

Find answers below for this question about LiftMaster H.
Need a LiftMaster H manual? We have 12 online manuals for this item!
Question posted by Brisbinian on July 5th, 2021

Motor Capacitor Issues.

I know there is nothing wrong with the motor or the capacitor. Which of the relays send power to the capacitor? Tech support is off for the day... Of course.

Current Answers

Answer #1: Posted by Troubleshooter101 on July 5th, 2021 10:25 AM
This answer was accepted by the poster of the original question.
Troubleshooter101

Member since:
September 30th, 2015

Points: 2,927,030
1,100
points
Capacitors have a limited life and are often the problem in capacitor motors. Capacitors may have a short circuit, an open circuit, or may deteriorate to the point that they must be replaced. ... When a capacitor short-circuits, the winding in the motor may burn out.

https://www.liftmaster.com/motor-capacitor-56uf-220v/p/030B0532-1


https://veterangaragedoor.com/faq/can-i-replace-th...


Thanks


Please respond to my effort to provide you with the best possible solution by using the "Acceptable Solution" and/or the "Helpful" buttons when the answer has proven to be helpful. Please feel free to submit further info for your question, if a solution was not provided. I appreciate the opportunity to serve you!
Troublshooter101
Answer #2: Posted by SonuKumar on July 6th, 2021 8:47 AM
SonuKumar

Member since:
May 9th, 2021

Points: 16,633,680
100
points
When garage door opener capacitors fail, the door won't have any motion when you press the start button. The common symptoms are humming or buzzing noise and possible smoke release inside the garage. ... To avoid further issues, unplug the unit from the electric outlet, disengage the opener and close the door.

Can I replace starter capacitor on a garage door opener?

A garage door opener starter capacitor is a crucial part of the electric system in a garage door opener. If you look inside any electronic device you will find capacitors, they are long cylindrical shapes. The ones you will find on a garage door opener are from the same shape long and cylindrical, and are use to start the electric motor which operate the openers chain, screw or belt. The total job depends on your skills and on finding the right replacement part.

Step 1 - Garage Door Starter Capacitor Failure

When garage door opener capacitors fail, the door won't have any motion when you press the start button. The common symptoms are humming or buzzing noise and possible smoke release inside the garage. Although the event can be scary for homeowners, do not panic if this happens to you because it is very common. A garage door capacitor failure is due to corrosion, excessive use, high temperature and high-energy currents. To avoid further issues, unplug the unit from the electric outlet, disengage the opener and close the door.

Step 2 - Call a professional or DIY

Consider if you want to do the job yourself since a replacement of a garage door starter capacitor require proper tools and knowledge. You can also call a garage door repair company to provide you with an estimate on a new garage door capacitor replacement.

Step 3 - Extract the old Garage Door starter capacitor

Reassure that the opener is unplug from the electric outlet and then remove the plastic cover from the opener. Look inside the garage door opener and locate the long cylinder capacitor with 4 wires coming out (It will be in either gray, black, yellow or blue). The capacitor usually held in place by a small setscrew - loosen a bit the screw to slide the capacitor and remove it. Don't disconnect any wires; you must first identify what kind of capacitor you need. Garage door capacitors vary on size, color, capacitance and voltage. You can take a quick snapshot with your cell phone or write down all of the information written on the side of the capacitor. If it's very hard to read the information printed on the capacitor then you might have to disconnect the wires and take it with you to make sure you install the right kind of the capacitor since there so many different kinds.

Step 4 - Find a new garage door starter capacitor

There are many different types of garage door starter capacitors, and the most common are:

Capacitor 50-60MFD (Genie)

Capacitor 53-64UF (Genie)

Capacitor 60-70UF (Genie)

Capacitor 70MFD (Genie)

Capacitor 43-53UF for 1/3 HP (Lift Master)

Capacitor 56UF for ½ HP (Lift Master)

Capacitor 56UF for ¾ HP (Lift Master)

Capacitor 89UF for ¾ HP (Lift Master)

Hardware stores such as Home Depot, Ace or Lowe's don't sell starter capacitor, you will have to buy it online or in a near by garage door repair shop.

Step 5 - Install the new garage door starter capacitor

Once you have the correct capacitor, you will have to connect the wire in the new capacitor the same way they were in the old one. It doesn't matter how you turn the capacitor but usually there are two different colors of wires - the top wire should be the same color and the bottom wires should be the opposite. If you turn a capacitor 180 degrees it won't not matter where you put the wires just so as long as you have the same color wires on top and the opposite on the bottom. Some garage door openers will require two garage door starter capacitor so if you are replacing them, you should replace them both at the same time and avoid future worries.

Once you have wired the capacitor, you must now secure it by retightening the side screw that you loosened. If the capacitor is stable, you may now plug in the main power to the unit so you can check if the problem is resolved. Do not re-attach the opener cover until you are sure that the problem is resolved and the garage door opener works.

Even though you have never done anything like this repair, it should not take you any more than two to three hours. It can also be dangerous if you do not unplug the opener unit before you attempt replacing the capacitor.

If you replace the capacitor and it does not rectify the problem with your opener than it is another issue that needs to be address. Also if the capacitor does not look like it has a problem like corrosion or it is leaking insulation then that does not mean that the capacitor is not bad but when diagnosing a garage door opener a capacitor it's a good place to start your diagnosis. And remember to ALWAYS unplug your garage door opener when you are attempting to repair any kind of malfunctions in your garage door opener because a garage door unit that is plug into a power source can easily shock you.

If you find that you have replaced parts of the opener but still the problem wasn't fixed so it might be time to replace the unit. This mean that possibility of the electric motor going bad is strong and you should check with a local garage door repair company what are the options for a new garage door opener.

How do you test a garage door opener capacitor?

Touch one meter probe to a terminal on each side of the capacitor. The meter will measure resistance quickly then go back to open circuit if the capacitor is good. any other reading of the meter means a bad capacitor. The capacitor will register then bleed down each time you reverse the leads of the meter.

https://www.youtube.com/watch?v=L6qiiNSuqEY


Please respond to my effort to provide you with the best possible solution by using the "Acceptable Solution" and/or the "Helpful" buttons when the answer has proven to be helpful.

Regards,
Sonu
Your search handyman for all e-support needs!!

Related LiftMaster H Manual Pages

GT- Logic 4 Installation Manual - Page 16

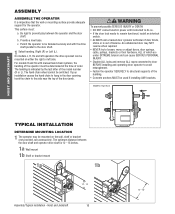
...possible SERIOUS INJURY or DEATH: • DO NOT connect electric power until instructed to do so. • If the door lock needs to structural supports of the AVERTISSEMENT building. • Concrete anchors MUST be mounted...(R or L). c. If your ATTENTION installation causes the hand chain to hang in the door opening, hook the chain to the side near the top of which are under EXTREME tension...
GT- Logic 4 Installation Manual - Page 18

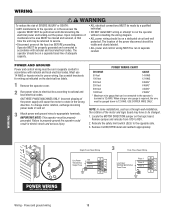
... in the wrong direction. Remove CLOSE/OPEN decal and reattach appropriately. 1 Single Phase Power Wiring 3 Three Phase Power Wiring Line Power Hot 2 115/230 Vac Single Phase Neutral Ground Line Power 208/230/460/575 Vac Three Phase Phase 1 Phase 2 Phase 3 WIRING Wiring - The location of the power supply will cause the motor to appropriate terminals. POWER WIRING CHART...
GT- Logic 4 Installation Manual - Page 19

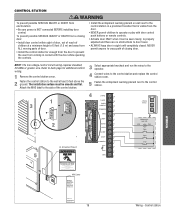
... CLOSE O COMMON 11 STOP 24VAC POWER 24VAC TIMER DEFEAT MAS 10 COMMON MAS LMEP 9 LMEP: TIMER NABLE EDGE: OPEN EDGE 8 CLOSE OPEN ADVERTSTOP ENCIA 7 COMMON CLOSE 6 N STOP 5 ADVERTENCIA SBC COMMON 4 UL Entrapment Placard WARNING 3 2 SBC 1 3-Button Station OPEN CLOSE STOP Maintenance Alert LED (RD) (WH) Open Close Stop Moving Door Can Cause Serious Injury or...
GT- Logic 4 Installation Manual - Page 21

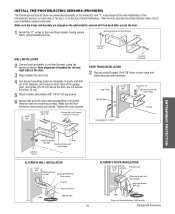
...Square Holes "C" Wrap Lock Nuts #10-32 WALL INSTALLATION 2 Connect each other across the door. 1 Fasten the "C" wraps to the mounting brackets having square holes, using the hardware ... sure all door hardware obstructions are cleared. Drill 3/8" holes in each side of the door or on both sides of the garage door, 4-6 inches (10-15 cm) above the floor. Floor - Door Track Drill ...
GT- Logic 4 Installation Manual - Page 33

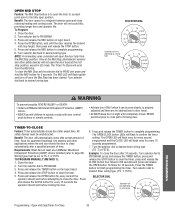
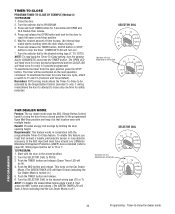
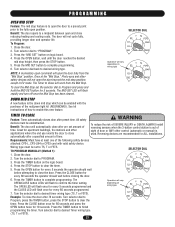
... buttons or remote controls. WA W TIMER-TO-CLOSE Feature: Timer automatically closes door after 70 seconds. The OPEN LED will not open position. Entrapment Protection (LMEP) device installed (refer to PROGRAM. Close the door. 2. Open mid stop position, except in sight until the door reaches the desired mid stop height, then press and release the STOP...
GT- Logic 4 Installation Manual - Page 34

...Feature: The car dealer mode uses the SBC (Single Button Control input) to bring the door from the open or mid stop position. 5. To deactivate the timer for more than one time for ..., photoelectric sensor or loop detector accessory to the SBC input and must be activated by limiting the door opening height. NOTE: To disable the Dealer Mode follow steps 2 and 3, then press the MRT button...
GT- Logic 4 Installation Manual - Page 38

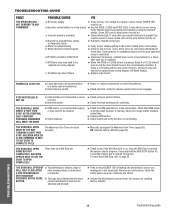
...To reset Open Mid Stop refer to move door. Allow motor to cool before attempting to page 33. If Relay A or B lights and the door does not...power supply b) Operator control station is wired wrong c) Interlock switch is activated d) Dial still in programming, option, or diagnostic mode e) Motor is malfunctioning f) Motor thermal overload tripped g) Possible accessory malfunction h) Off Board relay...
GT- Logic 4 User Manual - Page 9

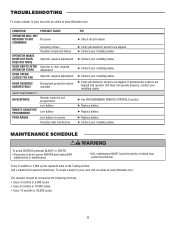
... technician. TROUBLESHOOTING To locate a dealer in your area visit us online at www.liftmaster.com CONDITION POSSIBLE CAUSE OPERATOR WILL NOT RESPOND TO ANY No power COMMANDS OPERATOR MAKES NOISE BUT DOOR DOES NOT MOVE DOOR DRIFTS AFTER OPERATOR STOPS DOOR OPENS/ CLOSES TOO FAR Accessory failure Possible component failure Operator requires adjustment Operator or...
GT- Logic 4 User Manual - Page 11

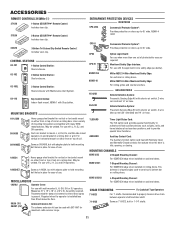
...for maximum radio receiver range. 65ME123CA3 L-Shaped Mounting Channel: For 65ME1234 edge when installed on rolling doors. Measures 31" x 19" x 18" (L x W x D). Recommended to mount J, H, DH, DJ, and GH side mount operators on rolling doors. OPEN ACCESSORIES OPEN CLOSE OPEN REMOTEOPENCONTROLS 315MHz CLOSE 371LM 1-Button SECURITY✚® Remote Control: Includes visor clip.
J- LOGIC 3 Manual - Page 5

... prevent play between frames. Shaft Support Bracket with manual hoist hand chain systems, the handing of the operator must : a. Be rigid to remain functional, install an interlock switch. • ALWAYS call a trained professional door serviceman if door binds, sticks or is indicated by last letter of door, and in the door opening, hook the chain off...
J- LOGIC 3 Manual - Page 8

... of SEVERE INJURY or DEATH, ALWAYS install CAUTION reversing sensors when the 3-button control station is out of sight of door opening . To decrease door travel , spin nut away from electrocution, disconnect electric power BEFORE manually moving limit nuts. If not pre-installed by either coiled cord or take-up reel. See field connection...
J- LOGIC 3 Manual - Page 21

... 70 seconds. AVERTISSEMENT 6. Operation will not cycle fully, providing longer door and operator life. Press the TIMER button to a midpoint between open the door beyond the mid stop height, then press the STOP button. 5. Benefit: The door opens to finish programming the timer. Close the door. 2. Press the "MID SET" button on the logic board. 4. SELECTOR...
J- LOGIC 3 Manual - Page 22

... a truck enters a garage. Push the MID button and release. To deactivate the timer from a closed position. 2. The timer will be installed. T wiring mode allows the door to attempt to the SBC...reach full open position press the STOP button. Start with the door in conjunction with multiple inputs. NOTES: To read back the Timer to be activated by limiting the door opening height....
J- LOGIC 3 Manual - Page 24

... or mid stop The red lamp holder receives power when the door opens and remains activated if the door is activated Greater than 10 seconds.) The red lamp holder will not be learned. CLEARING MEMORY To reset most of Operator feature (Odometer/Cycle Counter) ...
J- LOGIC 3 Manual - Page 27

...see if the Mid Stop LED is running. THE DOOR WILL OPEN BUT a) The photo eyes, edge or other sensing ...relay may need to be replaced see if motor is present they must be on and the door should turn on . ➤ Check Interlock(s). TROUBLESHOOTING GUIDE FAULT THE OPERATOR WILL NOT RESPOND TO ANY COMMANDS POSSIBLE CAUSE FIX a) No power supply b) Operator control station is wired wrong...
J - NEW STYLE DISCONNECT Manual - Page 3

... must : a) Be rigid to the door shaft. SECURE LOCK(S) IN "OPEN" POSITION. Shaft Support Bracket with Bearing (Not Supplied) Door Sprocket 52-1/24"" FIGURE 1 OPERATOR PREPARATION...door, and in the door opening, hook the chain off to be adversely affected if any of the model name (R or L). DO NOT CONNECT ELECTRIC POWER UNTIL INSTRUCTED TO DO SO. STICKING OR BINDING DOORS...
J - NEW STYLE DISCONNECT Manual - Page 6

...Dealer. b) Electrician must hardwire the junction box to TAKE-UP REEL: Take-up the door opening . 4. After adjustment, release plate and ensure it seats fully in accordance with the...POWER BEFORE MANUALLY MOVING LIMIT NUTS. 3. ly connected by the door manufacturer, mount the sensing edge on the door according to spin freely. Adjust open limit nut so that actuator is engaged as door...
J - NEW STYLE DISCONNECT Manual - Page 13

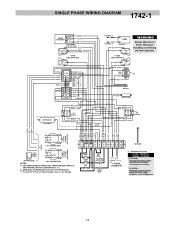
Transformer Primary & Relay Voltage same as Line Voltage. 1 2 3 4 5 7 10 L1 L2 L3 GROUND OPEN CLOSE STOP EXT. TO OPEN AND CLOSE SAFETY EDGE L1 L2 **1 PHASE POWER IN * -... 5 23 GY 4 BL-BK ( WHEN REQ'D ) 230V. CONNECTION TO MOTOR 230V. CONNECTION NOTES: 1) TO REVERSE MOTOR DIRECTION: INTERCHANGE PURPLE & GRAY MOTOR LEADS AT CONTACTOR 1 & 3. 2) WIRE MUST BE REMOVED FOR 23OV 1PH ...
J - NEW STYLE DISCONNECT Manual - Page 4

...CONNECT ELECTRIC POWER UNTIL INSTRUCTED TO DO SO. KEEP DOOR BALANCED....door shaft. Shaft Support Bracket with the drive shaft parallel to be fastened securely and with Bearing (Not Supplied) Door Sprocket WARNING ALL DOORS INTENDED TO BE MOTOR OPERATED SHOULD BE MANUFACTURED WITH SOLID DOOR...door, and in the door opening, hook the chain off to prevent play between frames. STICKING...
J LOW PROFILE ELEC.BOX Manual - Page 15

...MOTOR DIRECTION INTERCHANGE PURPLE & GRAY WIRES. 15 TO OPEN AND CLOSE L1 L2 L3 **3 PHASE GROUND POWER...Power Whenever Installing or Servicing the Door Operator. CONNECTION OVERLOAD 575V. RADIO RECEIVER R1 R2 R3 AUX.TERMINAL BLOCK FOR RADIO C NO AUX.OPEN L/S NC ORANGE YELLOW RED RED YELLOW PURPLE ORANGE OPEN LIMIT SWITCHES OPEN... 1 2 OPEN ORANGE YELLOW BLACK BLACK BLACK R1 RELAY ( 3/4 ...

Similar Questions

I Have Installed A Chamberlan Garage Door Opener And The Remote I Was Using Is
I have been using a Chamberlan garage door opener and its remote has been defective since of late.Pl...
(Posted by donweera42 8 months ago)
Garage Door Opens After Shutting.
My Lift master 8550 inside keypad is Inside wall pad is model #880LM. outside keypad Model # is 877M...
(Posted by BONNIECA92 2 years ago)
Does The Liftmaster Remote Hbw1573 Have A Battery? If So What Size, Description?
my garage door opener is model 3265 1/2 hp and my rmeote is HBW1573. is it operated by battery?
(Posted by mikenolen 11 years ago)
I Want To Know Where To Find The Learn Button On The Liftmaster H 5011 Ll ???
Trying to program the garage door open with the remote in the car...
(Posted by louiseaudet 11 years ago)
Ask a New Question
Use the box below to post a new question about this LiftMaster product .
Points & Prizes
  • You can earn points for nearly everything you do on HelpOwl.com
  • You can trade in those points for gift cards at leading retailers such as Amazon.com and Walmart
  • It's that simple!
See How it Works
Create a Free Account

LiftMaster Manuals

Find free LiftMaster H manuals and user guides available at ManualOwl.com. Try out our unique manual viewer allowing you to interact with manuals from directly within your browser!

LiftMaster Reviews

View thousands of LiftMaster user reviews and customer ratings available at ReviewOwl.com.

Contact Information

Complete LiftMaster customer service contact information including steps to reach representatives, hours of operation, customer support links and more from ContactHelp.com.

Scoreboard Ratings

See detailed LiftMaster customer service rankings, employee comments and much more from our sister site.