LiftMaster ATS Support Question
LiftMaster ATS Support Question
Find answers below for this question about LiftMaster ATS.Need a LiftMaster ATS manual? We have 1 online manual for this item!
Question posted by dwightoverton on August 26th, 2013
Light Stays On All The Time And Door Won't Shut
you have to hold the wall door button to shut door and the light stays on all the time
Current Answers
Related LiftMaster ATS Manual Pages
ATS2113X Manual - Page 1
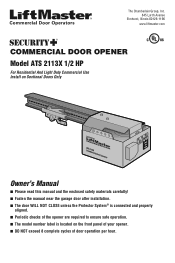
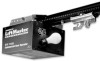
... OPENER Model ATS 2113X 1/2 HP
For Residential And Light Duty Commercial Use Install on Sectional Doors Only
L
O
W
H
I
L
G
A
H NO R M
FOURPCE
L
O
W H
I
L
G
A
H NO R M
FDOORWCNE
Owner's Manual
■ Please read this manual and the enclosed safety materials carefully! ■ Fasten the manual near the garage door after installation. ■ The door WILL NOT CLOSE unless the...
ATS2113X Manual - Page 2
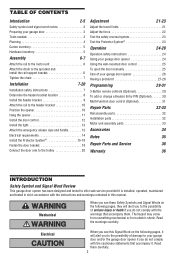
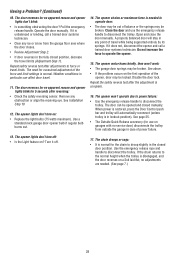
... the opener 10 Hang the opener 11 Install the door control 12 Install the light 13...garage door opener 26 Having a problem 27-28
Programming
29-31
3-Button remote controls (Optional 29 To add or change a Keyless Entry PIN (Optional 30 Multi-Function door...garage door opener has been designed and tested to your garage door opener 24 Using the wall-mounted door control 25 To open the door...
ATS2113X Manual - Page 3
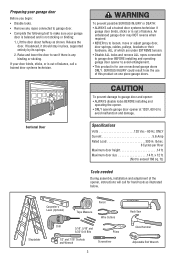
... on sectional garage doors ONLY. Release the door.
An unbalanced garage door may NOT reverse when required.
• NEVER try to loosen, move or adjust garage door, door springs, cables, pulleys, brackets or their hardware, ALL of which are under EXTREME tension.
• Disable ALL locks and remove ALL ropes connected to garage door BEFORE installing and operating garage door opener to see...
ATS2113X Manual - Page 5
...
"C" Wrap (2)
Rail Support Bracket
Lighted Door Control Button
2-Conductor Bell Wire White & White/Red
Door Bracket
Door Bracket Plate
Curved Door Arm
Safety Reversing Sensor Mounting Bracket .../8" (4) Lock Nut #10x32 (4) Insulated Staples (20)
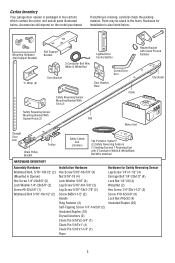
5 Carton Inventory
Your garage door opener is packaged in two cartons which contain the motor unit and all parts illustrated below . Parts may be ...
ATS2113X Manual - Page 7

...
To Tighten Inner Nut
1/2" (1.27 cm)
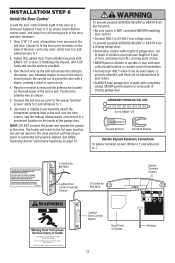
INSTALLATION
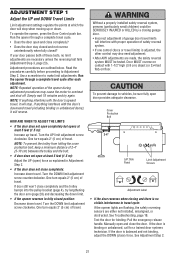
IMPORTANT INSTALLATION INSTRUCTIONS
WARNING
To reduce the risk of the door.
10. Install garage door opener 7 feet (2.13 m) or more above floor.
7. Install wall-mounted garage door control:
• within sight of the garage door.
• out of reach of children at its midpoint, re-tighten the inner nut to do...
ATS2113X Manual - Page 12
... ACTUAL SIZE
Screw 6ABx1-1/2"
Drywall Anchors
Insulated Staples
Outside Keylock Accessory Connections
To opener terminal screws: White to 2 and white/red to 1.
6.
Fasten the Lighted Door Control Button securely with 6ABx1-1/2" screws. To prevent possible SERIOUS INJURY or DEATH from a closing garage door. Connect it can be seen clearly, is properly adjusted, and there are...
ATS2113X Manual - Page 13
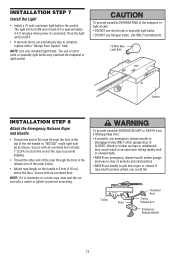
.... Use ONLY incandescent.
75 Watt Max. Weak or broken springs or unbalanced door could fall.
Secure with a "Garage Door Opener" bulb. NOTE: If it is CLOSED. To prevent possible OVERHEATING of short neck or specialty light bulbs may overheat the endpanel or light socket. To prevent possible SERIOUS INJURY or DEATH from the end of the...
ATS2113X Manual - Page 14

... brass terminal; the white (neutral) wire to establish permanent wiring connection.
• Garage door installation and wiring MUST be grounded.
• Reinstall the cover. INSTALLATION STEP 9
Electrical Requirements
To avoid installation difficulties, do not run the opener at this time. If the plug doesn't fit into a grounding type outlet. To reduce the...
ATS2113X Manual - Page 15
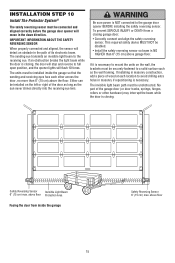
... masonry construction, add a piece of the door as long as the wall framing. above floor Protection Area
Facing the door from a closing .
above floor
15
If it is necessary to the garage door opener BEFORE installing the safety reversing sensor. The invisible light beam path must be installed inside the garage
Safety Reversing Sensor 6" (15 cm...
ATS2113X Manual - Page 16
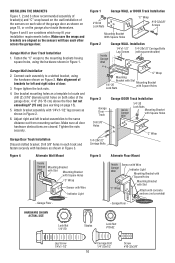
... 3
Garage Door Track
Garage DOOR Track Installation
Inside Garage Wall
1/4"-20 Lock Nuts
Mounting Bracket with Square Holes
Drill 3/8" Holes
1/4"-20x1/2" Carriage Bolts
"C" Wrap
Figure 4
Alternate Wall Mount
Figure 5
Alternate Floor Mount
Inside Garage Wall
Mounting Bracket with Slot Mounting Bracket
with Square Holes
"C" Wrap
Sensor with Wire Indicator Light
Inside Garage Wall...
ATS2113X Manual - Page 17

... the wall (Figure 8).
• Separate the safety reversing sensor wires and strip 1/4" (6 mm) of insulation from each end. MOUNTING AND WIRING THE SAFETY REVERSING SENSORS
Mounting:
• Center each sensor unit in a "C" wrap with lenses pointing toward each end. Be sure the lens is enough wire to the garage door opener. Figure 6
"C" Wrap
Indicator Light...
ATS2113X Manual - Page 18

Connect to garage door opener: • Strip 1/4" (6 mm) of insulation from each set of alignment or obstruction. When the green indicator light glows steadily, tighten the wing nut.
If the receiving eye indicator light is already open wire to the receiving eye.
3.
TROUBLESHOOTING THE SAFETY REVERSING SENSORS
1. If the sending eye indicator light glows steadily but the ...
ATS2113X Manual - Page 21
... travel . Turn the UP limit adjustment screw clockwise. One turn equals 2" (5 cm) of garage door travel limits will interfere with the door's upward travel (including binding or unbalanced doors), it will stop when moving up travel cycle. • Does the door open and close ) force. To prevent damage to vehicles, be SERIOUSLY INJURED or KILLED by...
ATS2113X Manual - Page 22
...until the door stops easily and opens fully.
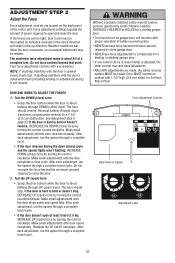
The maximum force adjustment range is hard to hold or doesn't reverse, DECREASE the DOWN (close) force by a closing garage door. •... the opener lights aren't flashing, INCREASE DOWN (close) force by turning the control counterclockwise. ADJUSTMENT STEP 2
Adjust the Force
Force adjustment controls are located on garage door will ...
ATS2113X Manual - Page 23

...®
• Press the remote control push button to open the door.
• Place the opener carton in the path of the opener. See the illustration on page 20.
• Repeat the test.
• When the door reverses on the floor, centered under the garage door.
• Operate the door in either sensor is off (alerting you to...
ATS2113X Manual - Page 24
... closed .
The opener lights will turn off automatically after interruption; when power is misaligned, the door won't close . NEVER use emergency release handle to move .
• The Wall-Mounted Door Control: Hold the push button or bar down travel .
4. NO ONE SHOULD CROSS THE PATH OF THE MOVING DOOR.
5. ALWAYS keep garage door in the opening , the door will reverse. 3. ALWAYS...
ATS2113X Manual - Page 28
... technician.
• Clear any ice or snow from outside the garage in the fully closed door position. The opener lights don't turn off .
17. A properly balanced door will automatically reconnect (unless trolley is restored, press the Door Control push bar and trolley will stay in lockout position). Repeat the safety reverse test after reversing:
• Check the...
ATS2113X Manual - Page 29

... opener lights should turn on the door control.
3. Press and hold the button on motor unit until completely closed.
Press and release the "learn " button on the hand-held remote.
3. With the door closed , press and hold "learn " button on the door control.
4. Test by pressing the large (Open) button on the door control.
3. You may set up this Security✚® garage door...
ATS2113X Manual - Page 30

... has learned the code. Press the four buttons for your garage door opener. Release the # button.
2. The motor unit lights will blink three times.
To set the number of hours this temporary PIN will no longer open the door. Test by pressing the new PIN, then press ENTER. Test by pressing the four buttons for 30 seconds.
2.
To set a temporary...
ATS2113X Manual - Page 31
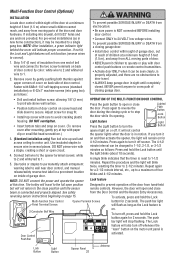
... with care to avoid cracking plastic
Press the push button to open position Designed to prevent operation of the door from hand-held
but will travel .
• ALWAYS keep garage door in motion. To activate, press and hold the Lock button until the light blinks (about 10 seconds). Lighted Push Button
Lock Button
housing. If you turn it off whenever the...
Similar Questions

Door Opener Only Moves 6 Inches
Opener Only Moves 6 Inches The Eyes Are Good And Down Force Is All The Way Up
Opener Only Moves 6 Inches The Eyes Are Good And Down Force Is All The Way Up
(Posted by trevorhahn 7 years ago)

How Do I Change The Battery Of My Liftmasyer Garage Opener Mounted On The Wall
(Posted by zahianamjaas 10 years ago)

Door Won't Shut By Remote
Door opens fine. light stays on all the time you have to hold wall door button to shut door. Would t...
Door opens fine. light stays on all the time you have to hold wall door button to shut door. Would t...
(Posted by dwightoverton 10 years ago)

Door Will Not Close Unless I Hold Down Wall Control Button
(Posted by dkRaco 11 years ago)

14' Ats Lightduty Total Length
I would like to know what the total length of a 14' ats light duty garage door operator
I would like to know what the total length of a 14' ats light duty garage door operator
(Posted by jjkearns9 12 years ago)