Lexmark X5495 Support Question
Lexmark X5495 Support Question
Find answers below for this question about Lexmark X5495 - Clr Inkjet P/s/c/f Adf USB 4800X1200 3.5PPM.Need a Lexmark X5495 manual? We have 4 online manuals for this item!
Question posted by ratpitts on June 30th, 2014
Can't Get X5495 Printer To Save Settings
The person who posted this question about this Lexmark product did not include a detailed explanation. Please use the "Request More Information" button to the right if more details would help you to answer this question.
Current Answers
Related Lexmark X5495 Manual Pages
User's Guide - Page 3
... phone service ...37
Understanding the control panel...37
Using the control panel ...37 Saving settings...40 Installing another language control panel...41
Installing the printer software...42 Installing the optional XPS driver (Windows Vista users only 42 Understanding the printer software...43 Turning printing voice notification on or off...46 Security Information...46
General...
User's Guide - Page 16
... • Macintosh users-If your
this printer will be free of defects in printer, or set forth at
printer. this
warranty that shipped with the printer software.
Record the following information (located ... Click Warranty Information.
3 From the Statement of Limited
Warranty section, click Inkjet &
All-In-One Printers.
4 Scroll through the Web page to find (US)
Where to view
...
User's Guide - Page 22
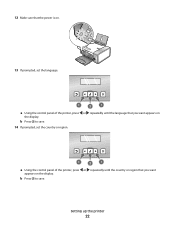
... that you want
appears on the display. b Press to save .
12 Make sure that the power is on.
13 If prompted, set the country or region. b Press to save . 14 If prompted, set the language. Setting up the printer
22
a Using the control panel of the printer, press or repeatedly until the language that you want appears...
User's Guide - Page 40
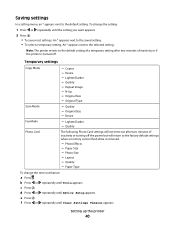
...Darker - Quality - c Press . f Press or repeatedly until Device Setup appears. An * appears next to the factory default settings when a memory card or flash drive is turned off the power but will return to the saved setting. • To select a temporary setting. Note: The printer reverts to the default setting. Resize
Fax Mode
- Quality - Resize - b Press or repeatedly...
User's Guide - Page 65
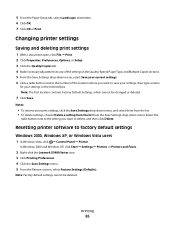
... and select them from the list. • To delete settings, choose Delete a setting from the list from the Save Settings drop-down menu, select Save your settings in the Quality/Speed, Paper Type, and Multiple Copies sections. 5 From the Save Settings drop-down menu. Changing printer settings
Saving and deleting print settings
1 With a document open, click File ΠPrint. 2 Click Properties...
User's Guide - Page 70
... photos
70 Print a test page.
• Device Setup-Customize printer setup settings. • Defaults-Reset printer settings to factory defaults.
1 Setting will return to print on a page. Photo ...of photos to factory default setting when a memory card or flash drive is removed. 2 Setting must be saved individually.
Note: To save Paper Size, Paper Type, or Photo Size settings:
1 Press . 2...
User's Guide - Page 71
... USB cable into additional submenus and settings, repeat step 4 and step 5 as needed.
7 If necessary, press repeatedly to return to the selected setting.
6 To go into the camera.
Layout1
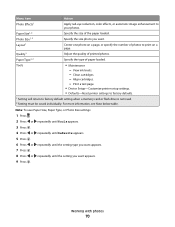
Center one end of the printer. Menu Item
Action
Paper Size1, 2
Specify the size of printed photos.
For more information on making camera selections, see "Saving settings...
User's Guide - Page 72
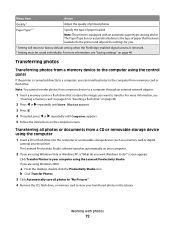
... are using the Lexmark Productivity Studio.
b Click Transfer Photos. 3 Click Automatically save all photos or documents from a memory device to your computer.
2 If you are using the control panel
If the printer is removed. 2 Setting must be saved individually. For more information, see "Saving settings" on the computer screen. Click Transfer Photos to a computer through an...
User's Guide - Page 91

...Copy settings
1 With your scanned image open on Saving settings.
Understanding the Copy menu
Understanding the Copy Menu
Use this resize setting, use photo paper and set ...- Align cartridges. - Print a test page.
• Device Setup-Customize printer setup settings. • Defaults-Customize printer settings.
* Temporary setting. Notes:
• If you select Custom Resize, press and...
User's Guide - Page 98
... Device Setup-Customize printer setup settings. • Defaults-Customize printer settings.
* Temporary setting. For information on the scanner glass. Scanning
98 Note: Pressing selects a setting. Clean cartridges. - Note: Do not load postcards, photos, small items, transparencies, photo paper, or thin media (such as magazine clippings) into the ADF or on saving temporary and other setting...
User's Guide - Page 112
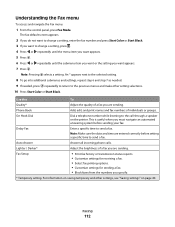
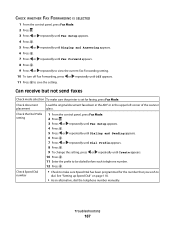
.... 10 Press Start Color or Start Black. Delay Fax
Enter a specific time to the previous menus and make other settings, see "Saving settings" on the printer.
Understanding the Fax menu
To access and navigate the Fax menu:
1 From the control panel, press Fax Mode. Fax Setup
• Print fax history or ...
User's Guide - Page 113
....
10 Press to create a fax header for faxes you set is used to save the setting. Note: You can enter a maximum of rings you send. Print a test page.
• Device Setup-Customize printer setup settings. • Defaults-Customize printer settings.
* Temporary setting. Setting up a fax header
During the initial setup of your printer, you have not entered this
To
Tools
•...
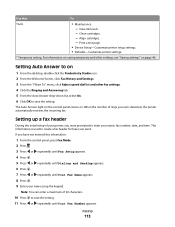
User's Guide - Page 145
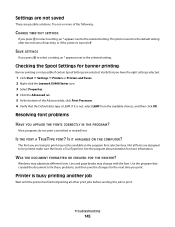
... next to the selected setting.
The printer reverts to the default setting after two minutes of inactivity or if the printer is a TrueType font. Windows may change with the font. SAVE SETTINGS
If you print. IS THE FONT A TRUETYPE FONT? The font you have the right settings selected.
1 Click Start ΠSettings ΠPrinters or Printers and Faxes. 2 Right-click...
User's Guide - Page 167
... Sending appears. 6 Press . 7 Press or repeatedly until Dial Prefix appears. 8 Press . 9 To change the setting, press or repeatedly until Off appears. 11 Press to save the setting.
Check Speed Dial number
• Check to make sure the printer is set for the number that you wish to be dialed before each telephone number. 12 Press...
User's Guide - Page 195
... 146, 148 connecting the printer to answering machine 31 computer modem 34 telephone 35 telephone wall jack 32 telephone wall jack in Germany 33 contents, box 18 control panel 25 copy menu 91 Fax menu 112 installing another language 41 Photo Card menu 69 PictBridge menu 71 saving settings 40
Scan menu 97...
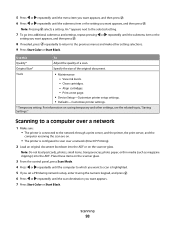
User's Guide - Page 40
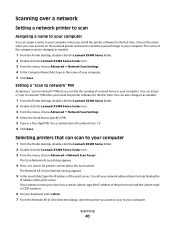
... when you scan an item on the network printer and want to scan to the local subnet. Setting a "scan to network" PIN
Assigning a "scan to network" PIN lets you want to send the scanned image to your network administrator for printers connected to your computer. 5 Click Save. Consult your computer.
The Network All-in...
User's Guide - Page 70

...printer's Speed Dial list.
Customizing fax settings
Setting up a fax header
During the initial setup of your printer, you send. Note: You can enter a maximum of 20 characters.
10 Press to save the setting... of 64 numbers.
14 Press to save the setting. 15 Press twice. 16 Press or repeatedly until Tools appears. 17 Press . 18 Press or repeatedly until Device Setup appears. 19 Press . 20 ...
User's Guide - Page 80

...For more information, see "Saving settings" on making camera selections, see the documentation that came with the
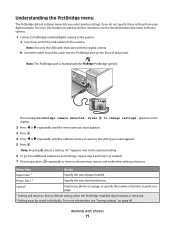
PictBridge symbol. to factory default setting when the PictBridge-enabled ...end of the printer. Understanding the PictBridge menu
The PictBridge default settings menu lets you select printer settings if you want appears.
5 Press . Note: Use only the USB cable that came ...
User's Guide - Page 81
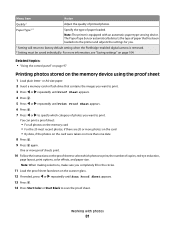
.... For more information, see "Saving settings" on the memory device using the proof sheet
1 Load plain letter- Note: When making selections, make sure you .
1 Setting will return to print.
Menu Item
Action
Quality1
Adjust the quality of paper loaded. Paper Type1, 2
Specify the type of printed photos.
Note: The printer is removed. 2 Setting must be saved individually.
User's Guide - Page 100
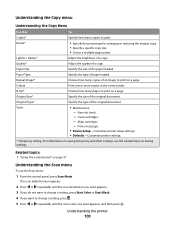
...original document. Original Size*
Specify the size of a copy. Print a test page.
• Device Setup-Customize printer setup settings. • Defaults-Customize printer settings.
* Temporary setting. Related topics: • "Using the control panel" on Saving settings. Clean cartridges. -
Lighter / Darker*
Adjust the brightness of the original document.
Understanding the...
Similar Questions


Lexmark X5495 Printer Manual
(Posted by jglondregan 10 years ago)

Scan On Save Setting
How I can scan documents on saved default settings?
How I can scan documents on saved default settings?
(Posted by kametchi 10 years ago)

X5495 Printer Driver From Lexmark Site Not Installing Correctly, Windows Vista .
Hi, I have a Lexmark X5495 and Windows Vista family version on a desktop. The printer is connected v...
Hi, I have a Lexmark X5495 and Windows Vista family version on a desktop. The printer is connected v...
(Posted by eamcarter 12 years ago)