
Lexmark X264dn Support Question
Lexmark X264dn Support Question
Find answers below for this question about Lexmark X264dn.Need a Lexmark X264dn manual? We have 8 online manuals for this item!
Question posted by arohdkid on June 14th, 2014
Does Replace Pc Kit Lexmark Make It Print Slow
The person who posted this question about this Lexmark product did not include a detailed explanation. Please use the "Request More Information" button to the right if more details would help you to answer this question.
Current Answers
Related Lexmark X264dn Manual Pages
User's Guide - Page 153
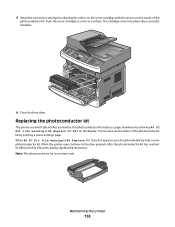
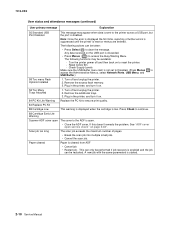
... as it will go. When 84 PC Kit life warning or 84 Replace PC Kit first appears, you before the photoconductor kit reaches a page maximum by printing a menu settings page.
You can also see the status of the photoconductor kit by showing 84 PC Kit life warning or 84 Replace PC Kit on the tracks of -life, print quality significantly decreases. 5 Install the new...
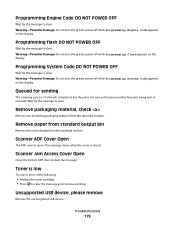
User's Guide - Page 179
... remove
Remove the unrecognized USB device.
Scanner Jam Access Cover Open
Close the bottom ADF door to clear the message. Queued for sending
The scanning process of the following:
• Replace the toner cartridge. • Press to clear the message and continue printing. Warning-Potential Damage: Do not turn the printer power off...
User's Guide - Page 182
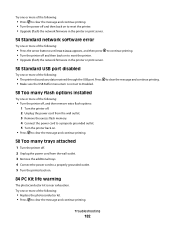
...PC Kit life warning
The photoconductor kit is not set to continue printing.
56 Standard USB port disabled
Try one or more of the following :
• The printer discards any data received through the USB port.
Press • Make...the printer or print server.
54 Standard network software error
Try one or more of the following :
• Replace the photoconductor kit. • Press ...
User's Guide - Page 183
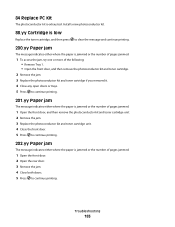
84 Replace PC Kit
The photoconductor kit is jammed or the number of pages jammed.
1 Open the front door. 2 Open the rear door. 3 Remove the jam. 4 Close both doors. 5 Press to continue printing.
202.yy Paper jam
The message indicates either where the paper is jammed or the number of pages jammed.
1 Open the front door...
User's Guide - Page 205

... more of the following :
CHECK THE PAPER TYPE SETTING
Make sure the Paper Type setting matches the paper loaded in the tray to the correct positions for the paper size loaded. THE TONER CARTRIDGE MAY BE DEFECTIVE
Replace the toner cartridge. Skewed print CHECK THE PAPER GUIDES
Move the guides in the tray...
User's Guide - Page 207
...risk of the printer might be hot. THE TONER CARTRIDGE IS DEFECTIVE
Replace the toner cartridge.
Clear any paper you are possible solutions.
Try...Print dialog, or the printer control panel, select another tray or feeder to cool before touching.
Use the cartridge handle whenever you see .
MAKE SURE THE PAPER PATH IS CLEAR
Paper could be caught between the photoconductor kit...
User's Guide - Page 228
...installed 182 58 Too many trays attached 182 84 PC Kit life warning 182 84 Replace PC Kit 183 840.01 Scanner Disabled 186 840.02 Scanner...unresponsive printer 176 checking an unresponsive scanner 192 checking device status on Embedded Web Server 158
cleaning ADF separator...193 scanner unit does not close 189 unable to pause print job to make
copies 192 copying
adding an overlay message 76 adjusting ...
User's Guide - Page 232
... 182 84 PC Kit life warning 182 84 Replace PC Kit 183 840....is low 179 Unsupported USB device, please
remove 179 Unsupported ...print side 55 recycled paper
using 56 recycling 213
Lexmark packaging 38 Lexmark products 38 toner cartridges 38 WEEE statement 212 reducing a copy 73
Index
232
Remove packaging material, check 179 Remove paper from standard output bin 179 replacing
photoconductor kit...
Maintenance Guide - Page 10

When 84 PC Kit life warning or 84 Replace PC Kit first appears, you before the photoconductor kit reaches a page maximum by showing 84 PC Kit life warning or 84 Replace PC Kit on the tracks of -life, print quality significantly decreases. While the printer may continue to function properly after the photoconductor kit has reached its official end-of the
photoconductor kit.
Maintaining ...
Service Manual - Page 33
...NAND NVM NVRAM OCF OCR OEM OHP OPC OPT PC PDF PICS PIN
Gigabyte Ground Fault Interrupter Gigahertz Host Based Printing High-capacity feeder High-capacity Input Tray High-... diode Long edge feed Lexmark Embedded Solution (applications) Laser Scanning Unit Low Voltage Low voltage power supply Magenta Megabyte Motor Driver Control Multifunction Device Multifunction Printer Message handling Motor ...
Service Manual - Page 44
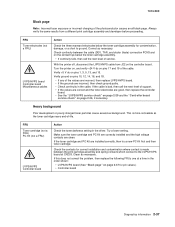
... the message. Turn the printer power off and then back on .
84 PC Kit Life Warning Replace the PC kit to ensure print quality.
84 Replace PC Kit 88 Cartridge Low
This warning is displayed when the cartridge is reset or menus are entered.
Check Supply Levels
Make sure the USB Buffer menu item is started.
2-10 Service Manual If...
Service Manual - Page 45

... started
Inspect the LVPS/HVPS. If so, then inspect the tray wear strips and replace if necessary. First, remove the PC kit and paper or debris at the input sensor.
200.01 200.02
Classic input jam... 32
Description Invalid refill Missing or defective cartridge Unsupported print cartridge
Action Replace the cartridge. The main input sensor never became uncovered from the sheet ahead.
Service Manual - Page 46

... is approved. If so, then inspect the tray wear strips and replace if necessary. Remove the toner cartridge/PC kit and inspect the input sensor flag. Verify that the media is running...not expected. Possible causes: slow or missing transport motor positional feedback, or the media is approved.
Inspect the wear strips in the input tray, and replace if necessary.
200.16 Transport...
Service Manual - Page 47

... 4-30.
201.01 Transport motor identification failed to clear the paper path.
Remove the toner cartridge/PC kit and check for the printhead. See "Main motor service check" on page 4-71.
200.32 ...media is not complete. Timed out waiting for page from tray 1 did make it is dislodged or broken, then replace the rear exit guide.
Check that the narrow media flag rotates freely and...
Service Manual - Page 48

...none, then inspect for damage at fuser nip before fuser reached acceptable operating temperature. Note: Print a page with sensor and reversing solenoid removal" on page 4-30.
202.06 Exit sensor...Page arrived at fuser earlier than intended
Remove the toner cartridge/PC kit and check for obstructions in the exit guide, then replace the exit guide. 7013-XXX
Error
Description
Action
201.02...
Service Manual - Page 70
...assembly, LVPS/HVPS, or controller board.
• Printhead errors typically result in a 'dirty' print. Unplug the printer, and check the cable continuity between the LVPS/HVPS connector marked OPC (at...allow light to evenly distribute the toner. Try a different toner cartridge and PC kit.
• If those fail, then replace the LVPS/HVPS, controller board, or the printhead in the opening for ...
Service Manual - Page 71
...2-37 for pin values.) • Controller board
Diagnostics information 2-37 Make sure the toner cartridge and PC Kit are correctly installed and the high voltage contacts are incorrect, then check... the LVPS/HVPS cable from a different print cartridge assembly and developer before proceeding.
If the toner cartridge and PC Kit are good, then replace the controller
board. • See the...
Service Manual - Page 72

... transfer roll bearings. Make sure recommended media is being used . The bearing assemblies should support the transfer roll, applying evenly distributed forces to evenly distribute the toner. A heavier media may not be operating at its ends.
Try a new PC Kit. Check the springs in the printer driver.
2-38 Service Manual Replace the transfer roll...
Service Manual - Page 73

...replacing PC Kit, if necessary. If all components appear free of contamination, then replace the following FRUs one at a time in the order shown:
• Transfer roll • LVPS/HVPS card
White or black lines or bands
FRU
Print...2-39 7013-XXX
Light print
FRU Toner cartridge (not a FRU)
Transfer roll LVPS/HVPS card
Action
Make sure the toner cartridge and PC Kit are installed correctly and ...
Service Manual - Page 74

...; Make sure the media is straight and unwrinkled. • Replace the PC Kit, and recheck before replacing the toner cartridge. Horizontal streaks
The toner cartridge or the fuser may be defective. The PC cleaner sump may be defective. Replace the PC kit.
2-40 Service Manual Vertical white lines
See "Vertical streaks" on the front or back of the page. Print...
Similar Questions


What Does It Mean When The Printer Says, ' Replace Pc Kit'
(Posted by vickiegrant 12 years ago)

Replace Pc Kit
Our printeer is reading replace pc kit. What doea this mean?
Our printeer is reading replace pc kit. What doea this mean?
(Posted by ajackson4780 12 years ago)