Lexmark 260dn Support Question
Lexmark 260dn Support Question
Find answers below for this question about Lexmark 260dn - E B/W Laser Printer.Need a Lexmark 260dn manual? We have 3 online manuals for this item!
Question posted by ashoktamrakar on August 24th, 2011
To Reset The Counter,
To reset the counter,Of photoconductor kit. in lexmark 260Dn
Current Answers
Answer #1: Posted by LexmarkListens on August 30th, 2011 1:08 PM
LexmarkListens

Member since:
July 1st, 2011 Points: 1,410,540

Member since:
July 1st, 2011 Points: 1,410,540
Please refer to the link provided below.
http://support.lexmark.com:80/lexmark/index?page=content&locale=EN&productCode=LEXMARK_E260&segment=SUPPORT&viewlocale=en_US&searchid=1314734781409&actp=search&userlocale=EN_US&id=HO3483
Please feel free to send us an email iif you have other inquires or you may contact Lexmark Technical Support.
Lexmark Listens
Phone:
USA: 1-800-539-6275
Canada: (877) 856-5540
UK: 0800 121 4726
South Africa: 0800 981 435
Related Lexmark 260dn Manual Pages
User's Guide - Page 4
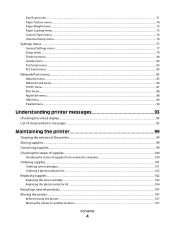
... the status of supplies from a network computer 100
Ordering supplies...101
Ordering toner cartridges...101 Ordering a photoconductor kit ...102
Replacing supplies...102
Replacing the toner cartridge ...102 Replacing the photoconductor kit ...104
Recycling Lexmark products...107 Moving the printer...107
Before moving the printer ...107 Moving the printer to another location...107
Contents
4
User's Guide - Page 5
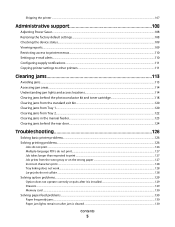
......110 Setting up e-mail alerts...110 Configuring supply notifications...111 Copying printer settings to other printers...111
Clearing jams 113
Avoiding jams...113 Accessing jam areas...114 Understanding jam lights and access locations...114 Clearing jams behind the photoconductor kit and toner cartridge 118 Clearing jams from the standard exit bin...120 Clearing jams...
User's Guide - Page 22

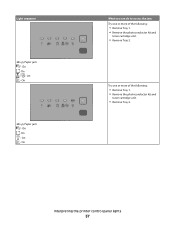
Light sequence
What you can do Replace the photoconductor kit. Replace PC Kit - Power Saver - On
Send a job to print. Ready - On (green)
Send a job to print.
Blinking - Blinking - On (yellow)
Interpreting the printer control panel lights
22
User's Guide - Page 27
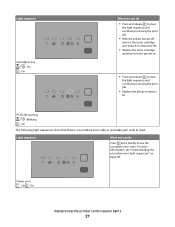
... its life.
• Replace the toner cartridge,
and then turn the printer on.
• Press and release to see "Understanding the secondary error light sequences" on page 28. On
What you can do
Press twice quickly to clear
the light sequence and continue processing the print job.
• Replace the photoconductor
kit. Printer error -
User's Guide - Page 34

... quickly to display the secondary jam light sequence which can do to access the jam
Try one or more of the printer to ensure all the paper is cleared, press to check all areas of the following:
• Remove Tray 1. • Remove the photoconductor kit and
toner cartridge unit.
200.yy Paper jam -
User's Guide - Page 35

On - On - Blinking - On - On
Interpreting the printer control panel lights
35 On
Open the front door, and then open the rear door.
231.yy Paper jam - On - On - On
Open the front door, and then open the rear door.
202.yy Paper jam - Light sequence
What you can do to access the jam
Remove the photoconductor kit and toner cartridge unit.
201.yy Paper jam -
User's Guide - Page 37
On - On - Interpreting the printer control panel lights
37 On - On
What you can do to access the jam Try one or more of the following :
• Remove Tray 1. • Remove the photoconductor kit and
toner cartridge unit.
• Remove Tray 2. On
24x.yy Paper jam - On - On -
Light sequence
24x.yy Paper jam...
User's Guide - Page 64
...On -
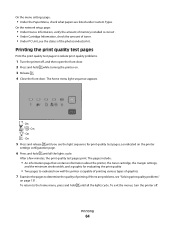
The pages include:
• An information page that contains information about the printer, the toner cartridge, the margin settings,
and the minimum stroke width, and a ...printer
settings configuration page.
6 Press and hold until all the lights cycle. On the menu settings page:
• Under the Paper Menu, check what papers are problems, see the status of the photoconductor kit...
User's Guide - Page 96
... or more of the following :
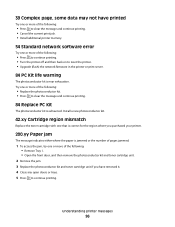
• Press to continue printing. • Turn the printer off and then back on to reset the printer. • Upgrade (flash) the network firmware in the printer or print server.
84 PC Kit life warning
The photoconductor kit is exhausted.
39 Complex page, some data may not have removed it. 4 Close any...
User's Guide - Page 97
...printer messages
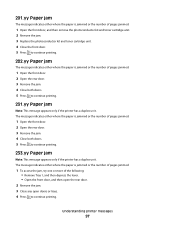
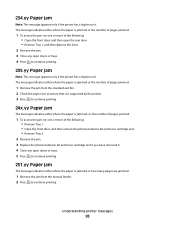
97 201.yy Paper jam
The message indicates either where the paper is jammed or the number of pages jammed.
1 Open the front door, and then remove the photoconductor kit and toner cartridge unit. 2 Remove the jam. 3 Replace the photoconductor kit....
233.yy Paper jam
Note: This message appears only if the printer has a duplex unit.
The message indicates either where the paper is...
User's Guide - Page 98
...: • Remove Tray 1. • Open the front door, and then remove the photoconductor kit and toner cartridge unit. • Remove Tray 2.
2 Remove the jam. 3 Replace the photoconductor kit and toner cartridge unit if you have removed it is supported by the printer. 3 Press to continue printing.
24x.yy Paper jam
The message indicates either where...
User's Guide - Page 102
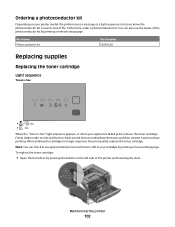
... also see approximately how much toner is left side of the printer and lowering the door.
At this time, order a photoconductor kit. When shaking the cartridge no longer improves the print quality, replace...Toner is low" light sequence appears, or when you know the photoconductor kit is low
•
- Maintaining the printer
102 You can check to redistribute the toner, and then reinsert...
User's Guide - Page 103
... quality problems.
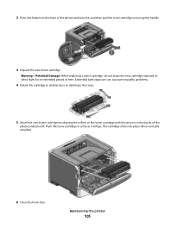
4 Rotate the cartridge in as far as it will go.
2 Press the button on the tracks of the photoconductor kit, and then pull the toner cartridge out using the handle.
3 Unpack the new toner cartridge. Warning-Potential Damage: When replacing ...by aligning the rollers on the toner cartridge with the arrows on the base of the
photoconductor kit.
Maintaining the printer
103
User's Guide - Page 104
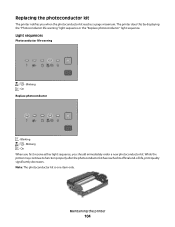
On When you first receive either light sequence, you when the photoconductor kit reaches a page maximum. Note: The photoconductor kit is one item only.
On Replace photoconductor
- Maintaining the printer
104 While the printer may continue to function properly after the photoconductor kit has reached its official end-of-life, print quality significantly decreases.
Blinking
- The ...
User's Guide - Page 105
... a flat, clean surface.
3 Press the button on the toner
cartridge handle.
Doing so may affect the print quality of the photoconductor kit. Warning-Potential Damage: Be careful not to touch the photoconductor drum. Maintaining the printer
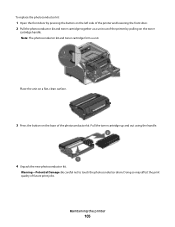
105 To replace the photoconductor kit:
1 Open the front door by pressing the button on the left side of the...
User's Guide - Page 106
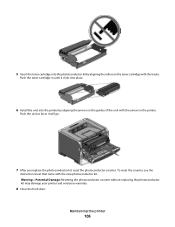
... on the guides of the unit with the arrows in the printer. To reset the counter, see the
instruction sheet that came with the tracks.
Maintaining the printer
106
Push the toner cartridge in until it will go.
7 After you replace the photoconductor kit, reset the photoconductor counter. Push the unit as far as it clicks into place.
6 Install...
User's Guide - Page 109
... browser.
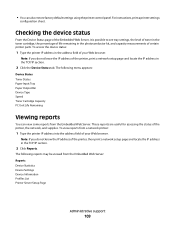
These reports are useful for assessing the status of certain printer parts. To access the device status:
1 Type the printer IP address in the photoconductor kit, and capacity measurements of the printer, the network, and supplies.
To view reports from a network printer:
1 Type the printer IP address into the address field of your Web browser. For...
User's Guide - Page 119

... fuser may be hot. CAUTION-HOT SURFACE: The fuser and the inside of the printer. To reduce the risk of the photoconductor kit. Note: If the paper is not easy to remove, then open the rear door....
3 Remove the jammed paper.
Warning-Potential Damage: Do not touch the photoconductor on a flat, clean surface. Use the cartridge handle whenever you are holding the cartridge. Clearing jams
119
User's Guide - Page 132
.... Try one or more of the following :
• Remove and reinstall the toner cartridge. • Remove and reinstall the photoconductor kit. To return to the correct positions for assessing how well the printer is capable of printing various types of printing.
Troubleshooting
132 If there are problems, see "Solving print quality problems"
on...
User's Guide - Page 133

... menu, do one of the following :
THE PHOTOCONDUCTOR KIT MAY BE DEFECTIVE
Replace the photoconductor kit. To access the Quality menu, do one of the following:
• If the printer is connected to a computer by a USB or parallel cable, open the Local Printer Settings Utility for
Windows or Printer Settings for Macintosh.
CHECK THE PAPER SIZE AND...
Similar Questions

How Do I Reset The Mainlanders Kit Count
how do I reset the maintenance kit count
how do I reset the maintenance kit count
(Posted by Chey1204 5 years ago)

How To Reset The Photoconductor Page Count On A Lexmark Es460dn Printer
(Posted by Aedivmaisa 9 years ago)

My Printer Makes Awful Squeeking Sounds When It Is Printing.
(Posted by Anonymous-50245 12 years ago)

Manual For Laser 260dn
I wnat to purchase a manual for a Lexmark laser printer model 260dn
I wnat to purchase a manual for a Lexmark laser printer model 260dn
(Posted by nlafitte 12 years ago)

I Would Like To Know How To Reset The Photoconductor ?
(Posted by krcoliveira 12 years ago)