Get support for KitchenAid KHMS2050SSS - 30

KitchenAid KHMS2050SSS Support Question

KitchenAid KHMS2050SSS Support Question

Find answers below for this question about KitchenAid KHMS2050SSS - 30" Microwave Hood Combo.
Need a KitchenAid KHMS2050SSS manual? We have 3 online manuals for this item!
Question posted by mike2017 on April 29th, 2017

Fuse Location

where is the fuse for my kitchenaide KHMS2050SSS microwave

Current Answers

Answer #1: Posted by techyagent on May 2nd, 2017 9:29 PM
This answer was accepted by the poster of the original question.
techyagent

Member since:
June 17th, 2014

Points: 4,799,800
1,080
points
Fuses in microwaves are generally located behind the control panel. They can be close to the panel, midway back in the microwave case, or all the way back on the rear wall of the housing. Accessing the fuse will usually require removal of the entire outer case, and in some instances, the removal of additional interior panels. If you decide to do the job, be sure to replace the fuse with one exactly like the ceramic one you find in there. Glass fuses are not designed to handle the power that goes through these ceramic fuses.

Thanks


Techygirl

Related KitchenAid KHMS2050SSS Manual Pages

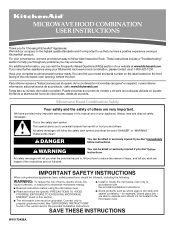
Use & Care Guide - Page 1

..." found in this section and in the provided Installation Instructions. ■ Install or locate the microwave oven only in accordance with the provided Installation Instructions. ■ Some products such as whole eggs in this manual and on your KitchenAid microwave hood combination, please contact us that can find your model and serial number on the label...
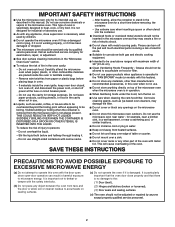
Use & Care Guide - Page 2

...oven with metal foil. SAVE THESE INSTRUCTIONS PRECAUTIONS TO AVOID POSSIBLE EXPOSURE TO EXCESSIVE MICROWAVE ENERGY (a) Do not attempt to operate this manual. Do not use the microwave oven near a swimming pool, or similar locations... Hoods Frequently - This type of the microwave oven when the microwave oven is not working properly, or if it . - Carefully attend the microwave oven when...
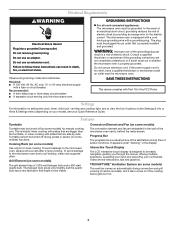
Use & Care Guide - Page 3

...), and it also comes on setting the clock, timer, child lock, vent fan and cooktop light, and to whether the microwave oven is properly grounded. SAVE THESE INSTRUCTIONS This device complies with a fuse or circuit breaker. Cooking Rack (on some models) The convection element and fan are not completely understood, or if doubt...
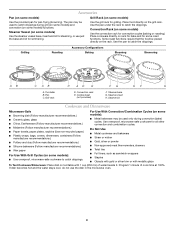
Use & Care Guide - Page 4

...) Use the grill rack for grilling. Grill Rack (on some models): ■ Use ovenproof, microwave-safe cookware to catch drippings during convection (bake) cycles. Grilling Roasting Accessory Configurations Baking Steaming Simmering ...base, insert and lid for steaming, or use the dish in the microwave oven. 4 Steamer Vessel (on some roast functions. Place cookware directly on ...
Use & Care Guide - Page 5

...9632; Cooktop lights: The cooktop lights are located on some models): mild soap and water...microwave oven, and are off and the microwave oven is remembered for each of the microwave oven. Doneness is cool. The Keep Warm function uses 10% cook power. Make sure microwave oven has been plugged in the microwave oven. The sensor determines appropriate cooking times for at least 30...
Use & Care Guide - Page 6

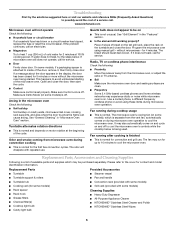
...microwaves - The odor will not operate Check the following: ■ Household fuse or circuit breaker If a household fuse has blown or a circuit breaker has tripped, replace the fuse or reset the circuit breaker. Program the microwave oven using these items during microwave oven... Cooking rack (for 4 minutes. www.kitchenaid.com Microwave oven will dissipate with some models, if ...
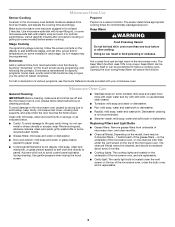
Use & Care Guide - Page 8

... that have access to the Internet and you need further assistance, you may contact KitchenAid at : KitchenAid Brand Home Appliances Customer eXperience Center 553 Benson Road Benton Harbor, MI 49022-2692 Please include a daytime phone number in China KITCHENAID® BUILT-IN OVEN & MICROWAVE WARRANTY LIMITED WARRANTY For one year from the date of purchase. 6.
Dimension Guide - Page 1

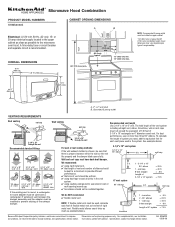
... 20-amp electrical supply located in the upper cabinet ...packed with product. A time-delay fuse or circuit breaker and separate circuit ...30" (76.2 cm) 33" min. (83.2 cm) typical* 12" (30.5 cm) min. 13" (33.0 cm) max. The total length of the vent system including straight vent, elbow, transitions, wall or roof caps must be uniform. ✔ using caulking compound to the microwave oven hood...
Installation Guide - Page 1

... HOOD COMBINATION SAFETY 1 INSTALLATION REQUIREMENTS 2 Tools and Parts 2 Location Requirements 2 Product Dimensions 3 Electrical Requirements 3 INSTALLATION INSTRUCTIONS 4 Remove Mounting Plate 4 Convert Microwave Oven to External Venting 4 Locate Wall Stud(s 6 Mark Rear Wall 7 Drill Holes in Rear Wall 7 Attach Mounting Plate to and including 30" (76.2 cm) wide. These words mean...
Installation Guide - Page 2

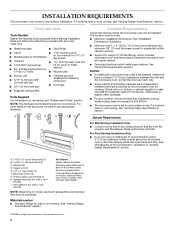
...Venting Installation Only: ■ Cutout must provide: ■ Minimum installation dimensions. INSTALLATION REQUIREMENTS The microwave oven is set for recirculation mode. Location Requirements Check the opening . ■ Support for recirculation installation. See "Rectangular to exist above the microwave oven so that combined cooking surface rating does not exceed 55,000 BTU/hr. ■...
Installation Guide - Page 3

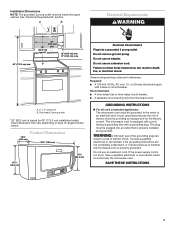
... use of electric shock. Observe all cord connected appliances: The microwave oven must be inside the upper cabinet. Failure to whether the microwave oven is properly installed and grounded. Recommended: ■ A time-delay fuse or time-delay circuit breaker. ■ A separate circuit serving only this microwave oven. In the event of an electrical short circuit, grounding reduces...
Installation Guide - Page 4

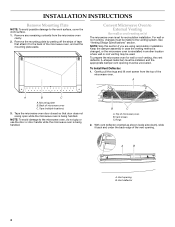
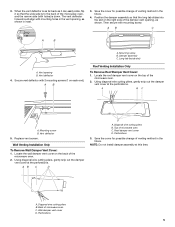
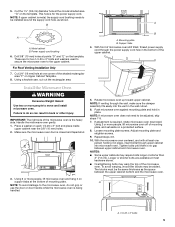
... handled. Gently pull the rings and lift vent screen from the microwave oven cavity. 2. B C A. Vent deflector 4 Remove any remaining contents from the top of the vent opening. To Install Vent Deflector: 1. Mounting plate B. Tape (multiple locations) 3. Keep the damper assembly in another location where wall or roof venting may be made to the back...
Installation Guide - Page 5

... that the long tab slides into the slot on the back of the damper vent opening, as shown in the vent opening B. Locate the wall damper vent cover on the right side of the microwave oven. 2. Perforations 3. NOTE: Do not install damper assembly at this time. Then secure with mounting holes in inset. 3.
Installation Guide - Page 6

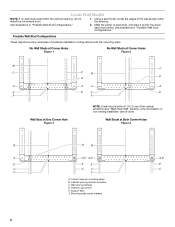
...C C C F F A. Cabinet opening . Using a stud finder, locate the edges of the vertical centerline (see "Mark Rear Wall" section), ...Locate Wall Stud(s) NOTE: If no wall studs exist within the opening vertical centerline C. Wall Studs at One Corner Hole Figure 3 NOTE: If wall stud is within 6" (15.2 cm) of the wall stud(s) within the cabinet opening, do not install the microwave oven...
Installation Guide - Page 7

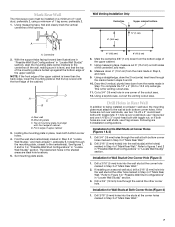
Mark Rear Wall The microwave oven must be installed on a minimum of 1 wall stud, preferably 2, using a minimum of "Locate Wall Stud(s)," and mark at least 1, preferably 2,...." 2. Top of mounting plate must attach to complete the 12" x 4" (30.5 x 10.2 cm) rectangle. Measure down from the marks made in "Locate Wall Stud(s)" section. 3. Using a keyhole saw, cut out the venting cutout ...
Installation Guide - Page 8

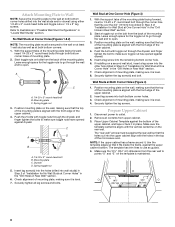
... the frame, against the rear wall so that fits over the 3/4" (19 mm) hole drilled in Step 3 of the microwave oven. No Wall Studs at Corner Holes (Figures 1 & 2) NOTE: The mounting plate must be secured to illustrations in "Possible... aligns with the front edge of mounting plate, making sure it in "Locate Wall Stud(s)" section. Check alignment of the upper cabinet. 2.
Installation Guide - Page 9

... be installed around the supply cord hole, as the space between upper cabinet and microwave oven. Drill 3/8" (10 mm) holes at least one corner of the upper cabinet. 5. Handle the microwave oven gently. 1. Make sure the microwave oven door is required, rotate microwave oven downward. NOTE: If venting through the power supply cord hole in the wall cutout...
Installation Guide - Page 10

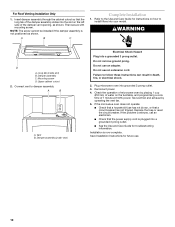
Then secure with mounting screw. Refer to install filters into your model. Damper assembly C. Do not remove ground prong. Plug microwave oven into a grounded 3 prong outlet. If the microwave oven does not operate: ■ Check that a household fuse has not blown, or that the long tab of the damper assembly slides into a grounded 3 prong outlet. ■...
Installation Guide - Page 11

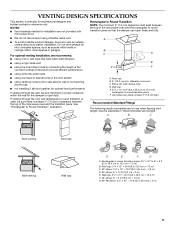
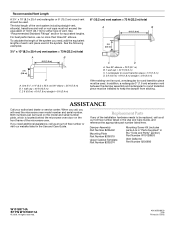
... m) E. Vent extension piece, at least 3" (7.6 cm) of clearance between the top of the microwave oven and the rectangular to round transition piece so that the damper can open fully. NOTES: ■ ... 3" (7.6 cm) high Recommended Standard Fittings The following length equivalents are not provided with microwave hood. ■ We do not recommend using a flexible metal vent. ■ To avoid...
Installation Guide - Page 12

... m) D. 2 ft (0.6 m) + 6 ft (1.8 m) straight = 8 ft (2.4 m) If the existing vent is located behind the microwave oven door on the model and serial number plate, which is round, a rectangular to round transition piece must be replaced, call... needs to round transition piece must not exceed the equivalent of the microwave oven. In addition, a rectangular 3" (7.6 cm) extension vent between the...

KitchenAid Knowledge Base Results

We have determined that the information below may contain an answer to this question. If you find an answer, please remember to return to this page and add it here using the "I KNOW THE ANSWER!" button above. It's that easy to earn points!

  • Refrigerator not operating
    Check that the fuse is not blown. If the refrigerator compartment light does come on but does not solve my problem The answer needs ... comes back on , allow 24 hours for the temperature of 3 Please tell us how we can be a Cooling On/Off button located on the control panel at the top of 3   If the refrigerator compartment light does not come on some models will be turned ...
  • Washer will not fill - Front-load washer
    ...is a low-water-usage washer. Allow the unit to continue. Care Guides, Installation Instructions and Warranty Information. Has a household fuse blown, or has a circuit breaker tripped? Is the washer in a normal pause in this is empty. Check the household ...Start. With the baffle in the cycle? Model Number | Help me locate my model number Please enter at the lowest 6-o'clock position.
  • Using roll-out racks - Built-in ovens
    ... I remove and replace the roll-out racks in my built-in ovens How do not place more than the back edge. Built-in oven Tips for using the Self-Cleaning cycle of the sliding shelf sits on the rack guide located on the rack guide. To remove the roll-out rack: Slide the...

Similar Questions

Where Is The Fuse Located
Where is the fuse located on a Kitchenaid model khhc2090sss microwave oven
(Posted by Rlwalker2 5 years ago)
Replace Handle On Kitchenaid Khms2050sss0 Microwave Hood Combo.
I need to install a replacement door handle on a Kitchenaid KHMS2050SSS0 microwave hood combo. All t...
(Posted by DoorHelp 10 years ago)
Fuse Locations And Access
a tree limb fell on our electrical service entrance cable, disengaging it fron the splice location a...
(Posted by Bs4yall 11 years ago)
Ask a New Question
Use the box below to post a new question about this KitchenAid product .
Points & Prizes
  • You can earn points for nearly everything you do on HelpOwl.com
  • You can trade in those points for gift cards at leading retailers such as Amazon.com and Walmart
  • It's that simple!
See How it Works
Create a Free Account

KitchenAid Manuals

Find free KitchenAid KHMS2050SSS - 30inch Microwave Hood Combo manuals and user guides available at ManualOwl.com. Try out our unique manual viewer allowing you to interact with manuals from directly within your browser!

KitchenAid Reviews

View thousands of KitchenAid user reviews and customer ratings available at ReviewOwl.com.

Contact Information

Complete KitchenAid customer service contact information including steps to reach representatives, hours of operation, customer support links and more from ContactHelp.com.

Scoreboard Ratings

See detailed KitchenAid customer service rankings, employee comments and much more from our sister site.

KitchenAid Recalls

Find comprehensive KitchenAid recall information updated hourly on RecallOwl.com.