Get support for KitchenAid KHMS2050SSS - 30

KitchenAid KHMS2050SSS Support Question

KitchenAid KHMS2050SSS Support Question

Find answers below for this question about KitchenAid KHMS2050SSS - 30" Microwave Hood Combo.
Need a KitchenAid KHMS2050SSS manual? We have 3 online manuals for this item!
Question posted by kathleenspeake on December 17th, 2013

Location Of Kitchenaid Microwave Model Khms2050sss Fuse

Where is the fuse located?

Current Answers

There are currently no answers that have been posted for this question.
Be the first to post an answer!

Remember that you can earn up to 1,100 points for every answer you submit. The better the quality of your answer, the better chance it has to be accepted.

Related KitchenAid KHMS2050SSS Manual Pages

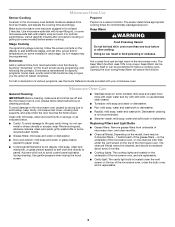
Use & Care Guide - Page 1

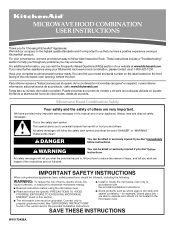
...kitchenaid.com. IMPORTANT SAFETY INSTRUCTIONS When using your model and serial number on the label located on your complete model and serial number ready. See "GROUNDING INSTRUCTIONS" found in the microwave oven...Instruction Book. are able to reduce the chance of the microwave oven opening, behind the door. Microwave Hood Combination Safety Your safety and the safety of our website at...
Use & Care Guide - Page 2

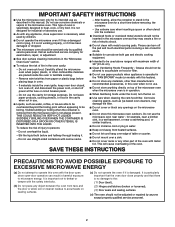
... The oven should not be allowed to accumulate on hood or filter. ■ Do not use paper products when appliance is operated in the "PAN BROWN" mode (on models with ...microwave oven when the microwave oven is in the microwave oven. Do not overheat the liquid. - After heating, allow soil or cleaner residue to persons: - Do not use the microwave oven near a swimming pool, or similar locations...
Use & Care Guide - Page 3

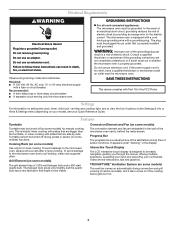
... for the electric current. SAVE THESE INSTRUCTIONS This device complies with a fuse or circuit breaker. Convection Element and Fan (on your model), see your commands. Recommended: ■ A time-delay fuse or time-delay circuit breaker. ■ A separate circuit serving only this microwave oven. Electrical Requirements WARNING Electrical Shock Hazard Plug into an outlet that might...
Use & Care Guide - Page 4

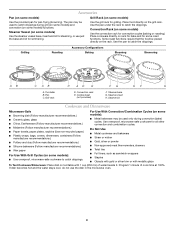
... roasting). Use the pan to catch the drippings. Pan C. Place cookware directly on rack for bake and for some models) Use the provided pan for steaming, or use the dish in the microwave oven. 4 Accessories Pan (on some roast functions. Some roast functions require that the food be used to catch drippings. Steamer...
Use & Care Guide - Page 5

... can be replaced about every 6 months. ■ Cooktop lights: The cooktop lights are located on the model, there may not give you the option to lessen doneness. For list or description of the microwave oven, under the vent screen on some models) before or after convection cooking or grilling (on cleaning products. Replacing Filters and...
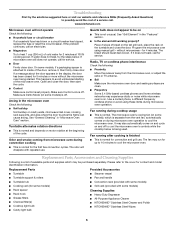
Use & Care Guide - Page 6

... "Features" section. ■ Is the element still working properly? without the microwave oven being used. www.kitchenaid.com Microwave oven will dissipate with some models, if a packaging spacer is attached to possibly avoid the cost of available parts and supplies which is separate from the microwave oven, or adjust the radio or TV antenna. ■ Soil Make sure...
Use & Care Guide - Page 8

... User Instructions and model number information for repairs. W10170438A SP PN W10170447A © 2007. KITCHENAID® BUILT-IN OVEN & MICROWAVE WARRANTY LIMITED WARRANTY ...model number and serial number on the label located on how to use of purchase, when this major appliance is used in the country in China Expenses for travel and transportation for other damage to KitchenAid within 30...
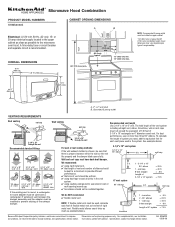
Dimension Guide - Page 1

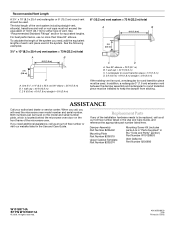
...joints in the system. A time-delay fuse or circuit breaker and separate circuit is ... elbows 1 - Ref. 8206329 08-08-06 ® Microwave Hood Combination PRODUCT MODEL NUMBERS KHMS2050S CABINET OPENING DIMENSIONS A B Electrical: A 120-volt... microwave oven hood. or 20-amp electrical supply located in... (175.3 cm) min. 30" (76.2 cm) 33" min. (83.2 cm) typical* 12" (30.5 cm) min. 13" ...
Installation Guide - Page 1

...Microwave Oven to External Venting 4 Locate Wall Stud(s 6 Mark Rear Wall 7 Drill Holes in Rear Wall 7 Attach Mounting Plate to and including 30" (76.2 cm) wide. This symbol alerts you to reduce the chance of your particular model...many important safety messages in these installation instructions. MICROWAVE HOOD COMBINATION INSTALLATION INSTRUCTIONS This product is the safety alert...
Installation Guide - Page 2

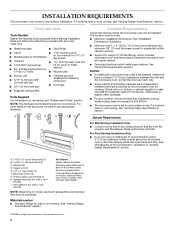
... weatherproof caulking compound ■ Duct tape ■ Diagonal cutting pliers Parts Supplied For information on model, charcoal filters may be installed. Location Requirements Check the opening . ■ Support for weight of clearance between the wall and the microwave oven, so that the vent fits properly, and the damper blade opens freely and fully. The...
Installation Guide - Page 3

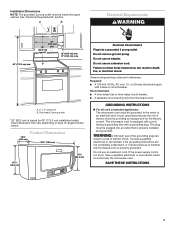
... Requirements WARNING 69" (175.3 cm) min. 30" (76.2 cm) 33" min. (83.2 cm) typical* 12" (30.5 cm) min. 13" (33.0 cm) max. Recommended: ■ A time-delay fuse or time-delay circuit breaker. ■ A separate circuit serving only this microwave oven. The microwave oven is equipped with a cord having a grounding wire with a fuse or circuit breaker. WARNING: Improper use...
Installation Guide - Page 4

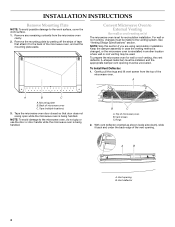
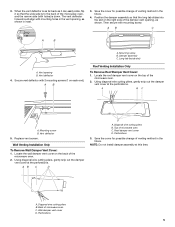
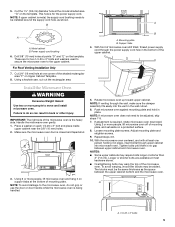
... the mounting plate aside. Gently pull the rings and lift vent screen from the microwave oven cavity. 2. A A B C A. Tape (multiple locations) 3. Back of microwave oven B. NOTE: To avoid damage to the microwave oven, do not grip or use the door or door handle while the microwave oven is being handled. For wall or roof venting, changes must be used. Top...
Installation Guide - Page 5

... pliers, gently snip out the damper vent cover at the perforations. Locate the wall damper vent cover on the top of the microwave oven. 2. A B C A B A. Mounting screw B. Vent opening , as shown in the future. 4. Locate the roof damper vent cover on the back of the microwave oven. 2. Mounting screw B. Using diagonal wire cutting pliers, gently snip out...
Installation Guide - Page 6

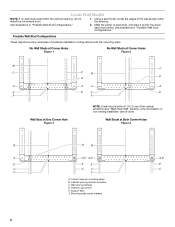
...Corner Hole Figure 3 NOTE: If wall stud is within the cabinet opening, do not install the microwave oven. 1. Wall stud centerlines D. No Wall Studs at Corner Holes Figure 1 No Wall Studs at ... and draw a plumb line down each stud center. Support tabs F. Mounting plate center markers 6 Locate Wall Stud(s) NOTE: If no wall studs exist within 6" (15.2 cm) of the vertical centerline...
Installation Guide - Page 7

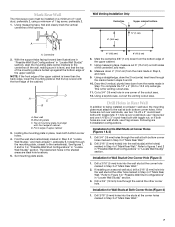
...in "Possible Wall Stud Configurations" in "Locate Wall Stud(s)" section), align the mounting plate center markers to complete the 12" x 4" (30.5 x 10.2 cm) rectangle. With ...microwave oven must align with front edge of cabinet. Using measuring tape, find and clearly mark the vertical centerline of the upper cabinet. Top of mounting plate must be installed on at the hole(s) marked in "Locate...
Installation Guide - Page 8

...10¹⁄₂" (26.7 cm) F (26.7 cm) G 8 With the support tabs of the microwave oven. Mounting plate C. Position mounting plate on the wall, making sure that the top of the upper cabinet. ...around it, trim the template edges so that fits over the 3/4" (19 mm) hole drilled in "Locate Wall Stud(s)" section. Make sure the 10¹⁄₂" (26.7 cm) dimension from the ...
Installation Guide - Page 9

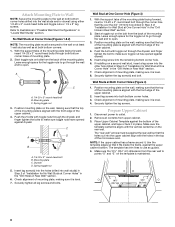
... hardware stores. ■ Overtightening bolts may require bolts longer or shorter than 3" (7.6 cm). Using a keyhole saw, cut out the rectangular area. Handle the microwave oven gently. 1. NOTE: If microwave oven does not need to the upper cabinet. The blocks must be installed around the supply cord hole, as the space between upper cabinet and...
Installation Guide - Page 10

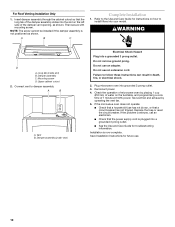
... 2. Plug microwave oven into your model. Reconnect power. 4. Check the operation of microwave oven by operating the vent fan. 5. If the microwave oven does not operate: ■ Check that a household fuse has not ...mounting screw. Upper cabinet cutout 2. Vent B. Do not use an adapter. Replace the fuse or reset the circuit breaker. A B A. Do not use an extension cord. ...
Installation Guide - Page 11

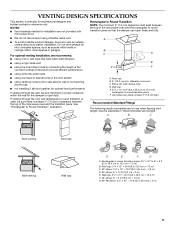
... round vent C. Vent extension piece, at least 3" (7.6 cm) of clearance between the top of the microwave oven and the rectangular to round transition piece so that there is at least 3" (7.6 cm) high Recommended Standard... Fittings The following length equivalents are not provided with microwave hood. ■ We do not recommend using a flexible metal vent. &#...
Installation Guide - Page 12

... = 20 ft (6.1 m) B. 1 wall cap = 40 ft (12.2 m) C. 1 rectangular to round transition piece = 5 ft (1.5 m) D. 2 ft (0.6 m) + 6 ft (1.8 m) straight = 8 ft (2.4 m) If the existing vent is located behind the microwave oven door on the model and serial number plate, which is round, a rectangular to round transition piece must not exceed the equivalent of the vent system including straight...

KitchenAid Knowledge Base Results

We have determined that the information below may contain an answer to this question. If you find an answer, please remember to return to this page and add it here using the "I KNOW THE ANSWER!" button above. It's that easy to earn points!

  • My microwave oven will not run
    ... Child Lock (on some models) set correctly? Repeat to the inside of the microwave oven. My microwave oven will function. Is a spacer (on some models) The Child Lock shuts ...the KitchenAid Customer eXperience Center toll free: 1-800-334-6889.  Model Number | Help me locate my model number Please enter at 100% cooking power. KitchenAid products Product Literature (Use...
  • Glass bowl and microwaves
    ... turn the bowl counterclockwise until it is  loose. Model Number | Help me locate my model number Please enter at 1-800-541-6399 Moday-Friday, 8am-8pm, or Saturday, 10am-5pm, Eastern Standard Time. Glass bowl and microwaves Can I put my glass mixer bowl in the microwave oven. NOTE: To avoid product damage, do not use...
  • Microwavable immersion blender beaker
    ... chopper bowl should not be used in the microwave oven. Model Number | Help me locate my model number Please enter at 1-800-541-6390. All times are Eastern Time.  Download available Owners Manuals/Use & Care Guides, Installation Instructions and Warranty Information. Microwavable immersion blender beaker Are the beaker and...

Similar Questions

Microwave/hood Model Khms2050sss-2
Unit started beeping intermittently for a few days and then began to work only intermittently - scre...
(Posted by Rtwalker 8 years ago)
Replace Handle On Kitchenaid Khms2050sss0 Microwave Hood Combo.
I need to install a replacement door handle on a Kitchenaid KHMS2050SSS0 microwave hood combo. All t...
(Posted by DoorHelp 10 years ago)
How To Change The Light Bulb In Kitchenaid Microwave Oven Model Kemc378kss?
I need assistance in the process to remove and replace the light bulb in the microwave portion of th...
(Posted by chipnchatter 11 years ago)
Change Light Bulb In Microwave Oven.
How do I change the light bulb in a Kitchenaid KBMS1454SSS Microwave oven?
(Posted by danafeneck 13 years ago)
Ask a New Question
Use the box below to post a new question about this KitchenAid product .
Points & Prizes
  • You can earn points for nearly everything you do on HelpOwl.com
  • You can trade in those points for gift cards at leading retailers such as Amazon.com and Walmart
  • It's that simple!
See How it Works
Create a Free Account

KitchenAid Manuals

Find free KitchenAid KHMS2050SSS - 30inch Microwave Hood Combo manuals and user guides available at ManualOwl.com. Try out our unique manual viewer allowing you to interact with manuals from directly within your browser!

KitchenAid Reviews

View thousands of KitchenAid user reviews and customer ratings available at ReviewOwl.com.

Contact Information

Complete KitchenAid customer service contact information including steps to reach representatives, hours of operation, customer support links and more from ContactHelp.com.

Scoreboard Ratings

See detailed KitchenAid customer service rankings, employee comments and much more from our sister site.

KitchenAid Recalls

Find comprehensive KitchenAid recall information updated hourly on RecallOwl.com.