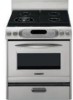
KitchenAid KGRA806PSS Support Question
KitchenAid KGRA806PSS Support Question
Find answers below for this question about KitchenAid KGRA806PSS - ARCHITECT Series: 30'' Gas Range.Need a KitchenAid KGRA806PSS manual? We have 2 online manuals for this item!
Question posted by tomob16 on August 3rd, 2014
Electronic Control Panel
The off button does not work when pressed. i have to turn the breaker off in order to turn the oven off after cooking something. Whats the best way to take the control panel off and how much does a panel cost?
Current Answers
Related KitchenAid KGRA806PSS Manual Pages
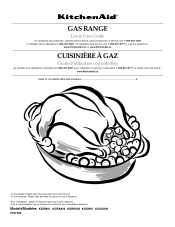
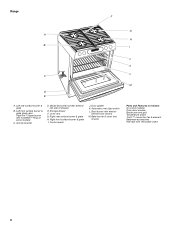
Use and Care Guide - Page 1
... future reference.
To the consumer: Please read and keep this instruction book with the unit. Models/Modèles KGRI801 KGRA806 KGRK806 KGSI901 KGSA906
9757452
GAS RANGE
Use & Care Guide
For questions about features, operation/performance, parts accessories or service, call: 1-800-422-1230 In Canada, call : 1-800-807-6777 or visit...
Use and Care Guide - Page 4
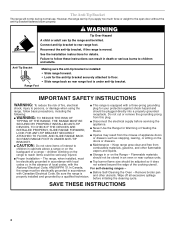
...and adults.
s Never Use the Range for details. children climbing on the Range - s Storage in the absence of the cooking utensil. the range must
should be seriously injured. ...
For self-cleaning ranges -
s
Before Self-Cleaning the Oven - Keep range area clear and free from combustible materials, gasoline, and other utensils. TIPPING OF THE RANGE, THE RANGE MUST BE
s ...
Use and Care Guide - Page 5
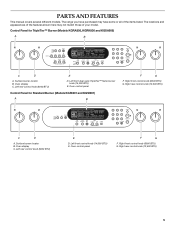
... knob (12,500 BTU)
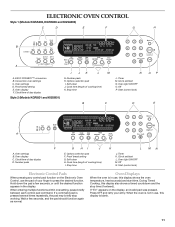
5 Oven display C. Oven display C. Oven control panel
F
G
F. Control Panel for Standard Burner (Models KGRI801 and KGSI901)
A
B
F
G
F. Surface burner locator B. Right rear control knob (12,500 BTU)
325˚ 350˚ 400˚ 425˚
Bake
Broil
Bread Proof
MED LOW HI
ON
F C
CONTROL LOCKED
CLEAN TIME PROBE TEMP
HR MIN COOK TIME
NIGHT LIGHT DELAY
MIN...
Use and Care Guide - Page 6
...and Features not shown (on some models) Oven door window Broiler pan and grid Temperature probe T.H.E.™ convection fan & element Bakeware accessories Half rack with InstaWok™ Ring on some models)
C. Range F
G A
H
B
I . Left front surface burner & grate (dual valve TripleTier™ flame burner with removable insert
6 Control panel
J. Left rear surface burner & grate
B. Anti...
Use and Care Guide - Page 7
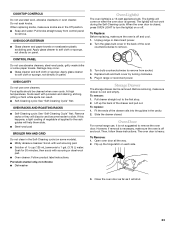
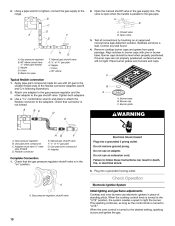
...that the control knob is pressed completely down on the grate or largest surface cooking area or ...Gas Conversion Kit is in how quickly and evenly heat is best for the most cooking...for a tripped circuit breaker or blown fuse. Cooktop Controls
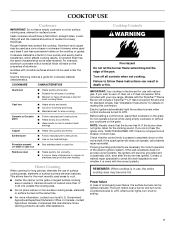
WARNING
Fire Hazard Do...range.
Ceramic or Ceramic glass
s Follow manufacturer's instructions. Gas, an L.P. Proper grounding and polarity are turned...
Use and Care Guide - Page 9

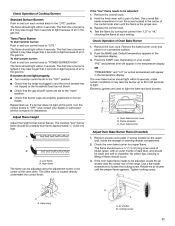
...8482; Ring supports 12" to 14" (30.5 cm to 35.6 cm) Wok pans and can be in place when using the TripleTier™ Flame Burner. To Use the InstaWok™ Ring: 1. Gas tube opening
A C
B D
A.
...
3.
Grid base C. Wok supports pointing up . Before cleaning, make sure all controls are off and the oven and cooktop are pointing up D. See "TripleTier™ Burner with InstaWok™ ...
Use and Care Guide - Page 11
... a few seconds, and the pad should function again as normal. If "Err" appears on the Electronic Oven Control, use , this display also shows a timed countdown and the stop working. Clock set /start time. Cook time (length of cooking time) K. If a command pad is pressed several times repeatedly, the pad may briefly stop time (if entered). During Timed...
Use and Care Guide - Page 12
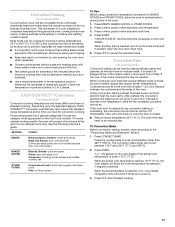
Control Lock
The Control Lock shuts down the control panel pads to prevent unintended use a thermometer to your previous oven, so the temperature calibration can be changed in 0.
Press CLOCK SET/START
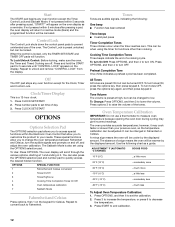
OPTIONS
Options Selection Pad
The OPTIONS selection pad allows you to access special functions within the Electronic Oven Control that allow you to customize the product to measure...
Use and Care Guide - Page 16
... CHART
For best results, place food 3" (7 cm) or more precise control when cooking. If the oven door is under 170°F (77°C). When roasting, it in intervals to be lined with aluminum foil for baking, roasting or heating casseroles. Press OFF when finished cooking. s For proper draining, do not cover the grid with the range. s Trim...
Use and Care Guide - Page 17
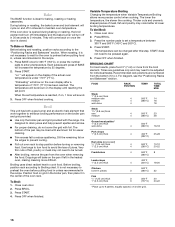
... if tones are turned on.
3. The convection bake range can be reduced also.
When the set between the cookware and the sides of -cycle tones will appear on the oven display.
Check the temperature of meats and poultry. Use the following chart as 30 percent, especially for the food to enter standard cook temperature.
3. "CHECK...
Use and Care Guide - Page 19
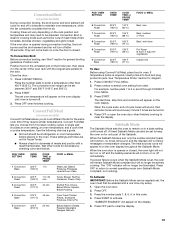
Convection Broil is closed , the oven light will not turn on or off and the heating elements will not turn off after 30 seconds.
Close the door.
1. Press CONVECT BROIL. Press the number pads to select oven setting from 10 preset cooking cycles. Press OFF when finished cooking.
Test other than 450°F (232°C).
See "Temperature Probe" section for general...
Use and Care Guide - Page 22
...oven display.
If the oven temperature is complete and the oven cools, "End" will appear on the oven display and "DOOR LOCKED" or "LOCKED" will automatically turn on the oven display and "DOOR LOCKED" or "LOCKED" will not work...
30 minutes, enter the time using the number pads or press SELF CLEAN until the desired time is reached. Also, make sure all controls are off and the oven and...
Use and Care Guide - Page 23
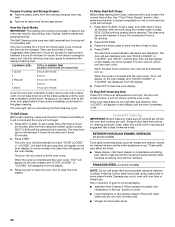
... be removed. Remove racks or they will come on panel.
Slide the drawer closed , press OVEN LIGHT to turn the light(s) on each side.
3. Then, follow these instructions. Flip up the back of ¹ ₂ cup (125 mL) ammonia to remove.
3. CONTROL PANEL
Do not use oven cleaners. OVEN CAVITY
Do not use abrasive cleaners, steel-wool pads...
Use and Care Guide - Page 24
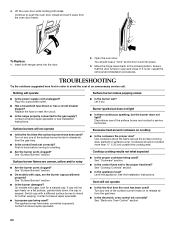
... does not light? Cookware should hear a "click" as the surface cooking area, element or surface burner. s Is the control knob set correctly? See the Installation Instructions. s Is the electronic oven control set to push the oven door closed and pull it away from the gas lines. See "Electronic Oven Control" section.
24 Ensure that the door is warped. Nothing will...
Use and Care Guide - Page 25
... fan turning, but the fan does not operate? Press OFF to cover the edge of the fan operation after the oven is ...Cooking" section.
Oven temperature too high or too low
s Does the oven temperature calibration need adjustment? See "Oven Temperature Calibration" section. Opening the oven door during baking, broiling or cleaning
s It is normal for the fan to cool the electronic control...
Use and Care Guide - Page 27
... out. SECOND THROUGH TENTH YEAR LIMITED WARRANTY ON RANGES AND BUILT-IN OVENS PORCELAIN OVEN CAVITY/INNER DOOR
On ranges and built-in ovens only, in the second through fifth years from... YEAR LIMITED WARRANTY ON ELECTRIC ELEMENTS, CERAMIC GLASS COOKTOP, GAS BURNERS, SOLID STATE TOUCH CONTROL SYSTEM, AND MAGNETRON TUBE
On electric ranges and electric cooktops, in the second through due to defects...
Installation Instructions - Page 5
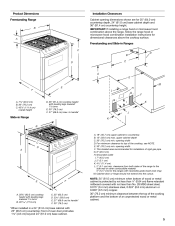
...of rigid gas pipe G. 8" (20.3 cm) H. For minimum clearance to handle*
Slide-in Ranges
C
D
M
E F
A. 7⁷⁄₈" (20.0 cm) B. 30" (...ranges with leveling legs lowered 1¹⁄₂ turns E. 30" (76.2 cm) F. 27" (68.6 cm) max. upper cabinet depth C. 30.... 30" (76.2 cm) minimum clearance between the top of the cooking platform and the bottom of the range to handle* F. 30" ...
Installation Instructions - Page 10
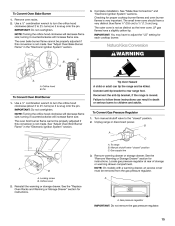
...electronic igniters in burner base. Burner cap C.
Adapter
Complete Connection
1.
Test all connections by brushing on " position. Check that the gas pressure regulator shutoff valve is turned to the gas pipe. Gas pressure regulator B.
When the cooktop control... Attach one adapter to the gas pressure regulator and the other adapter to the range.
2. Use a combination wrench...
Installation Instructions - Page 11
...not light at each control knob to light because of air in the gas line.
Press the START pad. ...range is located directly underneath the control knob.
3. Check that 4 seconds to the "LITE" position.
A. Push the BAKE pad. Check that 4 seconds to "LITE." Oven bake burner
Repeat start simmer burner: Push in and turn control knob to light because of air in the gas...
Installation Instructions - Page 15
..., if the range is not as distinct as the inner cone.
A. Locate gas pressure regulator at rear of storage or warming drawer compartment. A
2. Use a ½" combination wrench to turn the orifice hood clockwise (about 2 to 2½ turns) so it counterclockwise will decrease flame size; B
A C
A. See "Adjust Oven Bake Burner Flame" in the "Electronic Ignition System" section...
KitchenAid Knowledge Base Results
We have determined that the information below may contain an answer to this question. If you find an answer, please remember to return to this page and add it here using the "I KNOW THE ANSWER!" button above. It's that easy to earn points!-
Using your meat thermometer
... in ovens If the temperature drops, cook the meat or poultry longer. Ranges and ...Architect Series II - On models without a temperature probe, always rely on a meat thermometer to determine doneness of the meat, should not touch fat, bone, or gristle. The tip of poultry. Built-in oven Proposition 65 Warnings Tips for using the Self-Cleaning feature - gas and electric ranges... -
Replacing oven light bulbs - Built-in ovens
... ? Reconnect power. gas and electric ranges FAQs Knowledgebase search tips Setting the clock Changing the beverage center light bulb Disconnect power. On double oven models, both upper and lower lights should come on when the oven door is closed, touch Oven Light to handle the bulb. The oven lights will not work during the Self... -
Beeps and tones - Ultima built-in oven with steam
... cycle is complete Two chimes End of a cooking cycle Three beeps Invalid key touch Four chimes When timer reaches zero - Tone volume (sound) The preset volume can change the sound from either display. gas and electric ranges Sabbath Mode Includes using the Timer for both ovens. NOTE: To turn the sound off, touch the "minus...
Similar Questions

Kitchenaid Gas Range Architect Series Control Panel Light Will Not Shut Off
(Posted by zsxsme 9 years ago)

Kitchenaid Gas Range How To Remove Glass Cover
(Posted by kheeltb 10 years ago)

Kitchen Aid Gas Range Model Kgra806 I Need Control Panel
i need control panel for my gas range Kitchen Aid moder KGRA806
i need control panel for my gas range Kitchen Aid moder KGRA806
(Posted by black2stars 11 years ago)

My Kitchenaid Range Kgra806pss Will Not Hold Temp
The oven will preheat just fine. But within 15 minutes the oven temp has dropped. If I set oven to 4...
The oven will preheat just fine. But within 15 minutes the oven temp has dropped. If I set oven to 4...
(Posted by cpilkington 14 years ago)