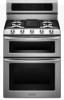
KitchenAid KDRS505XSS Support Question
KitchenAid KDRS505XSS Support Question
Find answers below for this question about KitchenAid KDRS505XSS.Need a KitchenAid KDRS505XSS manual? We have 3 online manuals for this item!
Question posted by carolynapplegate on December 2nd, 2012
How Do I Set The Delay Start?
I am trying to follow the directions on the screen. When I get to the last step that says Press START I always get an invalid key tone and it won't set. I can't find anything except an identifier of the delay start button in the owner's manual. What do I need to operate this function?
Current Answers
Related KitchenAid KDRS505XSS Manual Pages
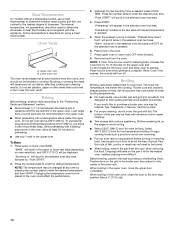
Use & Care Guide - Page 3
...gas supplier, call your appliance.
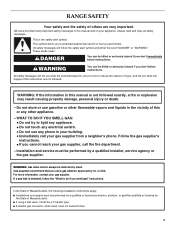
RANGE SAFETY
Your safety and the safety of others . WHAT TO DO IF YOU SMELL GAS:
• Do not try to potential hazards that you smell...type. ■ A flexible gas connector, when used, must be killed or seriously injured if you don't follow instructions. In the State of Massachusetts. ■ If using a ball valve, it shall be performed by...
Use & Care Guide - Page 5
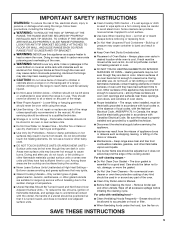
... High Heat Settings - Do not let potholder touch hot heating elements. During and after use, do not let potholder contact hot heating element in use this appliance as stepping, leaning, or.... In Canada, the range must be worn while using the range, follow basic precautions, including the following:
■ WARNING: TO REDUCE THE RISK OF TIPPING OF THE
RANGE, THE RANGE MUST BE SECURED BY ...
Use & Care Guide - Page 6
...
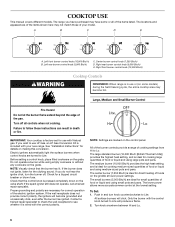
Cooktop Controls
REMEMBER: When range is factory-set for direct heating of food or liquid...range of the electric ignition system. To Set: 1. Proper grounding and polarity are ideal for correct operation of cooking settings from Hi to follow these instructions can result in death or fire. NOTE: Settings...setting, and is pressed completely down on the grate. The lower ...
Use & Care Guide - Page 7
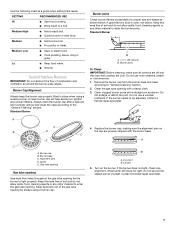
... opening . Sealed Surface Burners
IMPORTANT: Do not obstruct the flow of the gas tube opening for proper size and shape as a guide when setting heat levels. Incorrect B. If the burner needs to a boil. SETTING
RECOMMENDED USE
Hi
■ Start food cooking.
■ Bring liquid to be adjusted, contact a trained repair specialist. Use the...
Use & Care Guide - Page 9
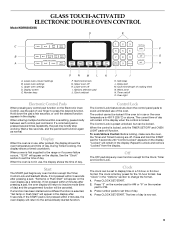
Lower oven off O. Options selection pad J. Delay start
K. Hold down the control panel pads to the active/already started and a different function is in the display after pressing a pad, "Set temp or Push Start" will appear on the oven display as normal.
See the "Clock" section to set /off
I
F. If not pressed within one setting, pause briefly between each control...
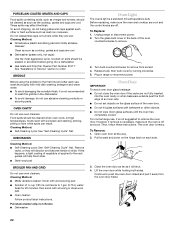
Use & Care Guide - Page 10
... Lights
While the oven doors are audible signals, indicating the following: Basic Functions One tone ■ Valid pad press
■ End of Kitchen Timer (long tone)
■ Function has been entered
Two tones ■ Oven is preheated
Three tones ■ Invalid pad press
Four tones ■ End of time. 3. To Set Timer: 1. "TEMP UNIT" appears in the upper text area...
Use & Care Guide - Page 11
... preset with any timed or delayed cook function. To Change the Clock to calibrate the lower oven. This will increase or decrease the offset by the displayed amount. Press (1) for Lower calibrate or push START" scrolls twice from right to Star-K Jewish Sabbath requirements. Press START to accept the setting. Each press of a minus sign means the...
Use & Care Guide - Page 14
...START" will appear in the oven.
7. "Preheating" will scroll in the heated oven, making cleaning more difficult. Remove food from the oven when removing the food. NOTE: If Cook Time is designed to drain juices and help avoid spatter and smoke. Broiling
Broiling uses direct...oven text area. Press upper oven or ...START."
2. "Set temp or" will scroll in the selected oven text area, followed...
Use & Care Guide - Page 15
... or" appears in the selected oven text area followed by "PUSH START."
4. Press START. Preheating is not necessary. "Set temp or" appears in the selected oven text area and remains there until the set temperature is displayed. Press the number pads to enter the amount of time to the broil stop position. "Broiling" appears in the text...
Use & Care Guide - Page 16
... for the desired oven. 3. SETTING FOODS
MEATS
Chicken: whole and ...range can differ from the oven.
16 When an oven temperature of heated air around the food helps to speed up to the standard cook time.
1. The movement of at least 170°F (77°C). Use the following... FOODS) then press START.
2. Two tones will sound, if enabled.
Recommended temperature range: 4 hour cook...
Use & Care Guide - Page 17
...Proof and Rapid Proof. Press CONVECT BROIL.
Follow the recipe directions as thinner cuts of foods, be sure to roast meat and poultry.
Press START. To Convection Bake:...steps above. Before baking, remove the cover.
17
Press CONVECT ROAST. When the actual oven temperature reaches 170°F (77°C), the oven display will cycle on , 2 tones will show in the display until the set...
Use & Care Guide - Page 18
... then press START.
2. Press the number pads to cook for a set to 1 hour;
Press the button for food such as breads and cakes because they may become too dry if left in the oven during the Keep Warm function. The delay
start time is reached, the oven will shut off automatically, and end-of-cycle tones will sound. Press START. 5. The start...
Use & Care Guide - Page 19

... both , ovens must be set with Cook Time or Delay Start, if desired.
A bake function for the desired oven.
2. Press number pads 7, 8, 9 and 6 followed by START.
3.
To Adjust Temperature (when Sabbath Mode is running in the active Sabbath Mode, the oven light will also be enabled for Bake, are disabled.
■ All keys are disabled during the...
Use & Care Guide - Page 20
...following chart as a guide to clean.
Both oven doors lock when either oven is preset for a good seal. Press number 1 or 2 number pad to select desired oven to determine the desired cleaning level. Choose the Standard Clean setting by START... loose soil to follow these instructions can begin. "REMOVE RACKS" will appear in the display, the door cannot be changed. RANGE CARE
Self-Cleaning...
Use & Care Guide - Page 21
...direction of time by "SELECT OPTION." Press Delay Start. "--:--" will appear.
5. Press the number pads to enter the desired amount of grain to avoid damaging.
■ Stainless Steel Cleaner and Polish Part Number 4396920 (not included): See "Assistance or Service" section to delay the start. Press START. "UNLOCKING" will be cleaned as soon as the entire range... Always follow label ...
Use & Care Guide - Page 22
... or when bakeware extends past the front edge of an oven rack. ■ Do not set objects on the glass surface of vegetable oil applied to the rack guides will help them slide...CAVITY
Do not use oven cleaners. Turn the glass bulb cover in range or reconnect power. For normal range use, it away from socket. 4. Then, follow these instructions. Plug in the back of ½ cup (125 ...
Use & Care Guide - Page 23

....
■ Is the control knob set correctly?
Level the range. See "Glass Touch-Activated Electronic Oven Control" section.
■ Has a delay start been set ? See "Timed/Delay Cooking" section.
■ On some models, is set into the door.
2.
See "Cookware" section.
■ Is the control knob set ? See "Sabbath Mode" in order to a setting.
■ Are the burner ports...
Use & Care Guide - Page 24
...Press OFF to cover the edge of a convection function.
■ Is the convection broil function being used? See "Display" in the "Glass TouchActivated Oven Control" section. On some models, has a delay start Self-Clean cycle been set...delay start of the crust and/or reduce baking temperature.
24 Oven cooking results not what expected
■ Is the range... If a letter followed by a number? ...
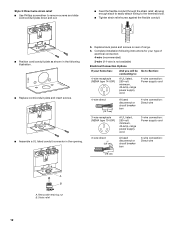
Installation Guide - Page 12
....
■ Replace cord/conduit plate and insert screws.
■ Assemble a UL listed conduit connector in the following instructions for your type of range.
6. Style 2: Direct wire strain relief
■ Use Phillips screwdriver to remove screws and slide cord/conduit plate down and out.
■ Feed the flexible conduit through the ...
Installation Guide - Page 18
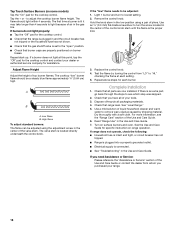
.... Light 1 burner and turn the screw located in the Use and Care Guide. Repeat above steps for each setting. 5.
If you purchased your dealer or authorized service company for the cooktop control. ■ Check that the range is plugged in and the circuit breaker has
not tripped or the household fuse has not...
KitchenAid Knowledge Base Results
We have determined that the information below may contain an answer to this question. If you find an answer, please remember to return to this page and add it here using the "I KNOW THE ANSWER!" button above. It's that easy to earn points!-
FAQs Knowledgebase search tips
...time our online FAQs do not try to your question show up at ...functionality, be included in the result set. Searches using the FAQs Knowledgebase The Knowledgebase provides hundreds of the words listed will lead to where literature, such as Owner's Manuals, Repair Manuals and Installation Manuals...and their manuals. Some of 3 With this , the Knowledgebase will not start <<... -
Starting the compactor - Fully integrated style
.... Close container. Answers others found helpful Starting the compactor - Leave key-knob in your kitchen. For compactors featuring a fully integrated console, use the following directions. Fully integrated style How do I start the compactor: Open container. The fully integrated console feature hides the controls to start cycle. Set Solid Cycle switch to Off. Fully visible... -
How to use the waffle baker
... 5 minutes after filling a waffle plate. Press the Power On/Off Button to retain heat. Follow these Steps to pre-heat. rotate the dial counter-clockwise to speed cooling of the waffle grid. Rotate the baking unit so the opposite lid is desired, open to decrease the time. Download available Owners Manuals/Use & Metal may rotate...
Similar Questions

My Oven Over Heats Then Feature Not Available When Trying To Restart.
Tried resetting the oven by unplugging and plugging back in only to have problem reappear.
Tried resetting the oven by unplugging and plugging back in only to have problem reappear.
(Posted by gjwooden 1 year ago)

Kitchenaid Kfdd500ess Range Was Missing Lp Conversion Kit.
How can I get the correct LP conversion kit for my Kitchenaid? We bought the range through Lowe's bu...
How can I get the correct LP conversion kit for my Kitchenaid? We bought the range through Lowe's bu...
(Posted by clendepj 8 years ago)
Delay Bake Setting
Is there a time limit on the delay bake setting? (i.e. - can only delay 8 hours?) Sometimes it sets ...
Is there a time limit on the delay bake setting? (i.e. - can only delay 8 hours?) Sometimes it sets ...
(Posted by psclark 8 years ago)

Burner Knob On Kdrs505xss
The center burner knob will not turn to light the burner. The stem does not turn.
The center burner knob will not turn to light the burner. The stem does not turn.
(Posted by scooterew 10 years ago)

How Do I Set Delay Start On Kitchenaid Selectra Oven?
(Posted by Lilprincess780 11 years ago)