KitchenAid KDRS505XSS Support Question
KitchenAid KDRS505XSS Support Question
Find answers below for this question about KitchenAid KDRS505XSS.Need a KitchenAid KDRS505XSS manual? We have 3 online manuals for this item!
Question posted by scooterew on June 15th, 2013
Burner Knob On Kdrs505xss
The center burner knob will not turn to light the burner. The stem does not turn.
Current Answers
Related KitchenAid KDRS505XSS Manual Pages
Use & Care Guide - Page 5
...or unattended in area where the range is turned inward, and does not extend ...over adjacent surface units.
■ Proper Installation - All other utensils. Do not let potholder touch hot heating elements. The range, when installed, must be moved while oven is hot, do not touch, or let clothing or other flammable vapors and liquids.
■ Top burner...
Use & Care Guide - Page 6
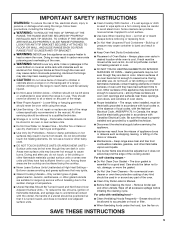
... correct polarity. The center burner (7,350 Btu/h) is in use or (on the grate.
The lower power allows more accurate simmer control at lower power settings. If you wish to use with the control knob turned to Lite. All surface burners will become hot. The range you do not hear the igniter click, turn knob counterclockwise to Lite...
Use & Care Guide - Page 7
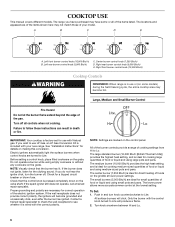
... and do not allow spills, food, cleaning agents or any other material to enter the burner ports. Replace the burner cap, making sure the alignment pins on the burner. Turn on the cap are cool. If the burner still does not light, do not allow spills, food, cleaning agents or any other material to enter the...
Use & Care Guide - Page 8

...material characteristics. Rough finishes may be used on the center burner on the cooktop or grates. A nonstick finish has the same characteristics as a guide ... unevenly.
■ Ideal results on 2 surface burners at the same time.
■ For more information, contact your local agricultural department. Turn off the cooktop burners and allow the grates to medium heat settings.
Griddle...
Use & Care Guide - Page 9
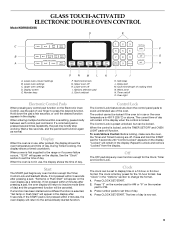
...TOUCH-ACTIVATED ELECTRONIC DOUBLE OVEN CONTROL
Model KDRS505XSS
D
E
C F
B
G
A
H
A. Options selection pad J. If not pressed within 2 minutes, the oven display will return to the range or if a power failure occurs,...for AM or "6" on the oven display as normal. Clock set .
9 Oven light
Electronic Control Pads
When pressing any oven function except the Timer, Control Lock and ...
Use & Care Guide - Page 17
...- To Proof: Before first proofing, place the dough in a lightly greased bowl and cover loosely with wax paper, coated with several ...100°F (38°C).
1. Cooking times will show in the center of the formed dough.
When the set temperature is preset at least ... for the first and second rise.
The convection roast range can be used for fresh dough, thawed dough and for...
Use & Care Guide - Page 20
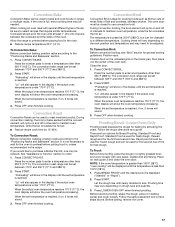
... heat, odors, and smoke. NOTE: The cooktop burners will not function during Self-Cleaning cycle. Press SELF... and a signal will appear in the display.
5.
Suggested clean times are 2 hours for light soil and between 3 hours and 4 hours for more smoke. Failure to program a clean... Close the oven door and press SELF CLEAN. RANGE CARE
Self-Cleaning Cycle
WARNING
How the Cycle Works
...
Use & Care Guide - Page 21
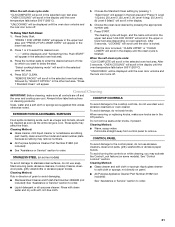
...Off position. Cleaning Method: ■ Warm, soapy water:
Pull knobs straight away from control panel to order.
Press SELF CLEAN. ...area.
2. "--:--" will be cleaned as soon as the entire range is cool. Push START" will scroll in the selected oven ...section to remove.
STAINLESS STEEL (on some models). To avoid turning the controls on while cleaning, you want to select the ...
Use & Care Guide - Page 22
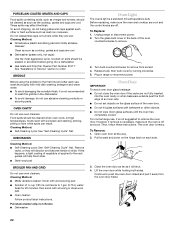
...burners while they will shut. 4. OVEN RACKS
Cleaning Method: ■ Self-Cleaning cycle: See "Self-Cleaning Cycle" first. Unplug range or disconnect power. 2. Turn...9632; Dishwasher
Oven Light
The ovens light is not suggested ...range use oven cleaners. Remove
racks, or they are off and cool. However, if removal is necessary, make sure the oven and cooktop are cool and the control knobs...
Use & Care Guide - Page 23

...
■ Is the cookware the proper size? See "Sealed Surface Burners" section. The range may have been used ? See the Installation Instructions. See "Timed/Delay Cooking" section.
■ On some models, is the Sabbath Mode set? See "Sabbath Mode" in knob before turning to the proper heat level? Move the hinge levers back to...
Use & Care Guide - Page 26
... INCIDENTAL OR CONSEQUENTIAL DAMAGES.
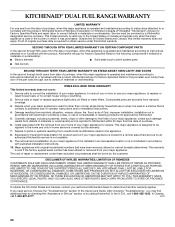
KITCHENAID® DUAL FUEL RANGE WARRANTY
LIMITED WARRANTY
For one year from the date ...9632; Solid state touch control system parts
■ Gas burners
SECOND THROUGH TENTH YEAR LIMITED WARRANTY ON STEAM-ASSIST OVEN... service by the customer. Repairs to repair or replace appliance light bulbs, air filters or water filters. The removal and reinstallation...
Installation Guide - Page 4
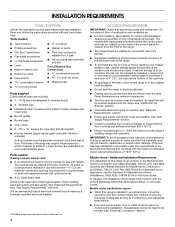
...IMPORTANT: Observe all parts are shown must be avoided. Do not obstruct flow of range near lower side)
■ Burner grates
■ Burner caps
■ Oven racks
■ 2 - #12 x 1⁵⁄₈...°C).
■ Use an insulated pad or ¼" (0.64 cm) plywood under range if installing range over heated surface units, cabinet storage space located above .
■ Four-wire power ...
Installation Guide - Page 8

... on the model/serial rating plate. Gas supply line B. Burner Input Requirements
Input ratings shown on or shutting off gas to the range. Gas Supply Pressure Testing
Gas supply pressure for connection to... follows for turning on the model/serial rating plate are reduced at ½ psi gauge (14" WCP) or lower The range must be disconnected from the supply and fuel lines so range will be ...
Installation Guide - Page 13

... (black)
D. Neutral (center) wire F.
Part of metal ground strap must be cut out and removed.
4. Connect line 1 (black) and line 2 (red) wires to the range with the ground-link screw.... Allow enough slack to easily attach the wiring to connect the green ground wire from the back of the range. Ground-link screw
2. The ground wire must be attached first.
5. Line 2 (red)
6. Feed the...
Installation Guide - Page 14

...Wire
Use this method only if local codes permit connecting chassis ground conductor to the center terminal block post with 10-32 hex nuts.
4. Discard C. Ground-link screw
...block access cover.
3" (7.6 cm)
2. Use Phillips screwdriver to the outer terminal block posts with one of the range. Ground-link screw
D. A B C
A. Strip outer covering back 3" (7.6 cm) to the terminal block. ...
Installation Guide - Page 15

...Securely tighten setscrew to XX lbs-in the package containing literature) to the range with one of range. Pull the conduit through the hole and conduit plate on bottom of terminal ...3-wire connection: Direct Wire
Use this method only if local codes permit connecting ground conductor to the center terminal block post with the ground-link screw. B A
C
D
E
B
A. Terminal lug B. Setscrew C. ...
Installation Guide - Page 17

... level. Check that the flexible conduit or power supply cord are not properly positioned, surface burners will not light. If burners do not light properly: ■ Turn cooktop control knob to the "OFF" position.
■ Check that the range is set to the gas pipe. The
valve is open when the handle is parallel to the "open...
Installation Guide - Page 18
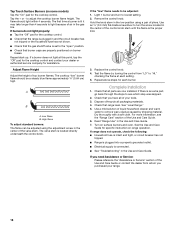
... the "Off" pad for the cooktop control. ■ Check that the range is connected. ■ See "Troubleshooting" in the gas line. Adjust Flame Height
Adjust the height of the control knob stem until the flame is located directly underneath the control knob. Light 1 burner and turn the screw located in the Use and Care Guide. 7. Use a mild...
Installation Guide - Page 20

... gas orifice spuds in the nut driver while changing it counterclockwise and lifting out. To range B. Turn manual shutoff valve to rear range foot. Remove the burner caps. 3.
IMPORTANT: You may have to children and adults. 1.
Natural Gas Conversion
WARNING
A. Burner base screws D. Press nut driver down onto the Natural gas orifice spud and remove...
Installation Guide - Page 21

...188;" to the end of Natural orifice spuds for the remaining burners.
9.
Replace burner grates.
11. Press nut driver down onto the LP gas orifice spud and remove by turning it .
Natural gas position C.
Burner base screws
B. A
A. To Convert Surface Burners
1.
Checking for each burner.
Plastic cover B. The small inner cone should have yellow tips...
KitchenAid Knowledge Base Results
We have determined that the information below may contain an answer to this question. If you find an answer, please remember to return to this page and add it here using the "I KNOW THE ANSWER!" button above. It's that easy to earn points!-
Compactor won't operate
Turn the key-knob (key-switch) fully to open Clearing a jammed disposer Is the drawer completely closed , you press.... Has a household fuse blown, or has a circuit breaker tripped? Press On before pressing Start? Is the key-knob turned all the way to Start? Replace the fuse or reset the circuit breaker. Did you may need assistance from a local service provider.... -
Reasons to use rinse aid in my tall tub dishwasher
...dish racks and the interior of your fingers or inserting a flat-blade screwdriver into the center of the dishes after every wash. Here Hard Water Filming in my Dishwasher ...up any spilled rinse aid with a damp cloth. Replace the knob and turn to 1 or 2. The factory setting is fully locked. Replace the dispenser knob. Order Jet-Dry Rinse Agent Why should I use... -
Lighting the beverage center
... light in my beverage center work? You may also turn on the light at any time the door is not operating, see Changing the beverage center light bulb If the light is opened. The beverage center has an interior light that comes on any time by opening the door and pressing the exterior switch located beside the temperature control knob...
Similar Questions

How Do I Replace A Front Right Burner Element When The Knobs Are In Front?
Right front burner element "burned out". How do I open flat-glass cooktop to expose the burner eleme...
Right front burner element "burned out". How do I open flat-glass cooktop to expose the burner eleme...
(Posted by Yazmin50 7 years ago)

Kitchenaid Kfdd500ess Range Was Missing Lp Conversion Kit.
How can I get the correct LP conversion kit for my Kitchenaid? We bought the range through Lowe's bu...
How can I get the correct LP conversion kit for my Kitchenaid? We bought the range through Lowe's bu...
(Posted by clendepj 8 years ago)

Where Is The Spud Chart To Convert From Natural To L.p. Gas.
(Posted by asak146 10 years ago)
Son Leaned On Knob Formy Burner And Broke Da Rod That Turns It On.wutz This Cald
(Posted by carlsenbrook 10 years ago)

Is This A Good Range To Buy? I Hear Bad Reviews On This Range.
(Posted by dalrenethahir 12 years ago)