
Genie Excelerator Support Question
Genie Excelerator Support Question
Find answers below for this question about Genie Excelerator.Need a Genie Excelerator manual? We have 1 online manual for this item!
Question posted by Anonymous-133384 on March 30th, 2014
Light Socket Housing Model H8000d
the housing that holds the two light bulbs cracked and broke away. the bulbs shortout the circuit. i need a new housing to replace the old one. can i order one?
Current Answers
Related Genie Excelerator Manual Pages
Owner's Manual - Page 1

....com
Please have Model information ready when calling. SAVEFTUHTIUSRMEARNEUFEARLEFNOCRE
This Equipment meets or exceeds all Federal, State and UL 325 Safety Requirements. Need Help?
Safe-T-Beam® Safety Reverse System Must be Installed and the Force Controls MUST be installed prior to close door. Extension Kit is available for Service 11 Garage Door Opener Installation 12...
Owner's Manual - Page 2

... children cannot reach it. • Away from all locks connected to the door before removing operator cover. • When replacing cover, make sure wires are used for opening equipment may cause injuries, your service representative.
2 Do Not install operator on when door is moving parts of a 2" x 4" board laid flat.
The light turns on an improperly balanced...
Owner's Manual - Page 3

... CONDITION AND THICKNESS
Check condition of balance. Door should stay stationary.
This Opener is out of vertical stile in most garages and connect to most garage doors. E If you will need.
If your door sticks, binds, or is acceptable.
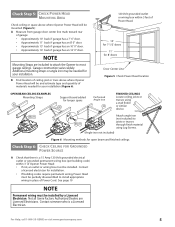
NOTE
The Excelerator Opener is "lightweight" (made with an automatic Garage Door Balance Detection System. A few additional parts and supplies...
Owner's Manual - Page 4

...7'-6", make sure your mark with at 1-800-35-GENIE. NOTE
• For both types of door to new mounting board. If the ceiling in the way, place the Header Bracket avove the spring. A ...not provided). • Transfer your garage is so low that there is 7'-6" or less, continue with tape measure. Bottom of the garage door opening. B If your door height is above the Header Bracket mounting...
Owner's Manual - Page 5
... 10' back if garage has a 7' 6" door. • Approximately 11' back if garage has an 8' 0" door. • Approximately 13' back if garage has an 10' 0" door. • Approximately 14' back if garage has an 12' 0" door. B Find location of ceiling joist or truss above where Opener Power Head will be and estimate type and quantity of materials needed for your installation...
Owner's Manual - Page 6

...electrician)
❐ Excelerator Extension Kit (for 8' garage doors) (store) ❐ Sufficient angle iron or strapping for hanging Power Head
(store)
❐ Two 60 Watt light bulbs
(Rough service bulbs recommended)(store)
❐ GER-2 Emergency Release Kit for entry during power failure
(store)
❐ Wood for header, ceiling, and/or door bracing reinforcement
(if needed )
Electric Drill...
Owner's Manual - Page 9

...and slide Collar over Hooks
Collar
9 Rail Clamps
13
11D. Finger-tighten until the Opener is needed, attach it per instructions supplied with 2 (1/4"-20) (yellow) Hex Head Shoulder Bolts ...Snap on Motor Shaft (Figure 9).
B Install Bumper (Figure 9). GARAGE DOOR OPENER ASSEMBLY
Assembly Step C1H: CONNECT RAIL TO POWER HEAD
OPEN BLUE PARTS BAG
A Turn Power Head upside down and place ...
Owner's Manual - Page 10

...
Rail Strap
15
16
A Attach Rail Strap to avoid damaging the Light Bulb Sockets. Insert (#8-32 x 1") Hex Head Screw into Switch hole and finger-tighten until later. Close Limit Switch
(Brown wire)
19
DOOR
Open Limit Switch
(White wire)
18
DOOR
15"
Arrows point DOOR toward door
Wire Clip
53
15"
#8-32 x 1" Hex Head
Screws 21
Figure 14...
Owner's Manual - Page 12

...door travel + 2-1/2" (sectional door) or
+ 6" (one-piece door) Figure 18 Attach Header Bracket above the spring. GARAGE DOOR OPENER INSTALLATION
NOTE
For lightweight garage doors, make sure you have sufficient support.
• If a door spring is in Figure 18. Alternative Header Bracket orientations
Highest Point of the door... the Header Bracket above Garage Door
A If needed, attach a 2" x...
Owner's Manual - Page 13
... vs. the thickness of masonite, lightweight wood, fiberglass, metal, or other lightweight materials must be properly braced before mounting door Opener. Check door condition and thickness.
For sectional doors:
A Place Door Bracket on top of door
Attach no lower than top roller, and mark holes (Figure 19).
Finger-tighten until later.
28
30
56 or 30...
Owner's Manual - Page 15

...: • Pull Cord through Magnetic Carriage Assembly Lever
until Knob is 6' from floor. • Tie a new overhand knot in Cord at Magnetic Carriage
Assembly Lever.
Securely tighten fasteners. C Attach both Arms together with garage door fully or partially open, garage door may leave Emergency Release Knob within reach of children. If the Knob is as short...
Owner's Manual - Page 18

... from
operating garage door). • Away from Entrapment Warning Label, and attach it to reach door while standing at Wall Console). F Remove protective backing from any wall consoles other than one lighted Wall Control per Opener will prevent the light from inside garage. • Independent Light Control allows convenient manual control of any moving garage door or Opener parts (you...
Owner's Manual - Page 20

... Console to close completely, measure distance from bottom of the Opener and the door. • Set the door Opener to use the minimum force needed
to run, move Limit Switch toward door and try again. - B Setting Open Limit Switch:
• Manually open garage door to full open position.
• Slide Open Limit Switch until it is required to turn the Force Adjusting...
Owner's Manual - Page 22
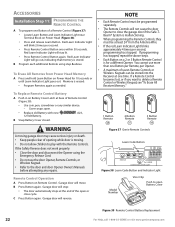
... at one Button of the open .
• Replace old Battery with the Remote Controls. B Snap Battery Cover closed.
You cannot use the door Opener, Remote Controls, or
Wireless Keypad. • Refer to close the garage door if the Safe-TBeam® System is for 10 seconds or until Learn Indicator Light goes out. Garage door will go out, indicating that...
Owner's Manual - Page 23

.... • Press the number of doors (total) you have an external receiver. Enter your door opener. - Press
. After a few seconds the LED will blink.
• Enter your door opener has a black antenna
Indicator LED
wire,the Learn Code Button and Indicator
LED are located near the antenna.
(The light lens may need to 8 characters).
• Press
.
-
Red...
Owner's Manual - Page 25
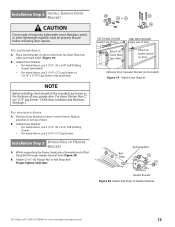
...light oil.
Close door. - b. B Yearly: • Wipe off old...• Door springs and door hardware:
- Raise door manually 3'- 4' and verify that may damage the Opener. Reattach ...door automatically or manually if springs are recommended. Installation Step 13: INSTALL LIGHT BULBS AND LENS
Snap Lens Hinges into Light Sockets (Figure 41): • Rough service, 130 Volt bulbs...
Owner's Manual - Page 26
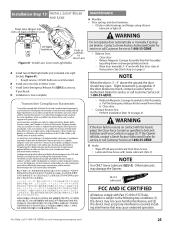
... make repairs to cables, spring assemblies, and other wall console can cause the Opener to operate unexpectedly and the light to stop working.
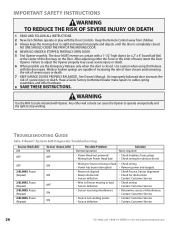
An improperly balanced door increases the risk of travel, retest the Door Opener. The door MUST reverse on contact with Opener. After adjusting either the Force or the Limit of severe injury or death...
Owner's Manual - Page 27

...of rest. Check Limit Switch Wire connections to the Opener.
Contact Customer Service for further assistance. Ribbon Cable ... be closed electrically by holding the Wall Console Button down until door is applied to Terminals...door can be installed and operational to enable door to close. See page 18
NOTE
• The status LED Indicator Light is equipped with an automatic garage door...
Owner's Manual - Page 28

... garage door and Opener are in good repair, properly lubricated, and properly balanced as needed .
• Check for shorted Wires. • Check garage door for binding.
• If a new installation, check Door ... lost or stolen? Replace any loose connections. Adjust as needed . • Check garage door for binding.
• Check Open Limit Switch for a short circuit and for service,or...
Owner's Manual - Page 29
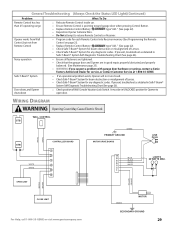
... (Always Check the Status LED Light)(Continued)
Problem
What To Do
Remote Control has less than 25' operating range
Opener works from Wall Control, but not from Remote Control
• Relocate Remote Control inside car.
• Ensure Remote Control is pointing toward garage door when pressing Control Button.
• Replace Remote Control Battery
type "A23...
Similar Questions

What Remote Do I Use For Powerlift Garage Door Opener Model Wr77 Serial No.08258
(Posted by tmski87 3 years ago)

Garage Door Opener Not Working
Green light and red light are on the safety"eye" When pushing wall, remote or key pad the screw driv...
Green light and red light are on the safety"eye" When pushing wall, remote or key pad the screw driv...
(Posted by scanty5 9 years ago)

Is Genie Excelerator Garage Door Opener Compatible With The 3 Button Remote?
(Posted by ven1anubis 10 years ago)

Garage Door Opener.
The unit will not work from the wall remote. The wall remote lights up but does not operat the unit....
The unit will not work from the wall remote. The wall remote lights up but does not operat the unit....
(Posted by ckniffen 10 years ago)