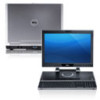
Dell XPS 8500 Support Question
Dell XPS 8500 Support Question
Find answers below for this question about Dell XPS 8500.Need a Dell XPS 8500 manual? We have 2 online manuals for this item!
Question posted by omalby on December 28th, 2013
How To Set Up A Xps 8500
The person who posted this question about this Dell product did not include a detailed explanation. Please use the "Request More Information" button to the right if more details would help you to answer this question.
Current Answers
Related Dell XPS 8500 Manual Pages
Owner's Manual (PDF) - Page 2
.... Information in trademarks and trade names other countries. Reproduction of these materials in any proprietary interest in this text: Dell™, the DELL logo, and XPS™ are either potential damage to change without the written permission of Microsoft Corporation in this document is strictly forbidden. Bluetooth® is used by...
Owner's Manual (PDF) - Page 23
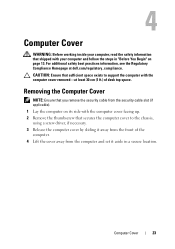
... information that sufficient space exists to the chassis, using a screw driver, if necessary. 3 Release the computer cover by sliding it away from the computer and set it aside in "Before You Begin" on page 13.
4
Computer Cover
WARNING: Before working inside your computer and follow the steps in a secure location.
Owner's Manual (PDF) - Page 35
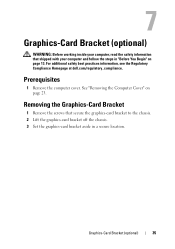
... working inside your computer, read the safety information that secure the graphics-card bracket to the chassis. 2 Lift the graphics-card bracket off the chassis. 3 Set the graphics-card bracket aside in "Before You Begin" on page 23.
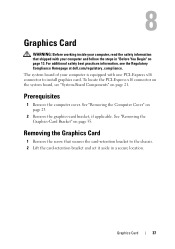
Owner's Manual (PDF) - Page 37
...
37 Removing the Graphics Card
1 Remove the screw that shipped with one PCI-Express x16 connector to the chassis. 2 Lift the card-retention bracket and set it aside in "Before You Begin" on page 23.
2 Remove the graphics-card bracket, if applicable. Prerequisites
1 Remove the computer cover.
Owner's Manual (PDF) - Page 44

Removing the PCI-Express x1 Card(s)
1 Remove the screw that secures the card-retention bracket. 2 Lift the card-retention bracket and set it aside in a secure location.
1 2
1 screw
2 card-retention bracket
44
PCI-Express x1 Card(s)
Owner's Manual (PDF) - Page 68
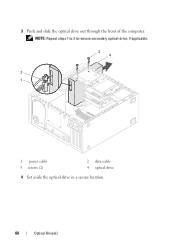
NOTE: Repeat steps 1 to 3 to remove secondary optical-drive, if applicable.
3 4
2 1
1 power cable 3 screws (2)
2 data cable 4 optical drive
4 Set aside the optical drive in a secure location.
68
Optical Drive(s) 3 Push and slide the optical drive out through the front of the computer.
Owner's Manual (PDF) - Page 77
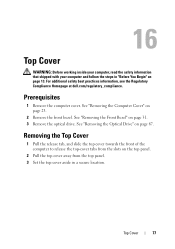
... of the computer to release the top-cover tabs from the slots on the top panel.
2 Pull the top cover away from the top panel. 3 Set the top cover aside in "Before You Begin" on page 23.
2 Remove the front bezel. See "Removing the Optical Drive" on page 31. 3 Remove the...
Owner's Manual (PDF) - Page 104

3 Orient the alignment notches on the processor with the alignment tabs on the socket.
4 Align the pin-1 corner of the processor with the pin-1 corner of the processor socket, and then place the processor in the socket and ensure that the processor is positioned correctly.
1 processor 2 socket
2 1
104
Processor Set the processor lightly in the processor socket.
Owner's Manual (PDF) - Page 107
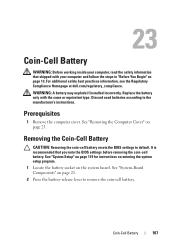
... removing the coin-cell battery. Discard used batteries according to default.
Removing the Coin-Cell Battery
CAUTION: Removing the coin-cell battery resets the BIOS settings to the manufacturer's instructions. It is recommended that shipped with the same or equivalent type. See "System-Board Components" on the system board. WARNING: A battery...
Owner's Manual (PDF) - Page 109

... in "After Working Inside Your Computer" on page 119.
Coin-Cell Battery
109 See "System Setup" on page 15.
3 Enter the system setup program and set the time and date. Postrequisites
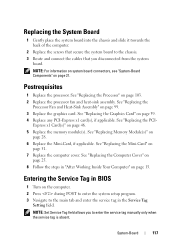
1 Replace the computer cover. See "Entering System Setup" on page 119.
4 Update the BIOS...
Owner's Manual (PDF) - Page 117
..." on
page 51. 7 Replace the computer cover.
See "Replacing the PCI- See "Replacing Memory Module(s)" on
page 25. 8 Follow the steps in the Service Tag
Setting field. NOTE: Set Service Tag field allows you disconnected from the system
board.
Owner's Manual (PDF) - Page 119
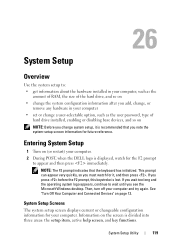
... of the hard drive, and so on • change the system configuration information after you add, change, or
remove any hardware in your computer • set or change a user-selectable option, such as the user password, type of
hard drive installed, enabling or disabling base devices, and so on
NOTE: Before...
Owner's Manual (PDF) - Page 120

...highlighted, the Help Screen displays more information about that option and available settings.
and down -arrow keys to your current settings.
Key Functions - System Setup Options
NOTE: Depending on the left side...current date in the Setup Item are changeable. Press the up -
NOTE: Not all settings listed in week mm/dd/yyyy format
Displays the service tag of your computer and ...
Owner's Manual (PDF) - Page 125
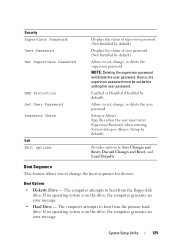
... Always (Setup by default)
Provides options to Save Changes and Reset, Discard Changes and Reset, and Load Defaults
Boot Sequence
This feature allows you to set, change, or delete the supervisor password NOTE: Deleting the supervisor password will delete the user password. The computer attempts to boot from the primary harddrive...
Owner's Manual (PDF) - Page 127

and down your computer and follow the steps in case you want to clear the CMOS setting. 1 Remove the computer cover. Clearing Forgotten Passwords
WARNING: Before working inside your computer, read the safety information that shipped with your current boot sequence in "...
Owner's Manual (PDF) - Page 128

Password:
4 Wait for approximately five seconds to clear the password setting.
5 Remove the 2-pin jumper plug from pins 1 and 2 and replace it on page 15.
128
System Setup Utility See "Replacing the Computer Cover" on page 25.
7 Follow the steps in "After Working Inside Your Computer" on pins 2 and 3.
6 Replace the computer cover.
Owner's Manual (PDF) - Page 129

... must be disconnected from pins 2 and 3 and fix it on page 21. 3 Remove the 2-pin jumper plug from the electrical outlet to clear the CMOS setting. 1 Remove the computer cover. See "Computer Cover" on page 23. 2 Locate the 3-pin CMOS reset jumper (RTCRST) on page 13.
Owner's Manual (PDF) - Page 130

4 Wait for approximately five seconds to clear the CMOS setting.
5 Remove the 2-pin jumper plug from pins 1 and 2 and replace it on page 15.
130
System Setup Utility See "Replacing the Computer Cover" on page 25.
7 Follow the steps in "After Working Inside Your Computer" on pins 2 and 3.
6 Replace the computer cover.
Similar Questions


Restore Factory Settings On Dell Laptop While Powered Down F11 Does Not Work
(Posted by dokarenb 10 years ago)

How To Reset The Connection Settings On Dell Laptop N4110
(Posted by jiBue 10 years ago)

Xps 8500 Cd Drive
How do you open the cd drive on a XPS 8500 computer?
How do you open the cd drive on a XPS 8500 computer?
(Posted by pplus10 11 years ago)