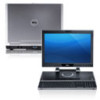
Dell XPS 8500 Support Question
Dell XPS 8500 Support Question
Find answers below for this question about Dell XPS 8500.Need a Dell XPS 8500 manual? We have 2 online manuals for this item!
Question posted by shawnpbasi on June 19th, 2014
How To Open Dell Xps 8500 Cpu Case
The person who posted this question about this Dell product did not include a detailed explanation. Please use the "Request More Information" button to the right if more details would help you to answer this question.
Current Answers
Related Dell XPS 8500 Manual Pages
Owner's Manual (PDF) - Page 2
... logo are trademarks of your product. Other trademarks and trade names may be used in this text: Dell™, the DELL logo, and XPS™ are either the entities claiming the marks and names or their products.
Dell Inc. All rights reserved.
WARNING: A WARNING indicates a potential for property damage, personal injury, or death.
CAUTION...
Owner's Manual (PDF) - Page 13
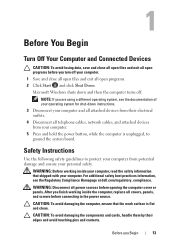
... using a different operating system, see the Regulatory Compliance Homepage at dell.com/regulatory_compliance. WARNING: Disconnect all open files and exit all power sources before connecting to protect your computer... shut-down and then the computer turns off your computer.
1 Save and close all open programs. 2 Click Start and click Shut Down. Microsoft Windows shuts down instructions.
3 ...
Owner's Manual (PDF) - Page 14
... program available at the back of the components inside your computer, ground yourself by touching an unpainted metal surface, such as the metal at support.dell.com
14
Before you must disengage before disconnecting the cable. CAUTION: Before touching anything inside the computer. CAUTION: Only a certified service technician is authorized to...
Owner's Manual (PDF) - Page 17
Technical Overview
17 For additional safety best practices information, see the Regulatory Compliance Homepage at dell.com/regulatory_compliance. 3
Technical Overview
WARNING: Before working inside your computer, read the safety information that shipped with your computer and follow the steps in "Before You Begin" on page 13.
Owner's Manual (PDF) - Page 23
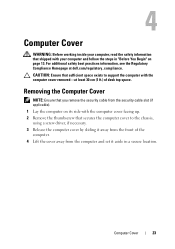
... aside in "Before You Begin" on its side with the computer cover facing up. 2 Remove the thumbscrew that shipped with the computer cover removed-at dell.com/regulatory_compliance.
For additional safety best practices information, see the Regulatory Compliance Homepage at least 30 cm (1 ft.) of the computer. 4 Lift the cover away...
Owner's Manual (PDF) - Page 27
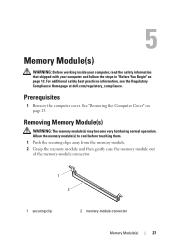
... module(s) may become very hot during normal operation.
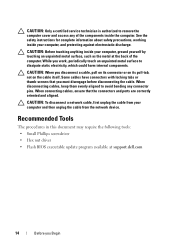
Prerequisites
1 Remove the computer cover. For additional safety best practices information, see the Regulatory Compliance Homepage at dell.com/regulatory_compliance. See "Removing the Computer Cover" on page 13.
Owner's Manual (PDF) - Page 28
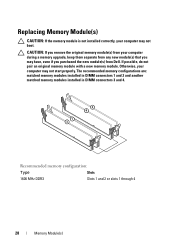
..., your computer during a memory upgrade, keep them separate from any new module(s) that you may have, even if you remove the original memory module(s) from Dell. The recommended memory configurations are: matched memory modules installed in DIMM connectors 1 and 2 and another matched memory modules installed in DIMM connectors 3 and 4. Recommended memory...
Owner's Manual (PDF) - Page 31
... safety information that shipped with your computer and follow the steps in an upright position. 2 Grasp and release the front bezel tabs sequentially, one at dell.com/regulatory_compliance. For additional safety best practices information, see the Regulatory Compliance Homepage at a time by moving
them outward from the front panel. 3 Rotate and...
Owner's Manual (PDF) - Page 35
... screws that shipped with your computer and follow the steps in a secure location. For additional safety best practices information, see the Regulatory Compliance Homepage at dell.com/regulatory_compliance.
7
Graphics-Card Bracket (optional)
WARNING: Before working inside your computer, read the safety information that secure the graphics-card bracket to the chassis...
Owner's Manual (PDF) - Page 37
... aside in "Before You Begin" on page 35. To locate the PCI-Express x16 connector on the system board, see the Regulatory Compliance Homepage at dell.com/regulatory_compliance.
Graphics Card
37 For additional safety best practices information, see "System-Board Components" on page 23.
2 Remove the graphics-card bracket, if applicable...
Owner's Manual (PDF) - Page 43
... the Computer Cover" on page 23.
2 Remove the graphics-card bracket, if applicable. For additional safety best practices information, see the Regulatory Compliance Homepage at dell.com/regulatory_compliance.
Owner's Manual (PDF) - Page 49
.... Your computer supports one half Mini-Card slot for Mini-Cards from sources other than Dell.
Wireless Mini-Card
49 If you ordered a wireless Mini-Card with your computer and ...follow the steps in protective antistatic packaging (see the Regulatory Compliance Homepage at dell.com/regulatory_compliance. See "Removing the Computer Cover" on page 13. 10
Wireless Mini-Card
...
Owner's Manual (PDF) - Page 53
... them from the top panel.
See "Removing the Top Cover" on page 13. For additional safety best practices information, see the Regulatory Compliance Homepage at dell.com/regulatory_compliance.
Owner's Manual (PDF) - Page 57
For additional safety best practices information, see the Regulatory Compliance Homepage at dell.com/regulatory_compliance. 12
mSATA Drive
WARNING: Before working inside your computer, read the safety information that secure the mSATA drive to the system board. 3 Lift ...
Owner's Manual (PDF) - Page 61
... chassis. 3 Slide the hard drive out towards the back of the hard drive. For additional safety best practices information, see the Regulatory Compliance Homepage at dell.com/regulatory_compliance.
WARNING: If you remove the hard drive from the primary hard-drive. 2 Remove the screws that shipped with your computer and follow the...
Owner's Manual (PDF) - Page 67
... the Front Bezel" on page 23.
2 Remove the front bezel.
Optical Drive(s)
67 For additional safety best practices information, see the Regulatory Compliance Homepage at dell.com/regulatory_compliance.
Owner's Manual (PDF) - Page 73
... the steps in "Before You Begin" on page 23.
2 Remove the front bezel. For additional safety best practices information, see the Regulatory Compliance Homepage at dell.com/regulatory_compliance. Prerequisites
1 Remove the computer cover. See "Removing the Optical Drive" on page 67. 4 Remove the top cover.
Owner's Manual (PDF) - Page 77
... drive.
See "Removing the Front Bezel" on page 23.
2 Remove the front bezel. For additional safety best practices information, see the Regulatory Compliance Homepage at dell.com/regulatory_compliance. See "Removing the Optical Drive" on page 13.
16
Top Cover
WARNING: Before working inside your computer, read the safety information that shipped...
Owner's Manual (PDF) - Page 81
... the Optical Drive" on page 77. Top I /O panel cables from the top panel. For additional safety best practices information, see the Regulatory Compliance Homepage at dell.com/regulatory_compliance.
See "System-Board Components" on page 21.
2 Remove the screws that secure the top I/O panel to the top panel. 3 Carefully remove the top...
Owner's Manual (PDF) - Page 127

... for Future Boots 1 Enter system setup.
For additional safety best practices information, see the Regulatory Compliance Homepage at dell.com/regulatory_compliance. See "Removing the Computer Cover" on page 23. 2 Locate the 3-pin password reset jumper (... up-
System Setup Utility
127 and down your computer and follow the steps in case you want to change the boot priority of the device.
Similar Questions


Xps 8500 Cd Drive
How do you open the cd drive on a XPS 8500 computer?
How do you open the cd drive on a XPS 8500 computer?
(Posted by pplus10 11 years ago)