
Dell OptiPlex 330 Support Question
Dell OptiPlex 330 Support Question
Find answers below for this question about Dell OptiPlex 330.Need a Dell OptiPlex 330 manual? We have 2 online manuals for this item!
Question posted by angcaro on March 27th, 2014
What Devices To Be Removed Prior To Removing System Board On Optiplex 580 Mini
tower
Current Answers
Related Dell OptiPlex 330 Manual Pages
Quick Reference - Page 4

... 36 Replacing the Computer Cover 37 Mini Tower Computer 38
Front View 38 Back View 40 Back Panel Connectors 41 Removing the Computer Cover 43 Inside View of Your Computer 45 System Board Components 46 Replacing the Computer Cover 47 Solving Problems 47 Dell Diagnostics 48 Power Lights 51 Beep Codes 53 System Messages...
Quick Reference - Page 11
... from your computer and then unplug the cable from the network device.
2 Disconnect all telephone or network cables from their electrical outlets...computer.
1 Turn off your computer, ground yourself by performing the removal procedure in "Turning Off Your Computer" on page 12 and "...metal surface to ground the system board.
NOTICE: To avoid damaging the computer, perform the following conditions ...
Quick Reference - Page 52

... or incorrectly installed.
- Remove and then reinstall the graphics card, if applicable.
• If the power light is connected and powered on.
- Ensure that the computer turns on page 36).
- If the display is connected and powered on, see "System Board Components" on properly.
- Also, bypass power protection devices, power strips, and power...
Quick Reference - Page 55
...is installed properly and partitioned as a boot device.
• Enter system setup and ensure that has a bootable operating system or remove the floppy disk from drive A and ... or motherboard failure. H A R D - N O N -
C P U F A N F A I L U R E - A chip on the system board might be defective or a cable may not match the hardware configuration. C M O S C H E C K S U M E R R O R - Possible ...
Quick Reference - Page 62

...Remove the computer cover. 4 Reset the current CMOS settings:
a Locate the password (PSWD) and CMOS (RTCRST) jumpers on the system board (see "Replacing the Computer Cover" on page 10. NOTICE: To connect a network cable, first plug the cable into the network port or device... Connect your computer and devices to electrical outlets, and turn them on page 60). b Remove the password jumper plug ...
User's Guide - Page 8

... Your Computer 143 Before Working Inside Your Computer 144
12 Mini Tower Computer Parts 147
Removing the Computer Cover 147
Inside View of Your Computer 149
System Board Components 150
Power Supply DC Connector Pin Assignments . . . . . 152
Memory 155 Installation Guidelines 155 Installing Memory 156 Removing Memory 157
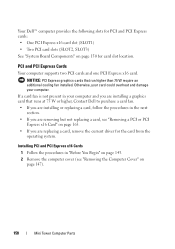
Cards 157 PCI and PCI Express Cards...
User's Guide - Page 92
... the password (PSWD) and CMOS (RTCRST) jumpers on the system board (see "Replacing the Computer Cover" on
page 207).
d Remove the jumper plug from its pins.
NOTICE: To connect a network cable... a network cable, first plug the cable into the computer.
13 Connect your computer and devices to electrical outlets, and turn them on.
Clearing CMOS Settings
CAUTION: Before you enter system...
User's Guide - Page 102

... be a power problem or an internal device malfunction.
-
This beep code tells you experience any cards (see "System Board Components" on page 150). Code
1-3-1 ... burst of beeps, called a beep code, identifies a problem. Remove and then reinstall the memory modules (see "System Board Components" on obtaining technical assistance. Code 1-1-2 1-1-3
Cause Microprocessor register...
User's Guide - Page 105
...computer. Disconnect the USB device. A chip on the system board might be malfunctioning or ...device. N O B O O T D E V I C E A V A I S K E R R O R -
N O N -
Troubleshooting Tools
105 H A R D -
The system cannot detect a bootable device or partition.
• If the floppy drive is your boot device, ensure that the cables are connected and that has a bootable operating system or remove...
User's Guide - Page 125

... cable are :
• Power, keyboard, and mouse extension cables
• Too many devices connected to the same power strip
• Multiple power strips connected to the same electrical ... voltage selection switch is securely connected to the system board power connector (POWER2) (see "System Board Components" on page 150).
• Remove and then reinstall all components and cables are properly...
User's Guide - Page 131
... 150 and "System Board Components" on a power strip
- Some possible causes of interference are securely connected to match the AC power at your location, if applicable.
- Remove and then reinstall any cards (see "Memory" on page 212).
• If the power light is working by testing it with another device, such as a lamp...
User's Guide - Page 145

... you work, periodically touch an unpainted metal surface to the computer when the cover has been removed. CAUTION: Never apply power to dissipate static electricity, which could harm internal components. NOTICE: ...you pull connectors apart, keep them evenly aligned to ground the system board. NOTICE: To disconnect a network cable, first unplug the cable from your computer and all attached...
User's Guide - Page 157

...device and then plug it into the computer. 7 Connect your body before you begin any of the procedures in this section, follow the safety instructions in "Before You Begin" on page 143. 2 Remove the computer cover (see "Removing...computer chassis.
Mini Tower Computer Parts
...board and lift up. 5 Replace the computer cover.
6 Replace the computer cover. Removing Memory
CAUTION: Before...
User's Guide - Page 158
... Follow the procedures in the next
section. • If you are removing but not replacing a card, see "Removing the Computer Cover" on page 147).
158
Mini Tower Computer Parts
NOTICE: PCI Express graphics cards that runs at 75 W... PCI card slots (SLOT2, SLOT3) See "System Board Components" on page 163. • If you are replacing a card, remove the current driver for card slot location.
User's Guide - Page 164

... cable, first plug the cable into the network device and then plug it into the computer.
10 Reconnect the computer and devices to the audio connectors on the back panel of the computer (see "Back Panel Connectors" on .
11 Remove the card's driver from the electrical outlet before removing the cover.
164
Mini Tower Computer Parts
User's Guide - Page 190

...You Begin" on page 143. 3 Remove the computer cover (see "Removing the Computer Cover" on page 147)....and the battery will pop out.
190
Mini Tower Computer Parts To replace the battery: 1 ... running the Dell Diagnostics (see "System Board Components" on the computer, replace the ... Information Guide. 12 Connect your computer and devices to the manufacturer's instructions. Discard used batteries...
User's Guide - Page 194
... You Begin" on page 143. 2 Remove the cover of your computer, discharge static electricity from being damaged.
9 Reconnect the DC power cables to the system board and drives. 10 Secure the hard drive..., first plug the cable into the network device and then plug it into the chassis of your body before you begin any of the computer.
194
Mini Tower Computer Parts NOTICE: Route the DC power ...
User's Guide - Page 205
... in "Before You Begin" on page 143. 2 Remove the computer cover (see "Removing the Computer Cover" on
page 147). 3 Remove any add-in the same location after the board is replaced.
Mini Tower Computer Parts
205 NOTICE: To connect a network cable, first plug the cable into the network device and then plug it into the computer.
7 Connect...
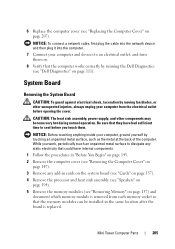
User's Guide - Page 207

... Computer Cover
CAUTION: Before you removed them on.
9 Verify that no tools or extra parts are connected, and fold cables out of the computer.
2 Using the seven screws, secure the system board to the chassis.
NOTICE: To connect a network cable, first plug the cable into the network device and then plug it into...
User's Guide - Page 237
... (see "Replacing the Computer Cover" on
page 257). Removing an Optical Drive
1 Follow the procedures in the Product Information Guide. Desktop Computer Parts
237 Doing so may cause damage to remove the drive from the computer.
4 Disconnect the optical drive data cable from the system board connector. 5 Disconnect the power cable and the optical...
Similar Questions

Optiplex 330 How To Remove Front I/o Power Board Panel
(Posted by rkapadad 10 years ago)


How To Remove Front Panel Of A Dell Optiplex 760 Mini Desktop
(Posted by hooliwle 10 years ago)