Canon FAXPHONE L90 Support Question
Canon FAXPHONE L90 Support Question
Find answers below for this question about Canon FAXPHONE L90.Need a Canon FAXPHONE L90 manual? We have 3 online manuals for this item!
Question posted by fmarzigliano on April 26th, 2017
Error Message: Check Scanning Area Or Press Ok
Why do I keep getting this message? I can not send or receive a fax. I am connected and Nothing is in the scanning area.
Current Answers
Answer #1: Posted by waelsaidani1 on April 26th, 2017 1:05 PM
waelsaidani1

Member since:
May 12th, 2013 Points: 19,501,797

Member since:
May 12th, 2013 Points: 19,501,797
You can use the Display Original Scanning Cleaning Area mode to prompt you to clean the scanning area when the machine detects streaks or stains. If the feeder is not clean, the machine will scan and print dust and grime on the output. The Clean the Original Scanning Area Prompt appears when originals are placed in the feeder. For instructions on cleaning the feeder's scanning area, see "Routine Maintenance" in Basic Operation Guide.
1.
Press (Settings/Registration).
2.
Press [Preferences] U94; [Display Settings] U94; [Display Original Scanning Cleaning Area].
3.
Press [On] U94; [OK].
If you do not want the Display Original Scanning Cleaning Area prompt to appear, press [Off].
Related Canon FAXPHONE L90 Manual Pages
Reference Guide FAXPHONE L90 - Page 27
... or fax. Before Using the
Machine
1
Document and Paper
2
Sending and
Receiving
3
Copying
4
Printing
5
System Manager
Settings
6
Maintenance
7
Troubleshooting
8
Appendix
9
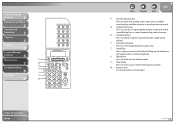
Table of the external telephone.
T [Hook] key Press when you want to dial without lifting up the handset or the handset of Contents Index
Back
Previous
Next
TOP
P [System Monitor] key Press to check the...
Reference Guide FAXPHONE L90 - Page 33
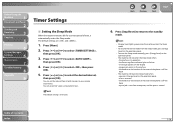
... display • a paper jam occurs in one-minute increments). Press [Menu]. 2.
Press [Stop/Reset] to return to select , then press
[OK].
5. To resume the normal mode from 3 to select ,
then press [OK].
3. Before Using the
Machine
1
Document and Paper
2
Sending and
Receiving
3
Copying
4
Printing
5
System Manager
Settings
6
Maintenance
7
Troubleshooting
8
Appendix
9
Timer...
Reference Guide FAXPHONE L90 - Page 52
...Table of ) (200 x 400 dpi)
Back
Previous
Next
TOP
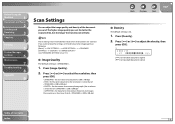
˙ Density
The default setting is .
1. Press [ ] or [
press [OK]. Before Using the
Machine
1
Document and Paper
2
Sending and
Receiving
3
Copying
4
Printing
5
System Manager
Settings
6
Maintenance
7
Troubleshooting
8
Appendix
9
Scan Settings
You can adjust the image quality and density of the document you want to keep...
Reference Guide FAXPHONE L90 - Page 62
... mode
- Press [ ] to 10 first
characters of Contents
Index
3-16 Before Using the
Machine
1
Document and Paper
2
Sending and
Receiving
3
Copying
4
Printing
5
System Manager
Settings
6
Maintenance
7
Troubleshooting
8
Appendix
9
4. Press [ ] or [ ] to 99).
- The recipients are listed in parentheses.
- Press [Address Book]. Press [ ] or [ ] to select , then
press [OK].
Reference Guide FAXPHONE L90 - Page 66
..., you to check for a dial tone. Before Using the
Machine
1
Document and Paper
2
Sending and
Receiving
3
Copying
4
Printing
5
System Manager
Settings
6
Maintenance
7
Troubleshooting
8
Appendix
9
7. You can also enter values with the numeric keys.
8. If necessary, press [Pause] to dial the international
access code. Ex.
=123P
-
Press [ ] or [ ] to select ,
then press [OK...
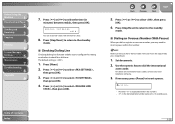
Reference Guide FAXPHONE L90 - Page 68
...procedure to select ,
then press [OK].
3. Any data stored in answering machine is connected to the machine.
- Press [ ] or [ ] to the standby
mode. Press [ ] or [ ] to select the receive mode,
then press [OK].
: Answers all calls as faxes. : Receives faxes automatically and records voice messages. (Distinctive Ring Pattern Detection): Distinguishes between fax and voice calls automatically if...
Reference Guide FAXPHONE L90 - Page 71
... [ ] or [ ] to select ,
then press [OK]. Contact the other party sends the fax by FAXPHONE L90 with ITU-T Standard Chart No.1, standard mode. Press [Menu].
2. Press [ ] or [ ] to select , then press [OK]. Once the pages are printed, they are deleted from the memory. - Press [ ] or [ ] to receive the remaining
pages. The maximum number of pages that the machine's memory can store up to...
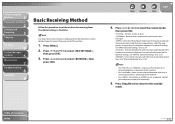
Reference Guide FAXPHONE L90 - Page 75
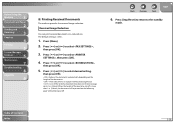
... being cut off is .
1. Press [ ] or [ ] to select desired setting,
then press [OK].
: Reduces the documents automatically depending on the length of the documents. : Prints documents on one page up to be printed on the following page without reducing the size. : Cuts off . Before Using the
Machine
1
Document and Paper
2
Sending and
Receiving
3
Copying
4
Printing
5
System...
Reference Guide FAXPHONE L90 - Page 76
... Using the
Machine
1
Document and Paper
2
Sending and
Receiving
3
Copying
4
Printing
5
System Manager
Settings
6
Maintenance
7
Troubleshooting
8
Appendix
9
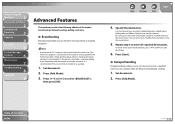
Advanced Features
The machine provides the following additional fax modes: broadcasting, delayed sending, polling, and relay.
˙ Broadcasting
Broadcasting enables you to send the same document to select ,
then press [OK].
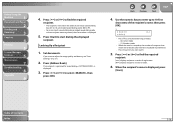
Reference Guide FAXPHONE L90 - Page 77
... ,
then press [OK].
4. Mode]. : Sends the same document to be retained in 24-hour military time format), then press [OK]. Press [Start] to scan the document for polling. (See "Polling Receiving," on p. 3-32.) : Sends a document to multiple recipients at a time. (See "Broadcasting," on p. 3-33.)
6. Before Using the
Machine
1
Document and Paper
2
Sending and
Receiving
3
Copying...
Reference Guide FAXPHONE L90 - Page 81
... job,
then press [OK].
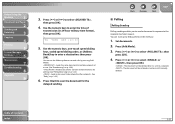
Table of the fax jobs. Press [ ] or [ ] to the standby
mode.
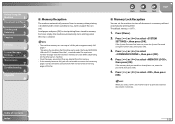
˙ Checking and Deleting Fax Documents Stored in Memory
1. Press [ ] to the standby mode.
4. Otherwise, press [Stop/ Reset] to return to select . NOTE For , all recipients entered for a broadcasting job will be canceled.
5. Before Using the
Machine
1
Document and Paper
2
Sending and
Receiving...
Reference Guide FAXPHONE L90 - Page 100

...the
Machine
1
Document and Paper
2
Sending and
Receiving
3
Copying
4
Printing
5
System Manager
Settings
6
Maintenance
7
Troubleshooting
8
Appendix
9
˙ Fuser Roller
If black streaks appear with printing, the fuser roller in
the paper feeder.
4. Should this may be sent. Press [ ] or [ ] to select , then press [OK].
3.
Back
Previous
Next
TOP
˙ Scanning area
Keep...
Reference Guide FAXPHONE L90 - Page 130
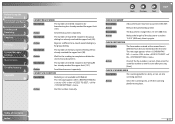
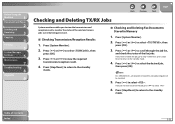
....
Action
Clean the scanning area, or lift the scanning platform into scanning position. This message appears when is different from the one entered at the first time. CHECK DESTINATION
Description
The fax number entered at the second time is set to in the of the menu. Before Using the
Machine
1
Document and Paper
2
Sending and
Receiving
3
Copying
4
Printing
5
System...
Reference Guide FAXPHONE L90 - Page 131
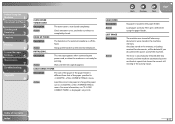
... existing in the memory, including received fax documents, will be deleted if you disconnect the power cord of the menu.
Action
Load the correct size paper or change the paper size in the paper feeder. Then press [OK] when using the paper feeder. Table of the paper specified in the machines memory.
LOAD PAPER Description...
Reference Guide FAXPHONE L90 - Page 140
Before Using the
Machine
1
Document and Paper
2
Sending and
Receiving
3
Copying
4
Printing
5
System Manager
Settings
6
Maintenance
7
Troubleshooting
8
Appendix
9
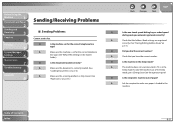
Sending/Receiving Problems
˙ Sending Problems
Cannot send a fax. Q
Is the machine set for the correct telephone line
type? A
Check that you have the correct number.
A
The machine does not scan documents if ...
Reference Guide FAXPHONE L90 - Page 141
... tone, contact your machine.
For an
overseas call, add pauses to the machine.
If there is compatible with
your local telephone company. A
The external phone is connected properly. (See
"Before FAX Setting," in the machine and try sending
again.
Q
Has an error occurred during transmission? A
Unplug the machine and let it cool for the documents to check the machine.
Reference Guide FAXPHONE L90 - Page 144
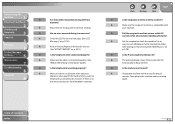
...Make sure the cable is connected properly. (See
"Before FAX Setting," in the Starter Guide.)
A
Check the LCD for an error message. (See "LCD
Messages," on p. 8-10.)
connected to switch between fax and telephone
Q
Has an error occurred during reception?
Q
Is the machine set to switch automatically between telephone and fax calls. calls automatically, the receive mode must be set...
FAXPHONE L90 Basic Operation Guide - Page 118
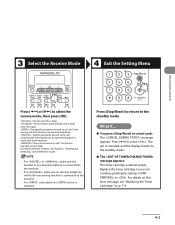
...appears: The toner cartridge is connected to the machine. : Does not answer any calls. Press [ ] to manually receive faxes. Select the Receive Mode
Exit the Setting Menu
Receiving Documents
Press [ ] or [ ] to select the receive mode, then press [OK].
: Answers all calls as faxes. : Receives faxes automatically and records voice messages. : Distinguishes between fax and voice calls if you...
FAXPHONE L90 Basic Operation Guide - Page 174
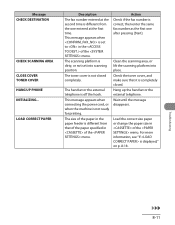
... external telephone is correct, then enter the same fax number as the first one entered at the first time. Action Check if the fax number is off the hook. Check the toner cover, and make sure that of the paper specified in of the menu. Message CHECK DESTINATION
CHECK SCANNING AREA CLOSE COVER TONER COVER HANG UP PHONE INITIALIZING...
FAXPHONE L90 Basic Operation Guide - Page 175
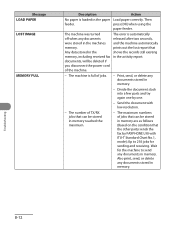
... documents in the activity report.
- Up to send any documents were stored in the memory, including received fax documents, will be stored in memory. press [OK] when using the
paper feeder. Any data stored in the machines memory. Print, send, or delete any documents stored in memory reached the maximum.
- Message LOAD PAPER LOST IMAGE
MEMORY FULL
Description...
Similar Questions


Error Message, No Destination Listed?
when I try to print from my Mac computer using the L100 fax/phone I get an error message, that no de...
when I try to print from my Mac computer using the L100 fax/phone I get an error message, that no de...
(Posted by stmaroma4 10 years ago)

Fax Will Not Work On Any Numbers - Error Message 'fax Info Does Not Match'
fax will not transmit - error message "fax info does not match"
fax will not transmit - error message "fax info does not match"
(Posted by bkmikkelson 11 years ago)

What Does The Error Code 'check Document' Mean?
(Posted by terryfoster 12 years ago)
Problems With Answering Machine And L90 Fax
i followed the instructions for setting up our answering machine with the fax, but the fax still pic...
i followed the instructions for setting up our answering machine with the fax, but the fax still pic...
(Posted by adama7 12 years ago)