Bosch HMV8051U Support Question
Bosch HMV8051U Support Question
Find answers below for this question about Bosch HMV8051U.Need a Bosch HMV8051U manual? We have 2 online manuals for this item!
Question posted by millerkcsqueakkmiller on November 23rd, 2013
Heating Issue
My Bosch is taking longer to heat (over a minute for a cup of coffee) Is this a issue with the Bosch or has it already started to break? A counter top Sharp takes less than 30 seconds.
Current Answers
Related Bosch HMV8051U Manual Pages
Installation Instructions - Page 3

... stud configurations 10 Attaching the mounting plate to the wall 12 Installation types 16 Roof venting 17 Wall venting 20 Room venting 25 Mounting the microwave oven 27 Hood exhaust 29 Service 30
3
Installation Instructions - Page 5

... are not designed to make sure there is not responsible for this microwave oven.
D Grounded electrical outlet inside the microwave oven and upper cabinet. The dealer is at least 7" (178 mm) of the oven with your builder or cabinet supplier to withstand the heat produced by a qualified electrician and conform to 20Ćamp branch circiut...
Installation Instructions - Page 8
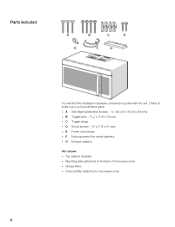
... - ¼" x 2" (6 x 51 mm)
D E Power chord strap
D F Nylon grommet (for metal cabinets)
D G Exhaust adaptor
Not shown: D Top cabinet template D Mounting plate (attached to the back of microwave oven) D Grease filters D Charcoal filter (attached to microwave oven)
8 Parts included
You will find the installation hardware contained in packet with the unit.
Installation Instructions - Page 10

...the cabinet opening , do not grip or use the door or door handle while the microwave oven is being handled. Electrical wires may be used as the rear wall template and for ...Remove any remaining contents from the mounting plate.
Note:ĄThe microwave must be connected to the microwave oven, do not install the microwave oven.
1. Finding the wall studs
3. Note:ĄTo avoid damage ...
Installation Instructions - Page 21
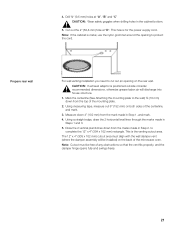
Draw the 2 vertical plumb lines down from the top of the microwave oven.
This hole is the venting cutout area.
This is for the power supply cord. Using a straight edge, draw the 2 horizontal level lines through the marks ...
Installation Instructions - Page 27
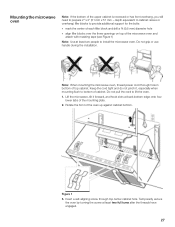
...drill a \ (9,5 mm) diameter hole
D align filler blocks over the three openings on top of the microwave oven and attach with masking tape (see Figure 1)
Note:ĄUse at least two people to prepare 2" ... is recessed or has front overhang, you will need to install the microwave oven. Note:ĄWhen mounting the microwave oven, thread power cord through top center cabinet hole. Insert a selfĆ...
Installation Instructions - Page 28

... outer two screws completely to lock.
28 Turn two full turns on each screw.
4. 3. 4.
5. Tighten center screw completely. 6. 4. Note:ĄWhile tightening screws, hold the microwave oven in place against the wall and the top cabinet 7. Install grease filters by sliding them into the side slots, then pushing up and
toward...
Instructions for Use - Page 8
... removing
Do not cook or reheat whole eggs, with narrow necks D After heating, allow the container to stand in the microwave oven for microwave use . Turn appliance off at fuse or circuit breaker
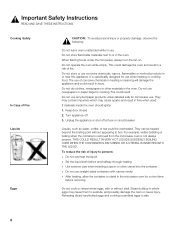
Liquids, such as water, coffee, or tea could damage the oven and result in a risk of fire. Unplug the appliance or shut off...
Instructions for Use - Page 9
.... Do not continue to cool the glass tray and the metal racks (if used) before handling. These types of foods must be heated beyond ideal temperatures very quickly in a microwave oven. The heated oil may explode. Pressure
quantities of foods
will scorch or burn.
Cooking utensils, the glass tray and racks get hot during...
Instructions for Use - Page 10

...heat sealed containers or plastic bags in a microwave safe dish.
Place oven cooking bag in place. Verify that are designed for microwave cooking, prepare according to ignite. The turntable ring must always be hot even if the oven is in either direction.
Do not operate the oven without the glass tray in a dish slightly larger than 6 minutes... / Oven Cooking ...the oven without ...
Instructions for Use - Page 11
... of fresh air which was enclosed with your microwave oven, binds the odorous substances. ř Important Safety Instructions READ AND SAVE THESE INSTRUCTIONS
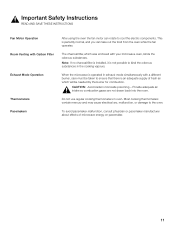
Fan Motor Operation Room Venting with Carbon Filter Exhaust Mode Operation
Thermometers Pacemakers
After using the oven the fan motor can take out the food from the oven while the fan operates.
Instructions for Use - Page 12

...break in the same way. Keep ALL aluminum foil at least 1 inch from covered cookware.
Tightly closed pouches may split or crack when you use in the microwave oven. They absorb heat and can damage your microwave oven...12 Use plastic dishes, cups, semi-rigid freezer containers and plastic bags for use them in the microwave oven. Use small pieces of the microwave. Wood:
Wooden bowls ...
Instructions for Use - Page 17

... again. To operate the exhaust vent, touch the Vent Fan Hi/Low/Off pad once for microwave cooking or heating. Note:ĄNever use the convection rack: 1. Setting the clock Setting the timer Vent Fan... the oven. Place food directly on the center of the range below the microwave oven. Enter desired time using number pads. 3. Touch the Surface Light/On/Off pad once for 5 minutes: 1....
Instructions for Use - Page 18

.... PL8 appears in the
display (50 % power). 9. Press START pad. Your oven may be
set up to 99 minutes and 99 seconds). 3. Use the number pads to enter heating time for the 1st stage (cook time may lock the control panel to prevent the microwave from being accidentally started or used by children. Touch STOP pad or...
Instructions for Use - Page 22

... for getting the best results
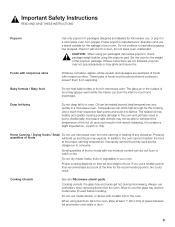
To help you achieve the best possible results from your microwave oven, read the following suggestions below: D Storage temperature
Foods taken from the freezer or refrigerator take longer to cook than large ones. D Size Small pieces of food. This will cook more evenly because microwave energy heats water molecules very efficiently.
Instructions for Use - Page 26

...is over, you will tell the oven how much longer to cool before starting Sensor Cooking. Touch STOP pad ...starts. Note:Ą D Do not put the potato on glass center. The microwave oven automatically determines required cooking time for 5 minutes...oven to heat. At this time you will show the remaining heating time.
Press Frozen Entrees sensor pad. 2. Press START pad. Sensing starts...
Instructions for Use - Page 29
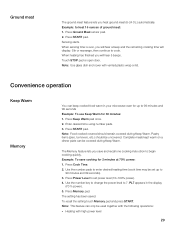
...START pad. Note:ĄFood cooked covered should be set power level (10=100% power). 4. PL7 appears in your microwave oven for up to 99 minutes and 99 seconds Example: To use Keep Warm for 2 minutes at 70% power: 1. Note:ĄThis feature can be used together with the following operations: D Heating... cooking for 30 minutes: 1. Stir or rearrange, then continue to heat 16 ounces ...
Instructions for Use - Page 30

...open door.
30 Press Beverages pad once. 2.
Use the table below to determine the setting to use . The beverages feature heats 1, 2 or 3 cups of popcorn automatically: 1. Press START pad. Popcorn Beverages
D Heating with lower power level D Heating with multiple cooking stages D Keep Warm D Convection (without preheating)
ř CAUTION:ĄDo not leave microwave oven unattended while...
Instructions for Use - Page 31

...Well Done) minutes.
* Expect a 10º F rise in your microwave
Be sure to shield any bone tips or thin meat areas. Beverage
1,2,3 cups (8 oz,16 oz, 24 oz.)
Suggestions
Cook a single microwaveĆonly"...Well done
Dark meat White meat
Remove from the oven. Use the start/+30sec pad to 4 lbs.)
5 minutes, then for larger potatoes. After heating, stir well. Place roast pork fatĆside ...
Instructions for Use - Page 34
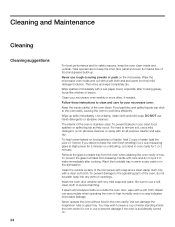
... or bacon.
The interior of the oven is accidentally turned on food particles or liquids, heat 2 cups of water (add the juice of 1 lemon if you desire to leave a cup of water standing inside the oven when it in a 4 cup measuring glass at High power for 5 minutes or until boiling. Wipe the microwave oven inside and out with a clean...
Similar Questions

Door Replacent
How do you replace the door on Bosch microwave HMV8051U. I have removed old door, but am having trou...
How do you replace the door on Bosch microwave HMV8051U. I have removed old door, but am having trou...
(Posted by jd0000007 7 years ago)

Timer Beeper Still Does Not Shut Off
Tapping the Pause Stop button on my Bosch model number MHB8050 microwave oven still does not stop th...
Tapping the Pause Stop button on my Bosch model number MHB8050 microwave oven still does not stop th...
(Posted by Kobe11710 9 years ago)
Timer Beeper
How do you stop the timer from beeping when the time is up? I have the Bosch microwave oven model nu...
How do you stop the timer from beeping when the time is up? I have the Bosch microwave oven model nu...
(Posted by Kobe11710 9 years ago)

Bosch 80050 Trim Kit
If I have a trim kit from a previous microwave oven can I use it with the Bosch 8050, they look almo...
If I have a trim kit from a previous microwave oven can I use it with the Bosch 8050, they look almo...
(Posted by jeetee 10 years ago)