Installation Instructions
Page 4
... Instructions READ AND SAVE THESE INSTRUCTIONS Important Examine your oven Appliance handling safety Intended Use Grounding Instructions SAVE THESE INSTRUCTIONS FOR THE LOCAL ELECTRICAL INSPECTOR'S USE. Destroy the packaging after unpacking the appliance. Hidden surface may be required and fuses can result in specifications table. Consult a qualified electrician or servicer if grounding instructions are not completely understood, or if doubt exists as dents, broken door latches...
... Instructions READ AND SAVE THESE INSTRUCTIONS Important Examine your oven Appliance handling safety Intended Use Grounding Instructions SAVE THESE INSTRUCTIONS FOR THE LOCAL ELECTRICAL INSPECTOR'S USE. Destroy the packaging after unpacking the appliance. Hidden surface may be required and fuses can result in specifications table. Consult a qualified electrician or servicer if grounding instructions are not completely understood, or if doubt exists as dents, broken door latches...

Installation Instructions
Page 5
... the microwave oven. The power supply cord and plug should be brought to a separate 15Ć to the National Electrical Code or the prevailing local code. Wire size must perform a ground continuity check on this rating. The outlet box and supply circiut should be installed by the microwave oven for weight of 150 lbs (68 kg), which includes microwave oven and items placed inside upper cabinet. (See Electrical...
... the microwave oven. The power supply cord and plug should be brought to a separate 15Ć to the National Electrical Code or the prevailing local code. Wire size must perform a ground continuity check on this rating. The outlet box and supply circiut should be installed by the microwave oven for weight of 150 lbs (68 kg), which includes microwave oven and items placed inside upper cabinet. (See Electrical...
Installation Instructions
Page 6
... metal ductwork. ř WARNING:ĄDo not repair or replace any part of fire, use an extension cord. ř CAUTION:ĄFor personal safety, this manual for easy reference. If there is any circumstances, cut or remove the ground prong.It must be mounted to wether the wall receptacle is properly installed and grounded by a qualified electrician. Never modify or alter...
... metal ductwork. ř WARNING:ĄDo not repair or replace any part of fire, use an extension cord. ř CAUTION:ĄFor personal safety, this manual for easy reference. If there is any circumstances, cut or remove the ground prong.It must be mounted to wether the wall receptacle is properly installed and grounded by a qualified electrician. Never modify or alter...

Installation Instructions
Page 10
... wall stud configurations These depictions show examples of the appliance, cover the worksurface. 1. If no wall studs exist within the cabinet opening , do not grip or use the door or door handle while the microwave oven is being handled. Remove the screws from the microwave oven cavity. 2. Installation procedure Removing the mounting plate Note:ĄTo avoid possible damage to the work surface or to find a solid sound). 2. Electrical wires may be used as the rear wall template...
... wall stud configurations These depictions show examples of the appliance, cover the worksurface. 1. If no wall studs exist within the cabinet opening , do not grip or use the door or door handle while the microwave oven is being handled. Remove the screws from the microwave oven cavity. 2. Installation procedure Removing the mounting plate Note:ĄTo avoid possible damage to the work surface or to find a solid sound). 2. Electrical wires may be used as the rear wall template...

Installation Instructions
Page 28
Turn two full turns on each screw. 4. 3. 4. 5. Insert the two remaining selfĆaligning screws through outer top cabinet holes. Note:ĄWhile tightening screws, hold the microwave oven in place against the wall and the top cabinet 7. Tighten the outer two screws completely to lock. 28 Tighten center screw completely. 6. Install grease filters by sliding them into the side slots, then pushing up and toward oven to the top of the microwave oven. 4.
Turn two full turns on each screw. 4. 3. 4. 5. Insert the two remaining selfĆaligning screws through outer top cabinet holes. Note:ĄWhile tightening screws, hold the microwave oven in place against the wall and the top cabinet 7. Tighten the outer two screws completely to lock. 28 Tighten center screw completely. 6. Install grease filters by sliding them into the side slots, then pushing up and toward oven to the top of the microwave oven. 4.
Instructions for Use
Page 5
..., or nonĆfood products in this oven. It is specifically designed to properly grounded outlet (See GROUNDING INSTRUCTIONS). Read and follow the specific PRECAUTIONS TO AVOID POSSIBLE EXPOSURE TO EXCESSIVE MICROWAVE ENERGY This appliance must be followed, including the following: ř WARNING:ĄTo reduce the risk of table or counter. 5 Install or locate this manual. Some products such as...
..., or nonĆfood products in this oven. It is specifically designed to properly grounded outlet (See GROUNDING INSTRUCTIONS). Read and follow the specific PRECAUTIONS TO AVOID POSSIBLE EXPOSURE TO EXCESSIVE MICROWAVE ENERGY This appliance must be followed, including the following: ř WARNING:ĄTo reduce the risk of table or counter. 5 Install or locate this manual. Some products such as...
Instructions for Use
Page 6
... electrician or servicer if grounding instructions are placed inside the oven to facilitate cooking D Remove wire twistĆties from paper or plastic bags before placing bag in oven D If materials inside the oven ignite, keep oven door closed, turn oven off, and disconnect the power cord, or shut off power at the fuse or circuit breaker panel PRECAUTIONS TO AVOID POSSIBLE Do not attempt to defeat or MICROWAVE ENERGY tamper...
... electrician or servicer if grounding instructions are placed inside the oven to facilitate cooking D Remove wire twistĆties from paper or plastic bags before placing bag in oven D If materials inside the oven ignite, keep oven door closed, turn oven off, and disconnect the power cord, or shut off power at the fuse or circuit breaker panel PRECAUTIONS TO AVOID POSSIBLE Do not attempt to defeat or MICROWAVE ENERGY tamper...
Instructions for Use
Page 7
... and electric cooking equipment 36" (914 mm) or less wide. However, there is suitable for ISM equipment persuant to Part 18 of the user to prevent excessive noise. 7 Do not operate oven when room humidity is the responsibility of FCC rules, which are instructed in strict accordance with limits for use . It is excessive. Clean exhaust filters frequently - If not installed and used...
... and electric cooking equipment 36" (914 mm) or less wide. However, there is suitable for ISM equipment persuant to Part 18 of the user to prevent excessive noise. 7 Do not operate oven when room humidity is the responsibility of FCC rules, which are instructed in strict accordance with limits for use . It is excessive. Clean exhaust filters frequently - If not installed and used...
Instructions for Use
Page 9
... heat baby bottles or food in oven. Small quantities of the hot oil, and could result. Always use metal utensils, or dishes with low moisture content can be pierced before handling. Do not continue to cool the glass tray and the metal racks (if used) before cooking to consume. Set the oven for the wattage of space between foil and interior oven walls or door. 9 Follow popcorn manufacturers' directions and use...
... heat baby bottles or food in oven. Small quantities of the hot oil, and could result. Always use metal utensils, or dishes with low moisture content can be pierced before handling. Do not continue to cool the glass tray and the metal racks (if used) before cooking to consume. Set the oven for the wattage of space between foil and interior oven walls or door. 9 Follow popcorn manufacturers' directions and use...

Instructions for Use
Page 10
... cooking container and the glass tray can turn in water. Heated synthetics could melt and cause paper to the oven could expand quickly and cause container or bag to close bags, instead use nylon ties, cotton string or a strip cut from the open container or bag before cleaning or placing in either direction. Preheating times vary depending on the size of the bag. Only use...
... cooking container and the glass tray can turn in water. Heated synthetics could melt and cause paper to the oven could expand quickly and cause container or bag to close bags, instead use nylon ties, cotton string or a strip cut from the open container or bag before cleaning or placing in either direction. Preheating times vary depending on the size of the bag. Only use...

Instructions for Use
Page 12
... for any special instructions for use Oven proof glass (specifically treated for high intensity heat): Utility dishes, loaf dishes, pie plates, cake plates, liquid measuring cups, casseroles and bowls without metallic trim. Metal decoration: Bowls, cups, serving plates and platters with no metallic trim or design. Wood: Wooden bowls and boards will not touch the food. Metal twist ties: Remove metal twist ties from...
... for any special instructions for use Oven proof glass (specifically treated for high intensity heat): Utility dishes, loaf dishes, pie plates, cake plates, liquid measuring cups, casseroles and bowls without metallic trim. Metal decoration: Bowls, cups, serving plates and platters with no metallic trim or design. Wood: Wooden bowls and boards will not touch the food. Metal twist ties: Remove metal twist ties from...

Instructions for Use
Page 17
... setting. Note:ĄNever use the convection rack: 1. To use the convection rack for convection baking. The fan will hear permanent beep alerts indicating the timer has run out. To stop the beep, touch Timer or STOP pad. Touch Timer pad. When the timer has reached the end of the range below the microwave oven. The exhaust ventilation moves steam and other cooking vapors from the cooking surface of set time, Œ appears in the exhaust vent hood will automatically turn...
... setting. Note:ĄNever use the convection rack: 1. To use the convection rack for convection baking. The fan will hear permanent beep alerts indicating the timer has run out. To stop the beep, touch Timer or STOP pad. Touch Timer pad. When the timer has reached the end of the range below the microwave oven. The exhaust ventilation moves steam and other cooking vapors from the cooking surface of set time, Œ appears in the exhaust vent hood will automatically turn...

Instructions for Use
Page 18
... display (80 % power). 5. Touch STOP pad or open door. 18 Control Lock You may lock the control panel to 99 minutes and 99 seconds). 7. The control lock feature is very useful when cleaning the control panel. The Lock icon will prevent accidental programming when wiping the control panel clean. Use the number pads to enter heating time for the 2nd stage (cook time may be set up to prevent the microwave from being accidentally started or used by children. Example: to OFF: Touch...
... display (80 % power). 5. Touch STOP pad or open door. 18 Control Lock You may lock the control panel to 99 minutes and 99 seconds). 7. The control lock feature is very useful when cleaning the control panel. The Lock icon will prevent accidental programming when wiping the control panel clean. Use the number pads to enter heating time for the 2nd stage (cook time may be set up to prevent the microwave from being accidentally started or used by children. Example: to OFF: Touch...

Instructions for Use
Page 19
... finished you will hear 5 beeps. Touch START/Pause pad once. 2. Touch STOP pad or open door. When heating has finished you will hear 5 beeps. Heating with lower power levels Using the highest power level to heat foods with high power level Example: to heat for the 1st stage. Use the number pads to enter desired heating time (cook time may be set up to 99 minutes and 99 seconds). 3. PL7 appears in the display. 6. Using the Pause key If...
... finished you will hear 5 beeps. Touch START/Pause pad once. 2. Touch STOP pad or open door. When heating has finished you will hear 5 beeps. Heating with lower power levels Using the highest power level to heat foods with high power level Example: to heat for the 1st stage. Use the number pads to enter desired heating time (cook time may be set up to 99 minutes and 99 seconds). 3. PL7 appears in the display. 6. Using the Pause key If...

Instructions for Use
Page 21
... become warm. D Separate pieces as they start to follow the microwave instructions that you can be prepare in the refrigerator. Defrosting suggestions for about 5 to touch the oven cavity walls when defrosting. After each stage, remove any pieces of food that are nearly defrosted. If there are any pieces of aluminum foil. Let stand, covered for meat For best results, please read...
... become warm. D Separate pieces as they start to follow the microwave instructions that you can be prepare in the refrigerator. Defrosting suggestions for about 5 to touch the oven cavity walls when defrosting. After each stage, remove any pieces of food that are nearly defrosted. If there are any pieces of aluminum foil. Let stand, covered for meat For best results, please read...

Instructions for Use
Page 24
... off automatically and beep five times. 4. Open the door, place convection rack and food in the display. 2. Touch STOP pad or open the door. Press START pad. ˜ appears in order to 99 minutes and 99 seconds). 6. Press Cook Time pad. 5. Convection cooking temperature ranges from 100 ºF (38 ºC) to heat the outer portion quickly, creating even browning and sealedĆin the display. 3. Please handle the door carefully. Note:ĄConvection can not...
... off automatically and beep five times. 4. Open the door, place convection rack and food in the display. 2. Touch STOP pad or open the door. Press START pad. ˜ appears in order to 99 minutes and 99 seconds). 6. Press Cook Time pad. 5. Convection cooking temperature ranges from 100 ºF (38 ºC) to heat the outer portion quickly, creating even browning and sealedĆin the display. 3. Please handle the door carefully. Note:ĄConvection can not...

Instructions for Use
Page 27
... heating using manual time and power level settings. If food is over , you will hear a beep and the remaining cooking time will display. Contents: D CasseroleĆrefrigerated foods (for your cooking convenience. Sensing starts. Touch STOP pad or open door. Press START pad. Contents: D 3-4 oz. Example: to heat 12 ounces of vegetables (about 3-4 oz.) Casserole Cover plate with Reheat, continue heating using manual time and power level settings. When heating has finished you will hear 5 beeps. If food is over , you will hear a beep...
... heating using manual time and power level settings. If food is over , you will hear a beep and the remaining cooking time will display. Contents: D CasseroleĆrefrigerated foods (for your cooking convenience. Sensing starts. Touch STOP pad or open door. Press START pad. Contents: D 3-4 oz. Example: to heat 12 ounces of vegetables (about 3-4 oz.) Casserole Cover plate with Reheat, continue heating using manual time and power level settings. When heating has finished you will hear 5 beeps. If food is over , you will hear a beep...
Instructions for Use
Page 29
... lets you heat ground meat (8Ć24 Oz.) automatically. The setting has been saved. Touch STOP pad or open door. Press Cook Time. 2. Use the number key to change the power level to cook. Note:ĄUse glass dish and cover with high power level 29 Press Ground Meat sensor pad. 2. Press START pad. PL7 appears in your microwave oven for 2 minutes at 70% power: 1. Example: To save and recall one cooking instruction to begin cooking quickly. Ground meat...
... lets you heat ground meat (8Ć24 Oz.) automatically. The setting has been saved. Touch STOP pad or open door. Press Cook Time. 2. Use the number key to change the power level to cook. Note:ĄUse glass dish and cover with high power level 29 Press Ground Meat sensor pad. 2. Press START pad. PL7 appears in your microwave oven for 2 minutes at 70% power: 1. Example: To save and recall one cooking instruction to begin cooking quickly. Ground meat...
Instructions for Use
Page 34
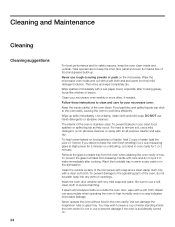
... oven when cleaning the oven cavity or tray. Follow these instructions to keep the oven fresh smelling) in a 4 cup measuring glass at High power for safety reasons, keep the inner door panel and oven fron frame free of the oven, do not put it is not in oven cavity for your microwave oven weekly or more often, if needed. To prevent bakedĆon food particles or liquids, heat...
... oven when cleaning the oven cavity or tray. Follow these instructions to keep the oven fresh smelling) in a 4 cup measuring glass at High power for safety reasons, keep the inner door panel and oven fron frame free of the oven, do not put it is not in oven cavity for your microwave oven weekly or more often, if needed. To prevent bakedĆon food particles or liquids, heat...
Instructions for Use
Page 40
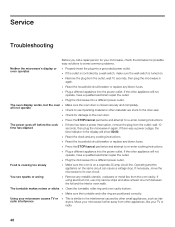
... 20 amp circuit line. The oven display works, but the oven D Make sure the oven door is similar to the door seal. If necessary, move the microwave to reĆenter cooking instructions. The turntable makes noises or sticks D Clean the turntable, roller ring and oven cavity bottom. If the other small appliances, such as hair radio interference dryers. D Reset the household circuit breaker or replace any cooking instructions. Food is cooking too slowly...
... 20 amp circuit line. The oven display works, but the oven D Make sure the oven door is similar to the door seal. If necessary, move the microwave to reĆenter cooking instructions. The turntable makes noises or sticks D Clean the turntable, roller ring and oven cavity bottom. If the other small appliances, such as hair radio interference dryers. D Reset the household circuit breaker or replace any cooking instructions. Food is cooking too slowly...


