
Bernina Bernette 56 Support Question
Bernina Bernette 56 Support Question
Find answers below for this question about Bernina Bernette 56.Need a Bernina Bernette 56 manual? We have 1 online manual for this item!
Question posted by midwifmom on December 14th, 2017
The Needle On My Bernina Bernette 56 Does Not Move Up And Down.
The needle desends one time into the fabric and does not come back up on its own. There are not any thread glitches in the top or in the bobin. I have removed the right end panel and the belt is in good condition and in place. Can you please advise me on what else this could be?Thank You,Anne C.
Current Answers
Related Bernina Bernette 56 Manual Pages
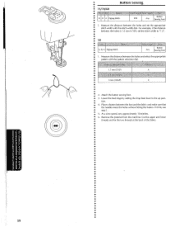
Instruction Manual - Page 2

... requires extreme care and knowledge of electric shock:
1. t!Jrer as threading the needle, changing the needl\3, threading the bobbin, or changing the presser foot. 15. Never operate the sewing machine with double insulation. This sewing machine is provided on the cord. "SAVE THESE INSTRUCTIONS" "This sewing machine is intended for a double-insulated product must be identical to the...
Instruction Manual - Page 5
... THE EARTH SYMBOL-:!:-
Turn on plug. When leaving the sewing machine unattended, the main switch ofthe machine must be switched off or the plug must be removed from the main leads must be cut off
When servicing the sewing machine, or when removing covers or changing lamps, the machine or the electrical set must be disconnected from the...
Instruction Manual - Page 6

... Lever 27
THREADING THE MACHINE 28 Winding the Bobbin 28 Lower Threading 29 Upper (Needle) Threading 30 Using the Needle Threader (75 only 32 Quick Thread-setting System FAST START BOBBIN (75 only 34 Drawing Up Lower Thread (50, 60 and 70 only) ..... 35 Twin-Needle Sewing (60, 70 and 75 only 36 Thread Tension 37 CHART OF SEWING FABRICS, NEEDLES AND THREAD COMBINATIONS 39...
Instruction Manual - Page 14
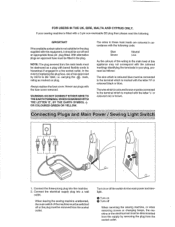
...; Connecting Plugs ••• 1. When changing the light bulb or when the sewing machine is wider than the • other). To reduce the risk of wanneer de naaimachine niet...qui se trouve sur !e cordon d'a!imentation entre
• Ia pedale et Ia fiche d'alimentation dans Ia machine. •• a 2. Brancher Ia fiche d'alimentation une prise secteur. • PRECAUTION:
•&#...
Instruction Manual - Page 17
...Voor bet uitvoeren van de verschil!ende functies met uw machine, zijn er verschillende naaldvoeten, ook we! 'persvoeten' genoemd, nodig. Place a different presser foot on the needle plate so that the bar on ...the Presser Foot
••• It may be necessary to change the presser foot according to your sew-
• ing needs.
•• SNAP-ON TYPE
• Turn power switch to its ...
Instruction Manual - Page 18
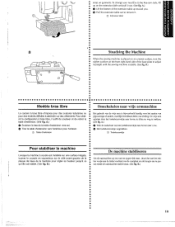
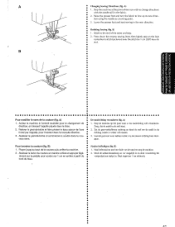
areas on the extension fable and pull it To change your machine to the free"arm style, lift up toward you.
8 Pull the extension table out to remove it out. (See fig. A.}
0 Uft the bottom of the extension table up on garments.
Instruction Manual - Page 33

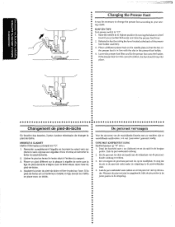
...
•• sE!Iectionne devienne un point etastique. (Voir fig.
If different types of fabric or thread are used or the pattern does not have the correct shape, turn the
B
•... stoffen of draad of naar "-"om de steek in - A.)
Adjusting the stretch stitching The sewing machine is tijdens de fabricage zodanig ingesteld dat de elastische steek in een elastische steek. (Zk fig...
Instruction Manual - Page 37
...en bas et vers Ia gauche, comme illustre sur
4.
A
B-2
8-3
c
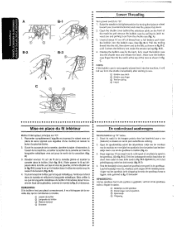
lower Threading
Turn power switch to sew. Raise the needle to its latch toward you and pulling it out from a full bobbin and insert...va s'€chapperde Ia na-
a vette des qu'on the front of the machine and remove the bobbin case by pulling its highest position by the latch, fully insert the bobbin ...
Instruction Manual - Page 40

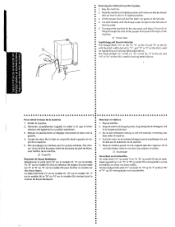
Turn the balance wheel toward you {counterclockwise) until the bottom of th~ needle holder aligns with the bottom of the needlethreading-hook holder. Lower the presser foot.lever.
2. Using the Needle Threader
(75 only)
Turn power switch to "0".
1.
Instruction Manual - Page 42
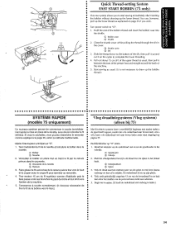
...)
This new system allows you wish . Hold the end of
the
upper
thread
as
usual,
then
pull
it on page 35 if you to complete the lower threading .
• 4. Turn power switch to draw up the lower thread. Start sewing as explained on the cutter to start sewing immediately after inserting the bobbin without drawing up...
Instruction Manual - Page 45
... How To Correct Them
A Upper tension is recommended that a test sample be adjusted when you change fabric or thread type.
lt may need to be made on a fabric scrap before sewing on your stitches. B Upper tension is "5".
The.basic thread tension setting is too loose.
1
locks appear on the surface of your project. locks appear...
Instruction Manual - Page 49
...thread by turning the balance wheel toward you
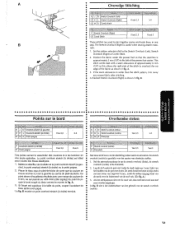
(counterclockwise) and place both the upper and lower threads...on the foot controller. Sew 5 to Jock or reinforce the end of the fabric. 5. Placer le ... voetpedaal. a 7. Place the fabric under the presser foot with the needle 1 em (3/8") from the edge...selection dial to start sewing in zo~ •• dat de machine vooruit begint te naaien...
Instruction Manual - Page 50
... machine at the point where you wish to the end of the seam and stop de machine. 2. Press down the reverse sewing ...sewing in the fabric.
2. De naairichting veranderen (fig. A) L Stop de machine op het punt waar u van naairichting wilt veranderen . Piquer jusqu'au bout de Ia couture puis arreter Ia machine. 2. Naaien beCindigen (fig. Stitch to change directions
• with the needle...
Instruction Manual - Page 51
... the needle to the left side of the machine .
•• lift the presser foot and pull the fabric out gently to its highest position and make sure that the thread
take-up lever is also in its highest position. 3. To prepare the machine for the next seam, puf! Removing the Material From the Machine 1. Stop the machine. 2.
Instruction Manual - Page 58
...modele sur le point overlock stretch'(8. gauM
overlock (rechts) of the fabric as this allows the right side of the stitch to the left of the presser foot center.... Si I'Scart est superieur Ia tail!e du point, couper l'excedent de
tissu apres avoir pique. In fig. B. droite) est id8al
overlock (rechts) is useful when sewing...
Instruction Manual - Page 60
... shown in fig. Stop the machine when the buttonhole is completed, gently pull the gimp thread to "CJ".
3. Hook the gimp thread onto the back end of the buttonhole foot, • then bring the two gimp thread ends to match the diameter of the buttonhole on Stretch Fabrics (fig. When sewing buttonholes on thin fabrics, place stabilizer material
on...
Instruction Manual - Page 63

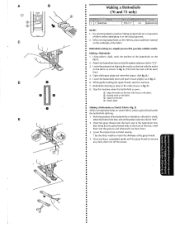
... 1 (Front bar tack)
_,
Step 2 (Left side)
[
Step 3 (Back bar tack)
Step 4 (Right side)
1. Stop the machine when the needle is at the left side of the stitch,
then raise the needle.
Mettre !e s9!ecteur de modele sur 1. 2. Coudre 5 6 points.
3. lower the presser foot and sew 5 to "1 ". 2. Sew the predetermined length of the stitch,
then raise the...
Instruction Manual - Page 67
... width dial. Attach the button sewing foot. • 3. Measure the...sew approximately 10 stitches. •• 6. Cut the upper and lower
• threads and tie the two threads at the back of the fabric .
•
59 Measure the distance between the foot and the fabric and make sure that • the needle enters the holes without hitting the button. Remove the material from the machine...
Instruction Manual - Page 76

... draaien zonder dat
er een draad is available from the outlet 2.
Remove the power supply plug from your local sewing machine dealer or service center.
•
<
G•ra•i•s&#...off the machine. Be sure to 3 drops of oil at a fast speed without thread installed for a short
time . 5.
Essuyer tout excedent d'huile. •• REMARQUE: • Si Ia machine est utilie ...
Instruction Manual - Page 84
...; mal fait ou avec des matSriaux inad6quats pourrait occ8.sionner des
• d8g8.ts pendant le transport. BELANGRIJK
Dit verpakkingsmateriaal is needed to reship the sewing machine.
Emballage de Ia machine ••• ConseiVer !e carton et les materiaux d'emballage pour pouvoir les
• reutiliser dans !e futur ou pour reexpedier Ia...
Similar Questions

Bernette 66 Sewing Machine
How do I thread a Bernette 66 sewing machine?
How do I thread a Bernette 66 sewing machine?
(Posted by stringpam 8 years ago)

How To Thread A Bobbin On A Bernette 56 Sewing Machine
(Posted by scannie2 9 years ago)

Bernina 1090 S Sewing Machine Manual
I Dont See The User Manual For This Machine For Free Downloading.what User Manual Are The Same As Th...
I Dont See The User Manual For This Machine For Free Downloading.what User Manual Are The Same As Th...
(Posted by cynthianel 10 years ago)
How To Sew A Stright Line On Abernina Bernette 56
What is the tension on all 3 dials for the B.B. 56 to sew a striaght line
What is the tension on all 3 dials for the B.B. 56 to sew a striaght line
(Posted by catakuhata 10 years ago)