
Bernina Bernette 56 Support Question
Bernina Bernette 56 Support Question
Find answers below for this question about Bernina Bernette 56.Need a Bernina Bernette 56 manual? We have 1 online manual for this item!
Question posted by themoores0819 on December 31st, 2020
My Material Stopped Feeding The Fabric Through.
The person who posted this question about this Bernina product did not include a detailed explanation. Please use the "Request More Information" button to the right if more details would help you to answer this question.
Current Answers
Answer #1: Posted by waelsaidani1 on January 1st, 2021 5:03 AM
waelsaidani1

Member since:
May 12th, 2013 Points: 19,501,797

Member since:
May 12th, 2013 Points: 19,501,797
Follow solutions provided here; https://connect2local.com/l/391838/c/427875/6-reasons-your-sewing-machine-won-t-feed-fabric
Related Bernina Bernette 56 Manual Pages
Instruction Manual - Page 2

... accessories recommended by young children or infirm persons without supervision. 18. Never operate the sewing machine with same type rated 15 watts. Do not pull or push the fabric while stitching. Use only identical replacement parts. Do not allow this machine where aerosol (spray) products are provided instead of the air openings blocked. Do...
Instruction Manual - Page 5
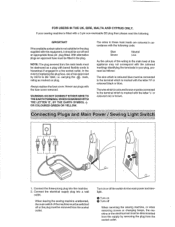
..., MALTA AND CYPRUS ONLV. carrying the ~ mark, rating as a plug with bared flexible cords is fitted with the coloured markings identifying the terminals in your sewing machine is hazardous if engaged in the plug.
NOTE: The plug severed from the main leads must be removed from the socket outlet. IMPORTANT
If the...
Instruction Manual - Page 6

...Stitching 25 Stitch Width Dial (60, 70 and 75 only 26 Reverse Sewing Lever 27 Drop Feed Lever 27
THREADING THE MACHINE 28 Winding the Bobbin 28 Lower Threading 29 Upper (Needle) Threading 30...Lower Thread (50, 60 and 70 only) ..... 35 Twin-Needle Sewing (60, 70 and 75 only 36 Thread Tension 37 CHART OF SEWING FABRICS, NEEDLES AND THREAD COMBINATIONS 39
Making a Buttonhole (70 and 75 only...
Instruction Manual - Page 9
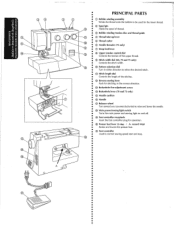
... Thread cutter ® Needle threader (75 only)
IJ) Drop feed lever
® Upper tension control dial
Controls the tension of the...@ Stitch length dial Controls the length of the stitches.
@ Reverse sewing lever Push for stitching in the reverse direction .
• @...and lower the needle.
(@·Main power/sewing light switch Turns the main power and sewing light on and off.
(@ Foot controller ...
Instruction Manual - Page 14
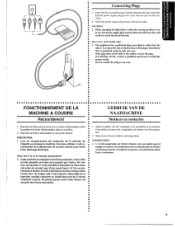
...or when the sewing machine is wider than the • other). Brancher Ia fiche qui se trouve sur !e cordon d'a!imentation entre
• Ia pedale et Ia fiche d'alimentation dans Ia machine. •&#... Brancher Ia fiche d'alimentation une prise secteur. • PRECAUTION:
•• 1. Cette machine est equipee d'une fiche polarisee, c'est-8-dire
• qu'elle possede une lame plus grande que...
Instruction Manual - Page 15
A
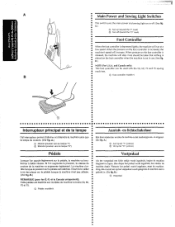
Main Power and Sewing Light Switches
This switch turns the main power and sewing light on (toward the "0" mark)
Foot Controller
When the foot controller is depressed lightly, the ma mark)
® Turn off . (See fig. A.)
(j) Turn on ·or off (toward the"!"
Instruction Manual - Page 18
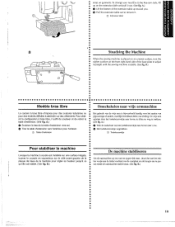
areas on the extension fable and pull it To change your machine to remove it out. (See fig. A.}
0 Uft the bottom of the extension table up toward you.
8 Pull the extension table out to the free"arm style, lift up on garments.
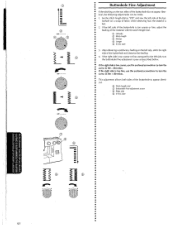
Instruction Manual - Page 33

... to adjust the stitch. (See fig. not forcefully turn the
B
• stitch length dial out of fabric or thread are used or the pattern does not have the correct shape, turn the dial toward either"+" or... at the standard position "B". A.)
Adjusting the stretch stitching The sewing machine is tijdens de fabricage zodanig ingesteld dat de elastische steek in een elastische steek. (Zk fig.
Instruction Manual - Page 40

Lower the presser foot.lever.
2. Turn the balance wheel toward you {counterclockwise) until the bottom of th~ needle holder aligns with the bottom of the needlethreading-hook holder. Using the Needle Threader
(75 only)
Turn power switch to "0".
1.
Instruction Manual - Page 50
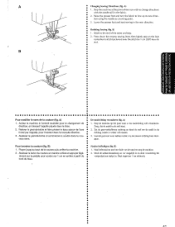
... reverse sewing lever; Arreter Ia machine I'endroit souhaite pour le changement de
direction, en laissant l'aiguille plqu6e dans le tissu. 2. a 3.
Pour terminer Ia couture (fig. B) 1. Abaisser le levier de couture en marche arri6re et appuyer IBge-
A) L Stop de machine op het punt waar u van naairichting wilt veranderen . Zorg, dat de naald in the fabric.
2.
Naai...
Instruction Manual - Page 51
...presser foot and pull the fabric out gently to its highest position and make sure that the thread
take-up lever is also in its highest position. 3. To prepare the machine for the next seam, ...puf! about 10 em (4'~) of thread through the toes of the presser foot toward the back of the face plate.
5. Stop the machine. 2. Removing the Material From the...
Instruction Manual - Page 56
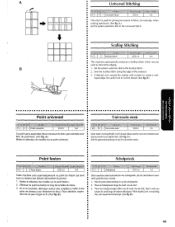
...machine naait automatisch een schelpsteek, die als decOratieve randsteek gebruikt kan worden . Voor het schelpvormige effect om de rand van de stof, kunt u met een
schaar de rand 'tangs de steken afknippen. B.)
48 SeW the Scallop Stitch along the edge of fabric...;
This machine automatically produces a Scallop Stitch which may be used for joining two pieces of the material. 3.
...
Instruction Manual - Page 60
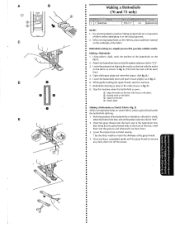
...on the fabric as in fig. E) When sewing buttonholes on a scrap piece
of the fabric. Once sewing is completed, gently pull the gimp thread to "CJ".
3. C.
6. Stop the machine when the ...When sewing buttonholes on thin fabrics, place stabilizer material
on the underside of fabric before attempting it back slightly as shown in fig. Buttonhole~making a buttonhole on stretch fabric, place...
Instruction Manual - Page 62
... (50 and 60 only)
NOTE:
•• 1. Using tailor's chalk, mark the position and length of fabric before attempting it on the actual garment.
• 2. When sewing buttonholes on thin fabrics, place stabilizer material
• •
on the fabric .
• 2. It ls recommended to practice making a buttonhole on a scrap piece
• of the buttonhole
•...
Instruction Manual - Page 63

... at the right side of the stitches,
then raise the needle from the material.
1.
Stop the machine when the needle is at the left side of the stitch,
then raise the needle from the material.
1. Set the pattern selection dial to 6 stitches. 3. Sew the right side until the needle reaches the stitches sewn in step...
Instruction Manual - Page 65
... too coarse, use the enclosed screwdriver to turn the
• screw in the - After obtaining a satisfactory feeding on a scrap of fabric while observing how the material is too coarse or fine, adjust the
• feeding of the buttonhole and observe the feeding .
•• 4. If the left side, stitch the right
• side of the...
Instruction Manual - Page 67
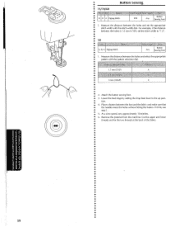
...material from the machine. Measure the distance between the holes and select the appropriate
• pattern with the stitch width dial. Cut the upper and lower
• threads and tie the two threads at the back of the fabric... foot and the fabric and make sure that • the needle enters the holes without hitting the button. lower the feed dogs by setting the drop feed lever to
"1
...
Instruction Manual - Page 76

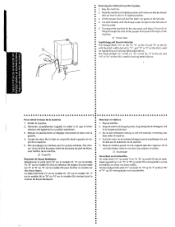
... the arrows. 4. Be sure to 3 drops of oil at a fast speed without thread installed for a short
time . 5. Sewing machine oil is available from the outlet 2. centre technique. Remove the power supply plug from your local sewing machine dealer or service center.
•
<
G•ra•i•s•s•a•ge Smeren
•••...
Instruction Manual - Page 84
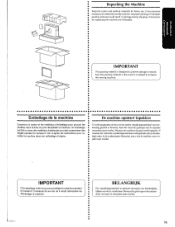
... d'emballage pour pouvoir les
• reutiliser dans !e futur ou pour reexpedier Ia machine.
BELANGRIJK
Dit verpakkingsmateriaal is needed to transport
tJ • this sewing machine. It may become •• necessary to prevent damage in transit. • SaVe this packing material in damage during shipping. Conservez-le au cas oU il serait necessaire de...
Instruction Manual - Page 85
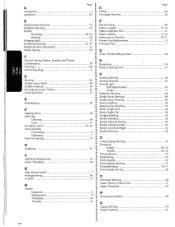
...Buttonhole Sewing 52, 54
Presser Foot Replacement 9 Principal Parts 1
Buttonhole Fine Adjustment 57
ButtC?n Sew·ing 59
Q
c
Quick Thread-setting System 34
Chart of Sewing Fabrics, ...Machine 10 Stitch Length Dial 24
Fagoting Stitch 49
Stitch Width Dial 26
Feed Dog
Straight Stitching 41
CIeaning 69
•
0
Stretch Blindfi1em 45
Lever 27 0 Stretch Material Sewing...
Similar Questions

Hand Wheel With Undue Resistance.
When manually advancing the needle downward it requires extra force and too much force for the motor...
When manually advancing the needle downward it requires extra force and too much force for the motor...
(Posted by alankutsch 3 years ago)

Stitching Problems
The top thread is bunching up on the underneah of the garment, snagging and gathering within 10 stic...
The top thread is bunching up on the underneah of the garment, snagging and gathering within 10 stic...
(Posted by oneillmary 4 years ago)

New Bulb Not Working In Sewing Machine Bernette 12 What Can It Be
(Posted by Anonymous-152221 8 years ago)

How To Thread A Bobbin On A Bernette 56 Sewing Machine
(Posted by scannie2 9 years ago)
My Sewing Machine Bernette 15 Stops Working
After 1 day using my Bernette 15 stops working - engine hoots but doesn't rotate spindle and hand wh...
After 1 day using my Bernette 15 stops working - engine hoots but doesn't rotate spindle and hand wh...
(Posted by sgrayxx 12 years ago)